Querying Databricks Delta Lake Data as a Graph
Summary
In this tutorial, you will:
- Create tables in Databricks using Delta Lake format under Unity Catalog and load it with example data;
- Start a PuppyGraph Docker container and query the example data as a graph.
Prerequisites
- Please ensure you have a Databricks account with a workspace, catalog and SQL Warehouse set. This demo utilizes Databricks on AWS, but the setup is comparable for other platforms.
- Accessing the PuppyGraph Web UI requires a browser.
Deployment
 Run the following command to start PuppyGraph:
docker run -p 8081:8081 -p 8182:8182 -p 7687:7687 -e PUPPYGRAPH_PASSWORD=puppygraph123 -d --name puppy --rm --pull=always puppygraph/puppygraph:stable
Data Preparation
This tutorial is designed to be comprehensive and standalone, so it includes steps to populate data in Databricks. In practical scenarios, PuppyGraph can query data directly from existing tables in your Databricks.
In your Databricks workspace: go to the SQL Editor page, select your catalog and then execute the following SQL statements in the Editor to create Delta tables with data:
create table modern.person (id string, name string, age int) USING DELTA;
insert into modern.person values
                              ('v1', 'marko', 29),
                              ('v2', 'vadas', 27),
                              ('v4', 'josh', 32),
                              ('v6', 'peter', 35);

create table modern.software (id string, name string, lang string) USING DELTA;
insert into modern.software values
                                  ('v3', 'lop', 'java'),
                                  ('v5', 'ripple', 'java');

create table modern.created (id string, from_id string, to_id string, weight double) USING DELTA;
insert into modern.created values
                               ('e9', 'v1', 'v3', 0.4),
                               ('e10', 'v4', 'v5', 1.0),
                               ('e11', 'v4', 'v3', 0.4),
                               ('e12', 'v6', 'v3', 0.2);

create table modern.knows (id string, from_id string, to_id string, weight double) USING DELTA;
insert into modern.knows values
                             ('e7', 'v1', 'v2', 0.5),
                             ('e8', 'v1', 'v4', 1.0);
The above SQL creates the following Delta tables under the modern schema:
| id | name | age |
|---|---|---|
| v1 | marko | 29 |
| v2 | vadas | 27 |
| v4 | josh | 32 |
| v6 | peter | 35 |
| id | name | lang |
|---|---|---|
| v3 | lop | java |
| v5 | ripple | java |
| id | from_id | to_id | weight |
|---|---|---|---|
| e7 | v1 | v2 | 0.5 |
| e8 | v1 | v4 | 1.0 |
| id | from_id | to_id | weight |
|---|---|---|---|
| e9 | v1 | v3 | 0.4 |
| e10 | v4 | v5 | 1.0 |
| e11 | v4 | v3 | 0.4 |
| e12 | v6 | v3 | 0.2 |
Data Access Authentication Preparation
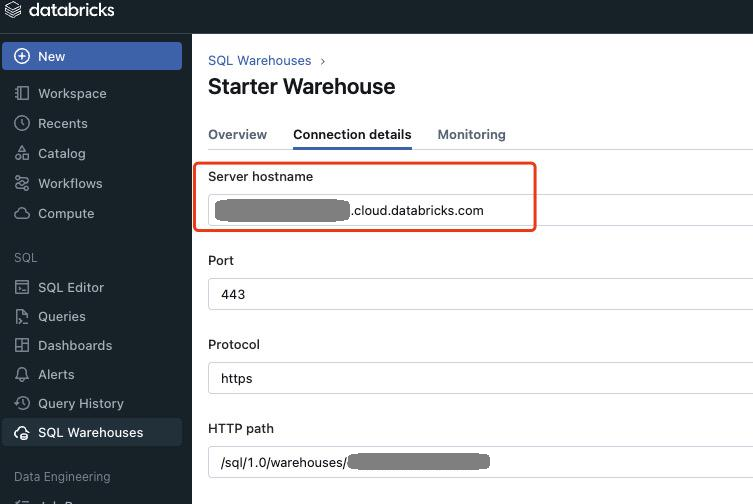
In your Databricks workspace: Goto SQL Warehouses and select Connection details tab. Save the Server hostname as it would be used later.
Personal Access Tokens (PATs)
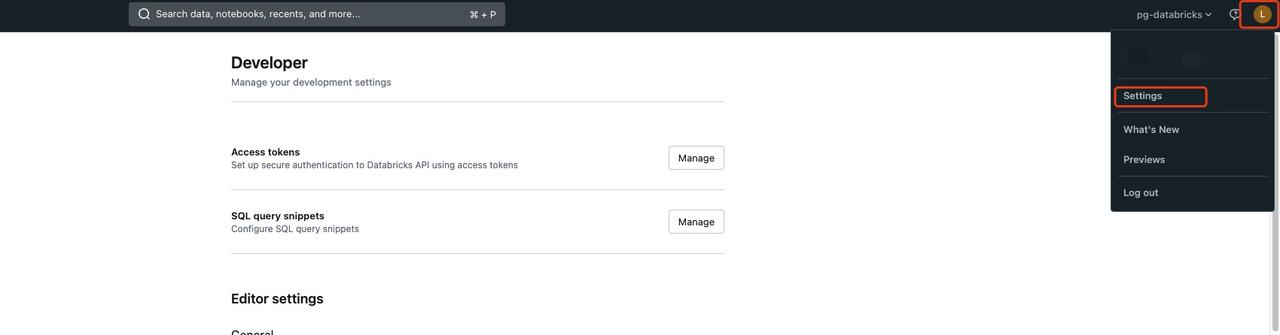
Log in to your Databricks workspace. Click icons on top-right, then click Settings as follows
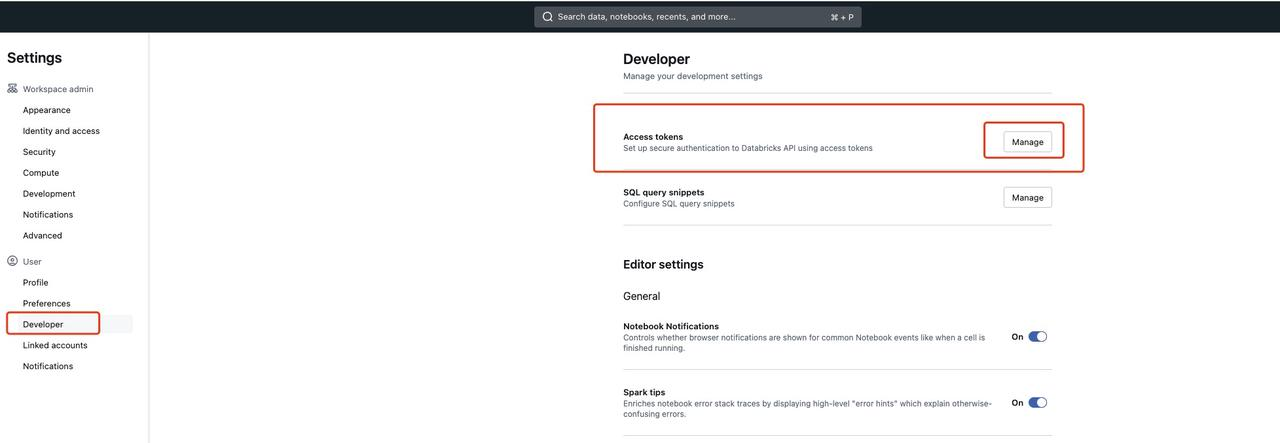
Click on Developer tab and then click on Manage button in the Access tokens section.
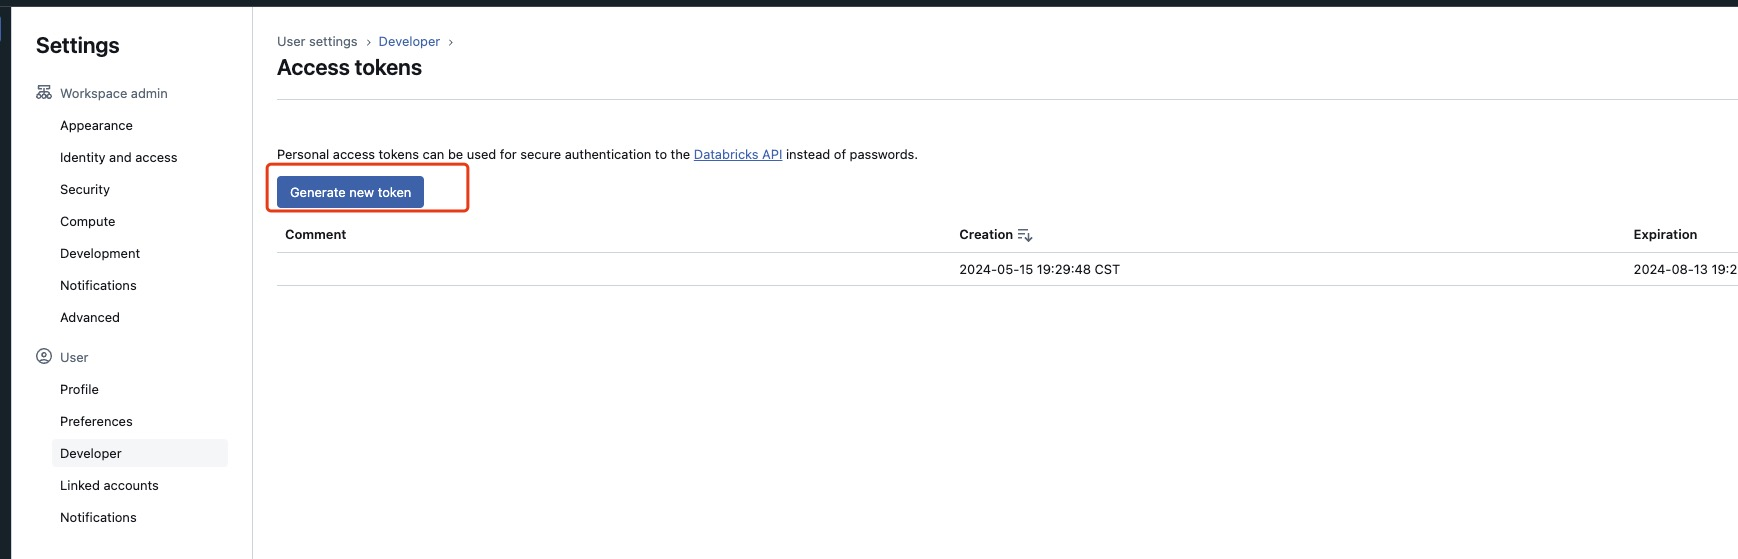
Click on Generate new token and save the generated Databricks Access token for later use.
OAuth for Service Principals (OAuth M2M)
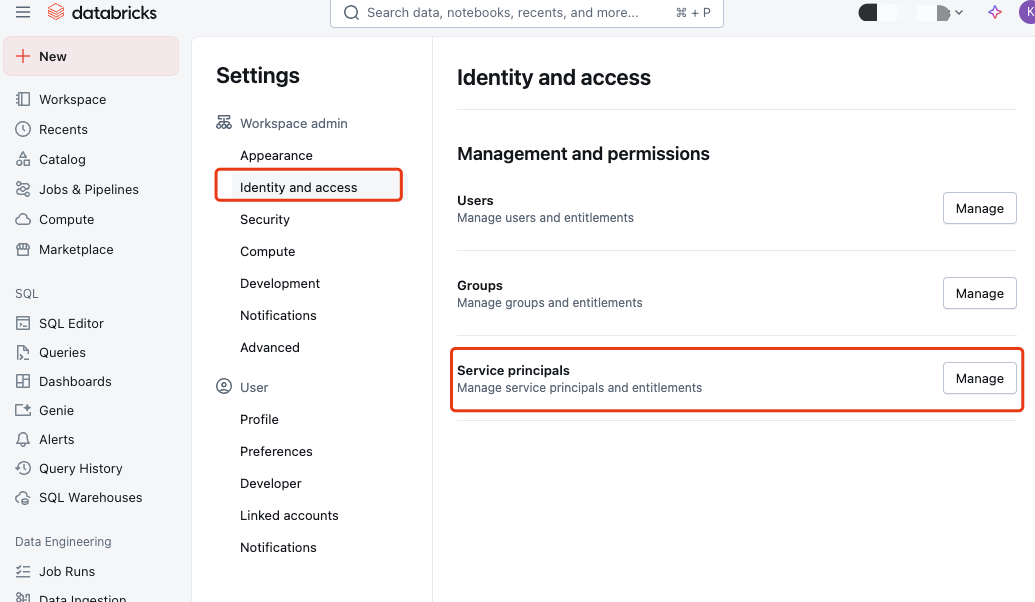
Log in to your Databricks workspace. Click icons on top-right, then click Settings as follows
Click on Identity and access tab and then click on Manage button in the Service principals section.
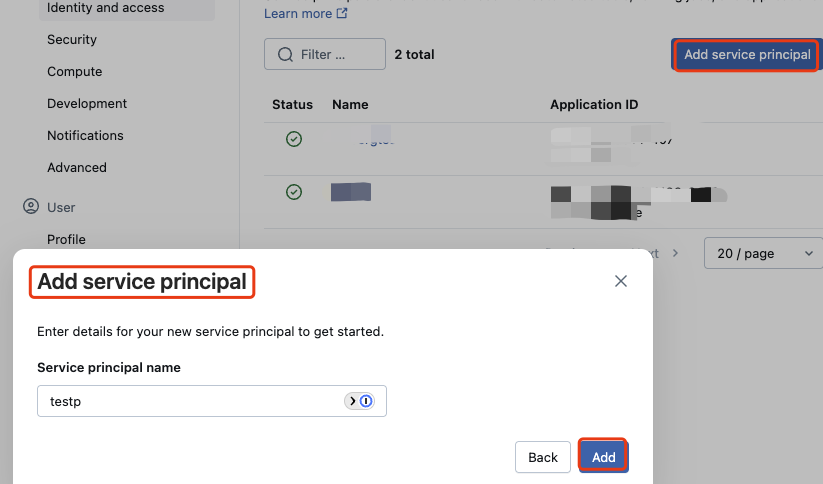
Click on Add service principal and then click on Add new button, type your principal name and click Add.
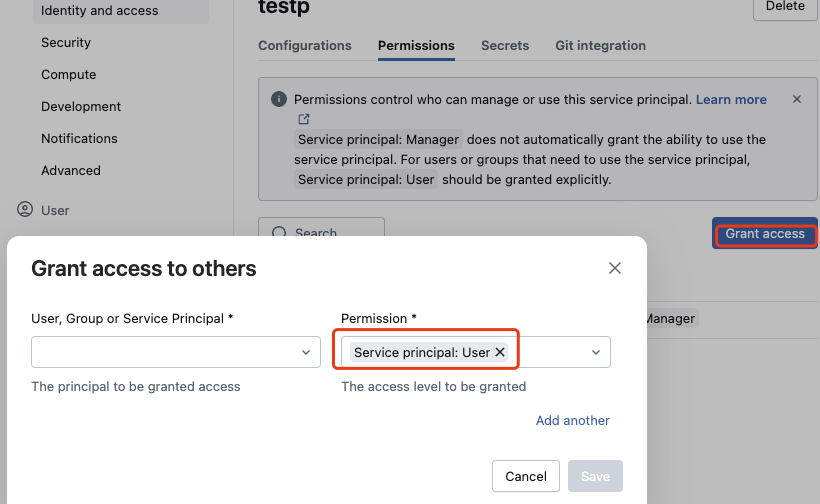
Click the principal name you just created, then click Permissions tab, click on Grant access tab. Choose the user and Select User Permission.
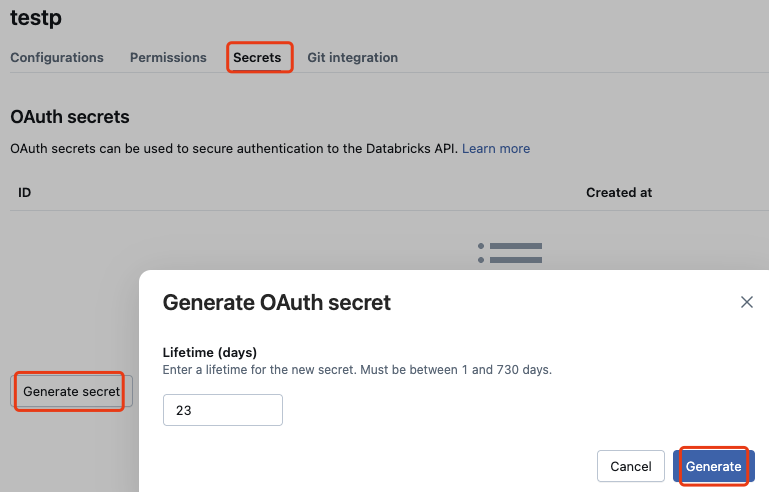
Click on Secrets tab and then click on Generate secret button, input the lifetime of the secret and click Generate to generate the secret. Record the Client ID and secret.
Databricks Credential Vending Preparation
Follow Databricks credential vending instructions to configure permission. If you don't have the permission to configure, please use storage parameters in guideline. To learn more, please contact us.
Modeling a Graph
Step 1: Connecting to Databricks
Log into PuppyGraph Web UI at http://localhost:8081 with username puppygraph and password puppygraph123.
Click on Create graph schema to create a new graph schema.
Fill in the fields as follows.

Create Databricks Catalog Using PAT

Create Databricks Catalog Using Oauth M2M
| Parameter | Value |
|---|---|
| Catalog type | Delta Lake |
| Catalog name | Some name for the catalog as you like. |
| Databricks Auth Type | Personal access tokens (PATs) or OAuth for service principals (OAuth M2M) |
| Databricks Host | Host get from Connection details |
| Databricks catalog name | Catalog name in Databricks to query. |
| Personal access token(PATs) | token that you generate at Personal Access Tokens (PATs) steps |
| OAuth Client ID | client ID for the principal |
| OAuth Secret | client secret for the principal |
| Storage type | Get from metastore |
Click on Save, then Click on Submit to connect to Databricks.
Step 2: Building the Graph Schema
In the Schema Builder, add the first node (vertex) to the graph from the table person.
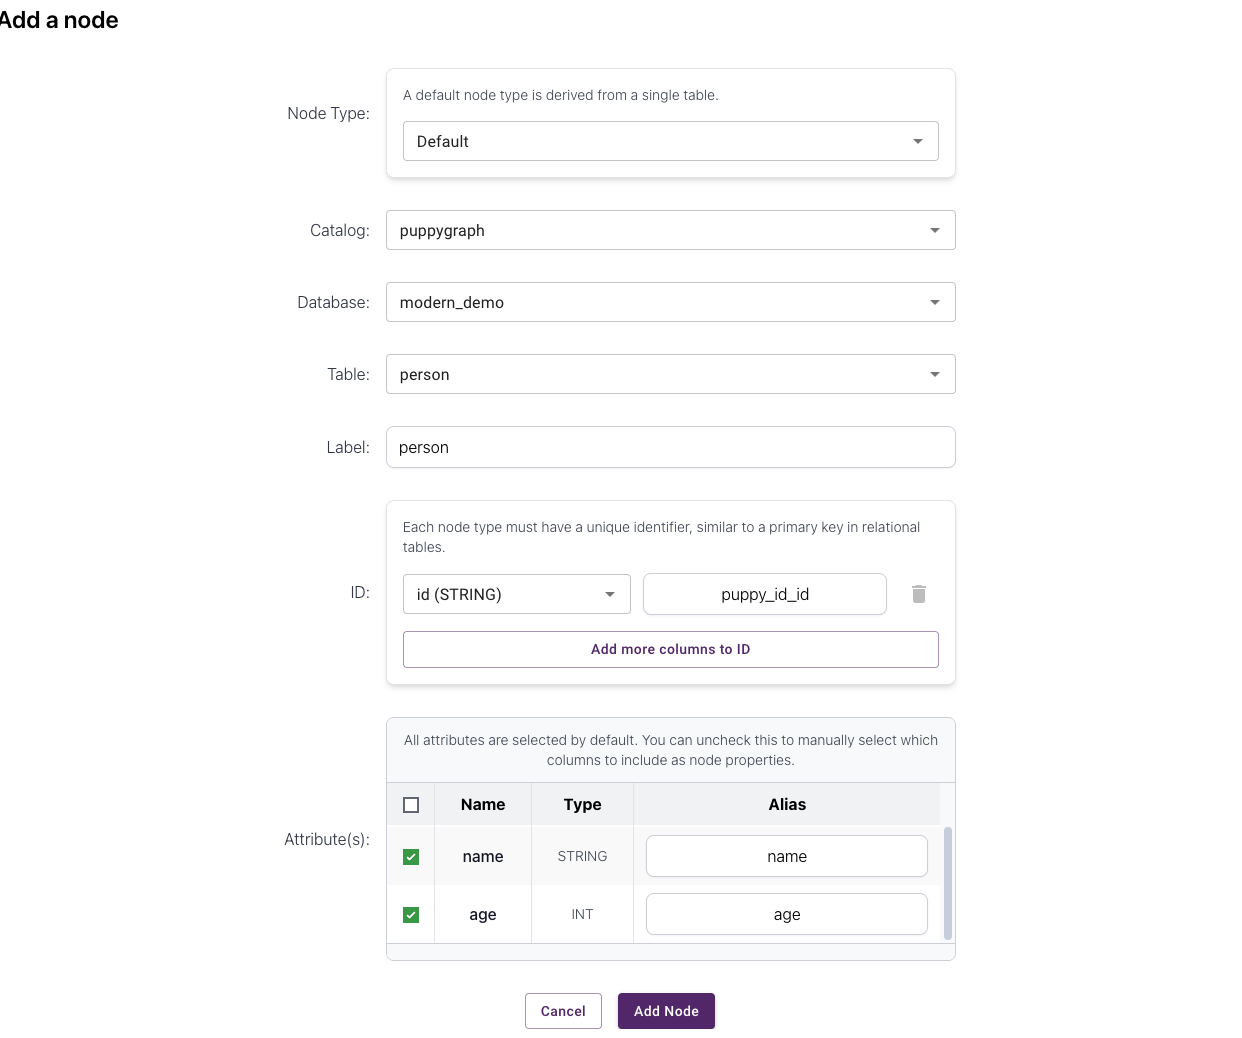
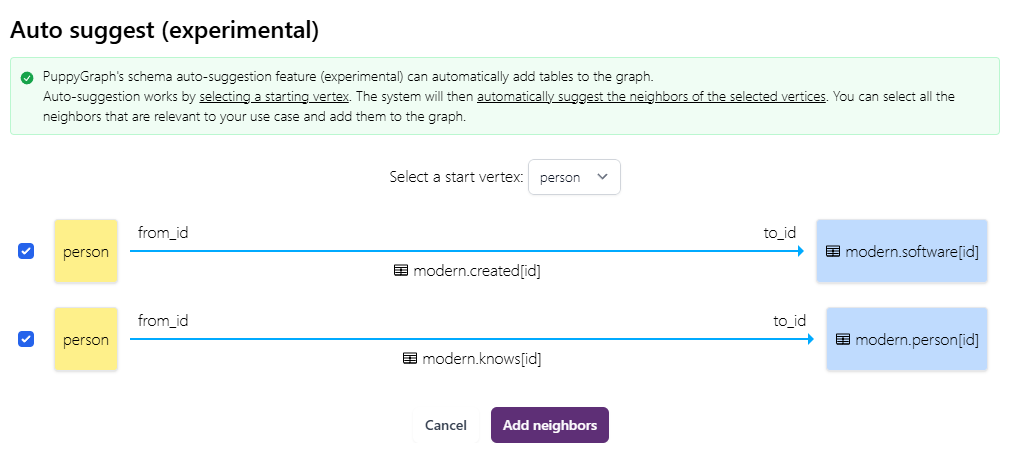
After that use the Auto Suggestion to create other nodes and edges.
Select person as the start node (vertex) and add the auto suggested nodes and edges.
The graph schema should look like this:
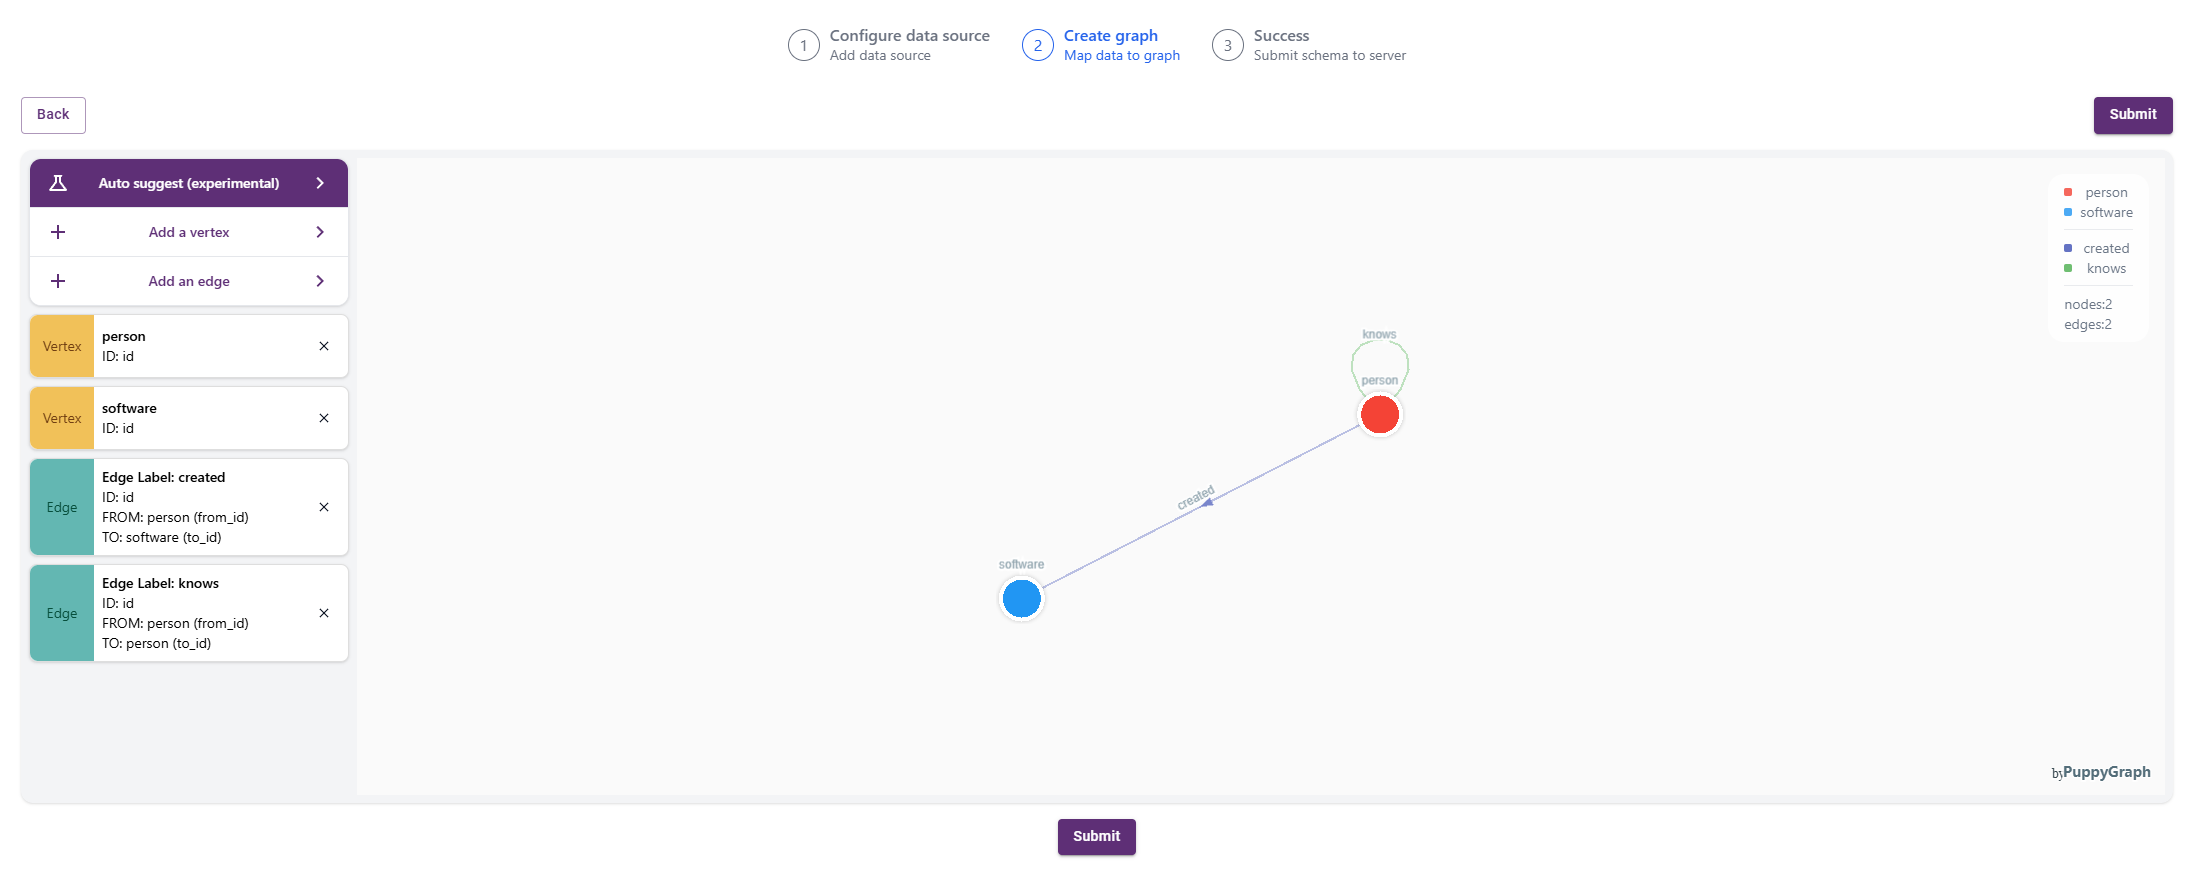 Submit the schema to create the graph.
Querying the Graph
In this tutorial we will use the Gremlin query language to query the Graph. Gremlin is a graph query language developed by Apache TinkerPop. Prior knowledge of Gremlin is not necessary to follow the tutorial. To learn more about it, visit https://tinkerpop.apache.org/gremlin.html.
Click on the Query panel the left side. The Gremlin Query tab offers an interactive environment for querying the graph using Gremlin.
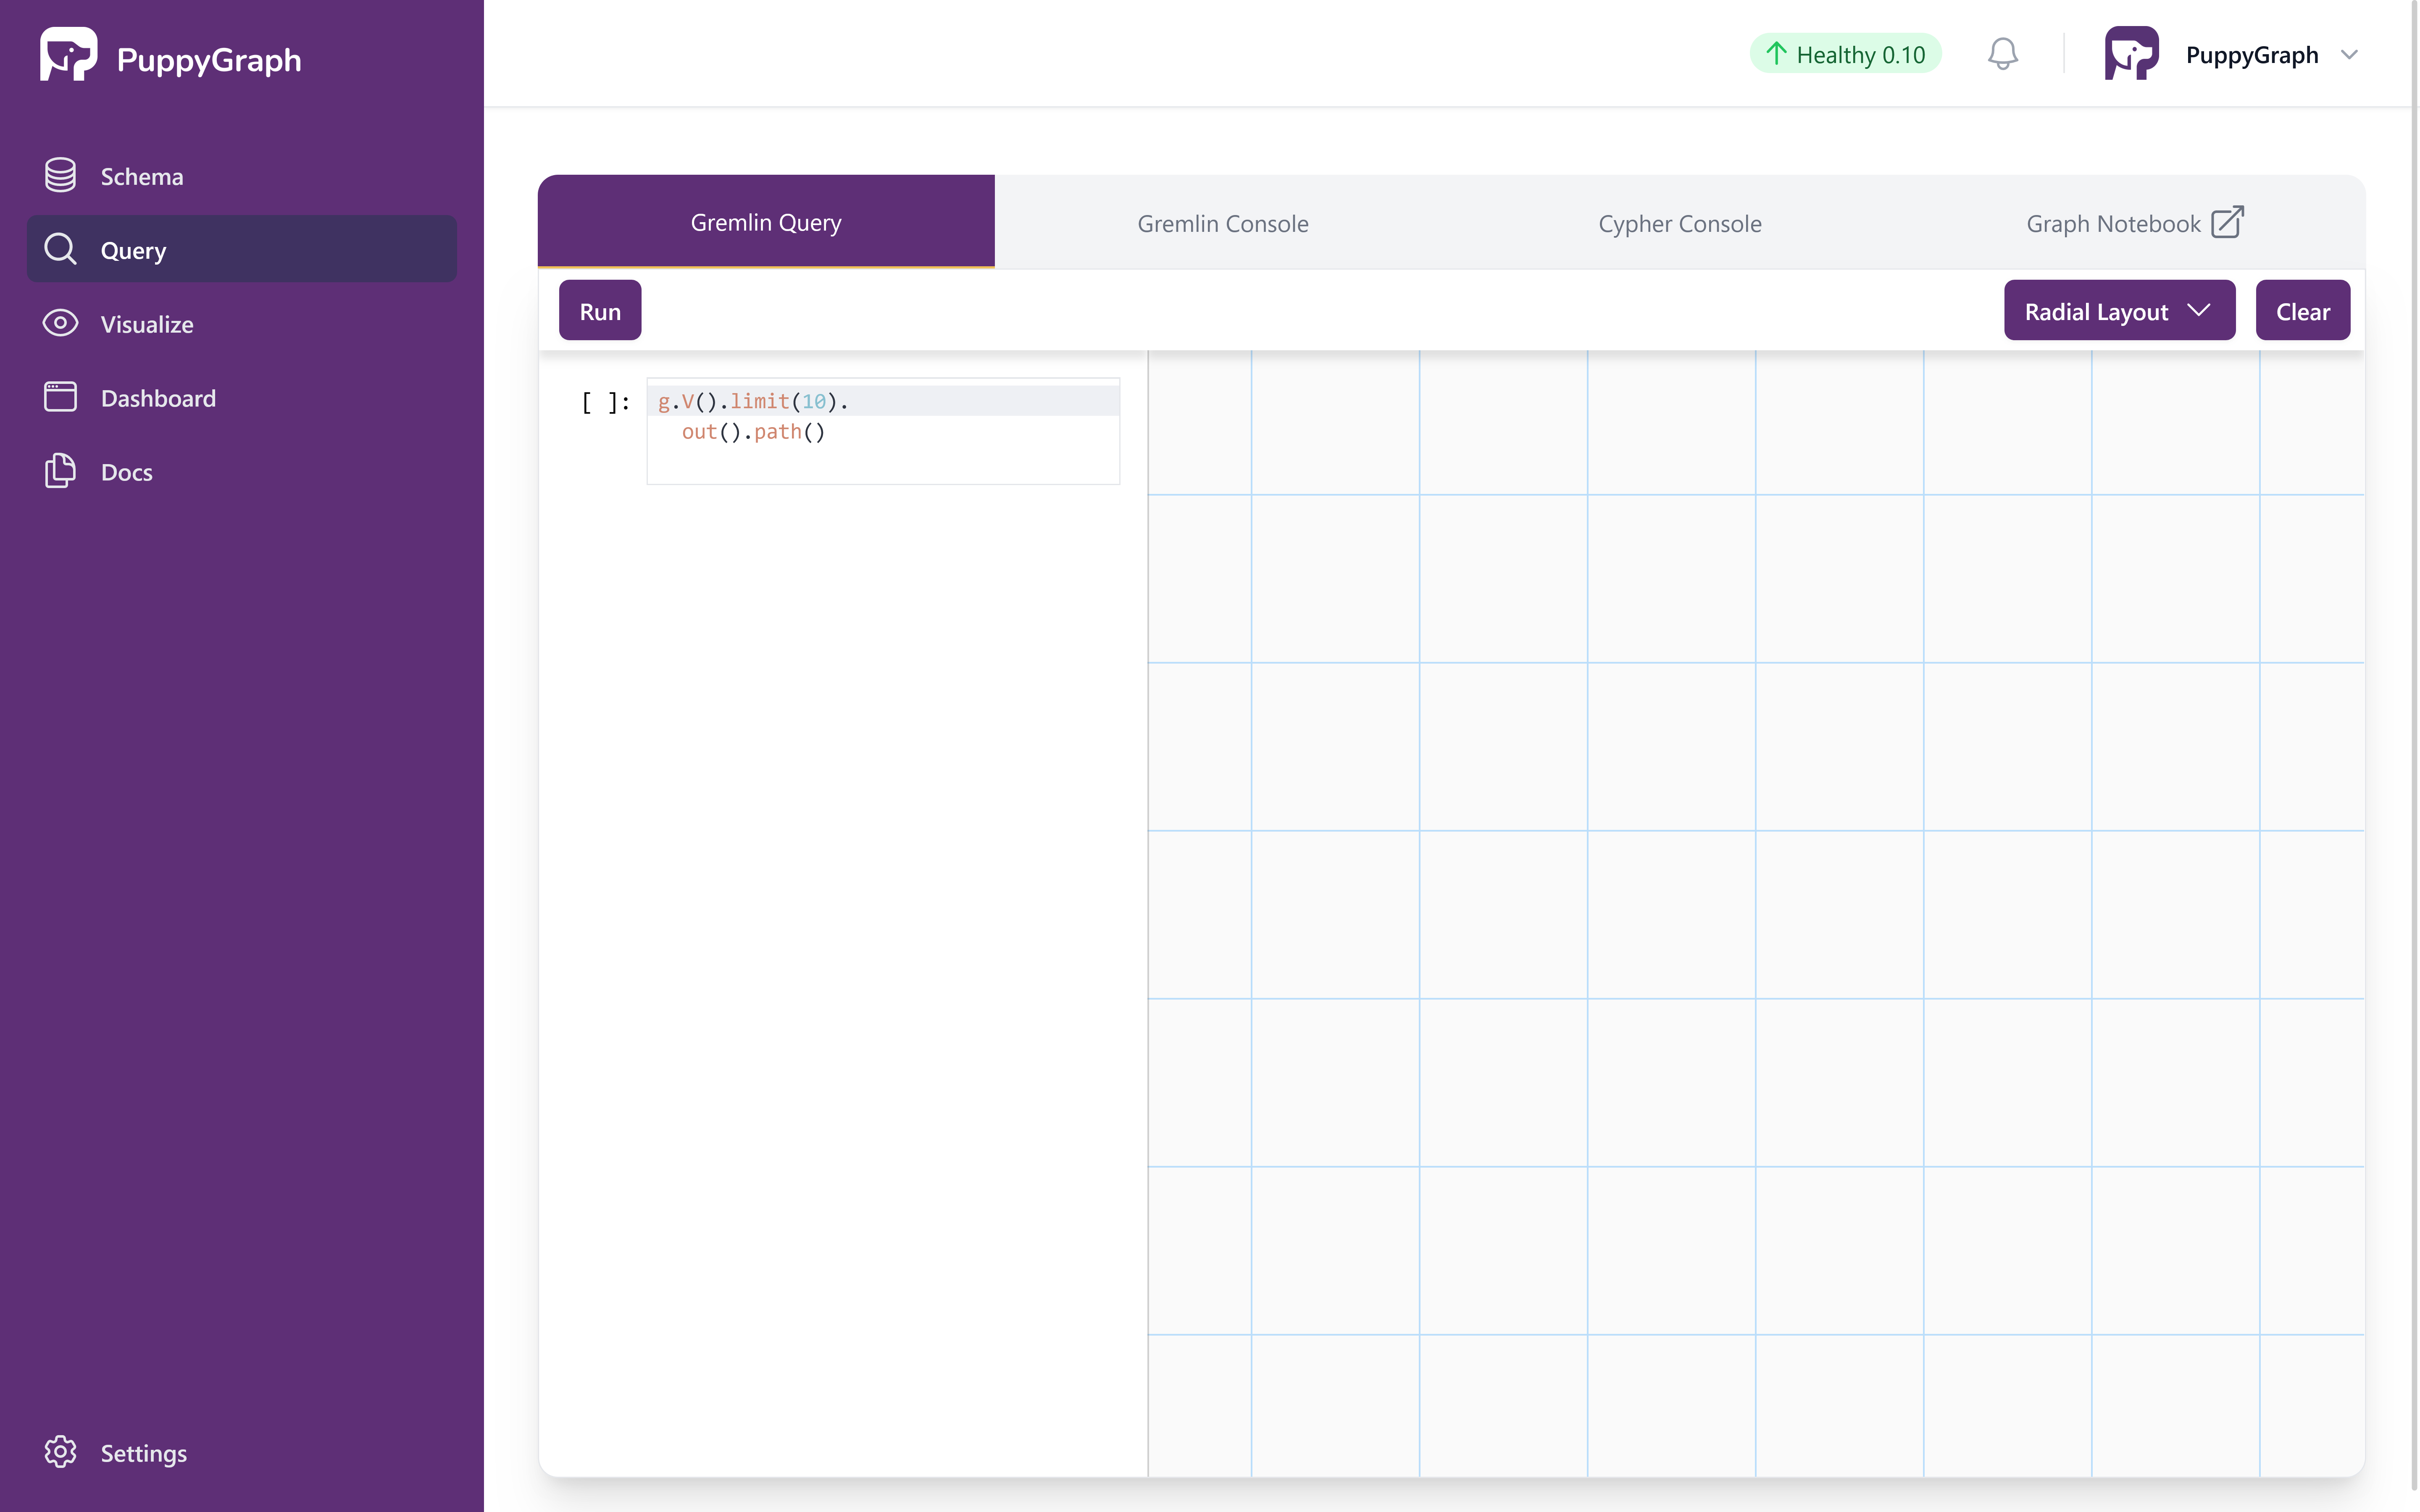
Interactive Gremlin Query Page
Queries are entered on the left side, and the right side displays the graph visualization.
The first query retrieves the property of the person named "marko".
Copy the following query, paste it in the query input, and click on the run button.
The output is plain text like the following:
Now let's also leverage the visualization. The next query gets all the software created by people known to "marko".
Copy the following query, paste it in the query input, and click on the run button.
The output is as follows. There are two paths in the result as "marko" knows "josh" who created "lop" and "ripple".
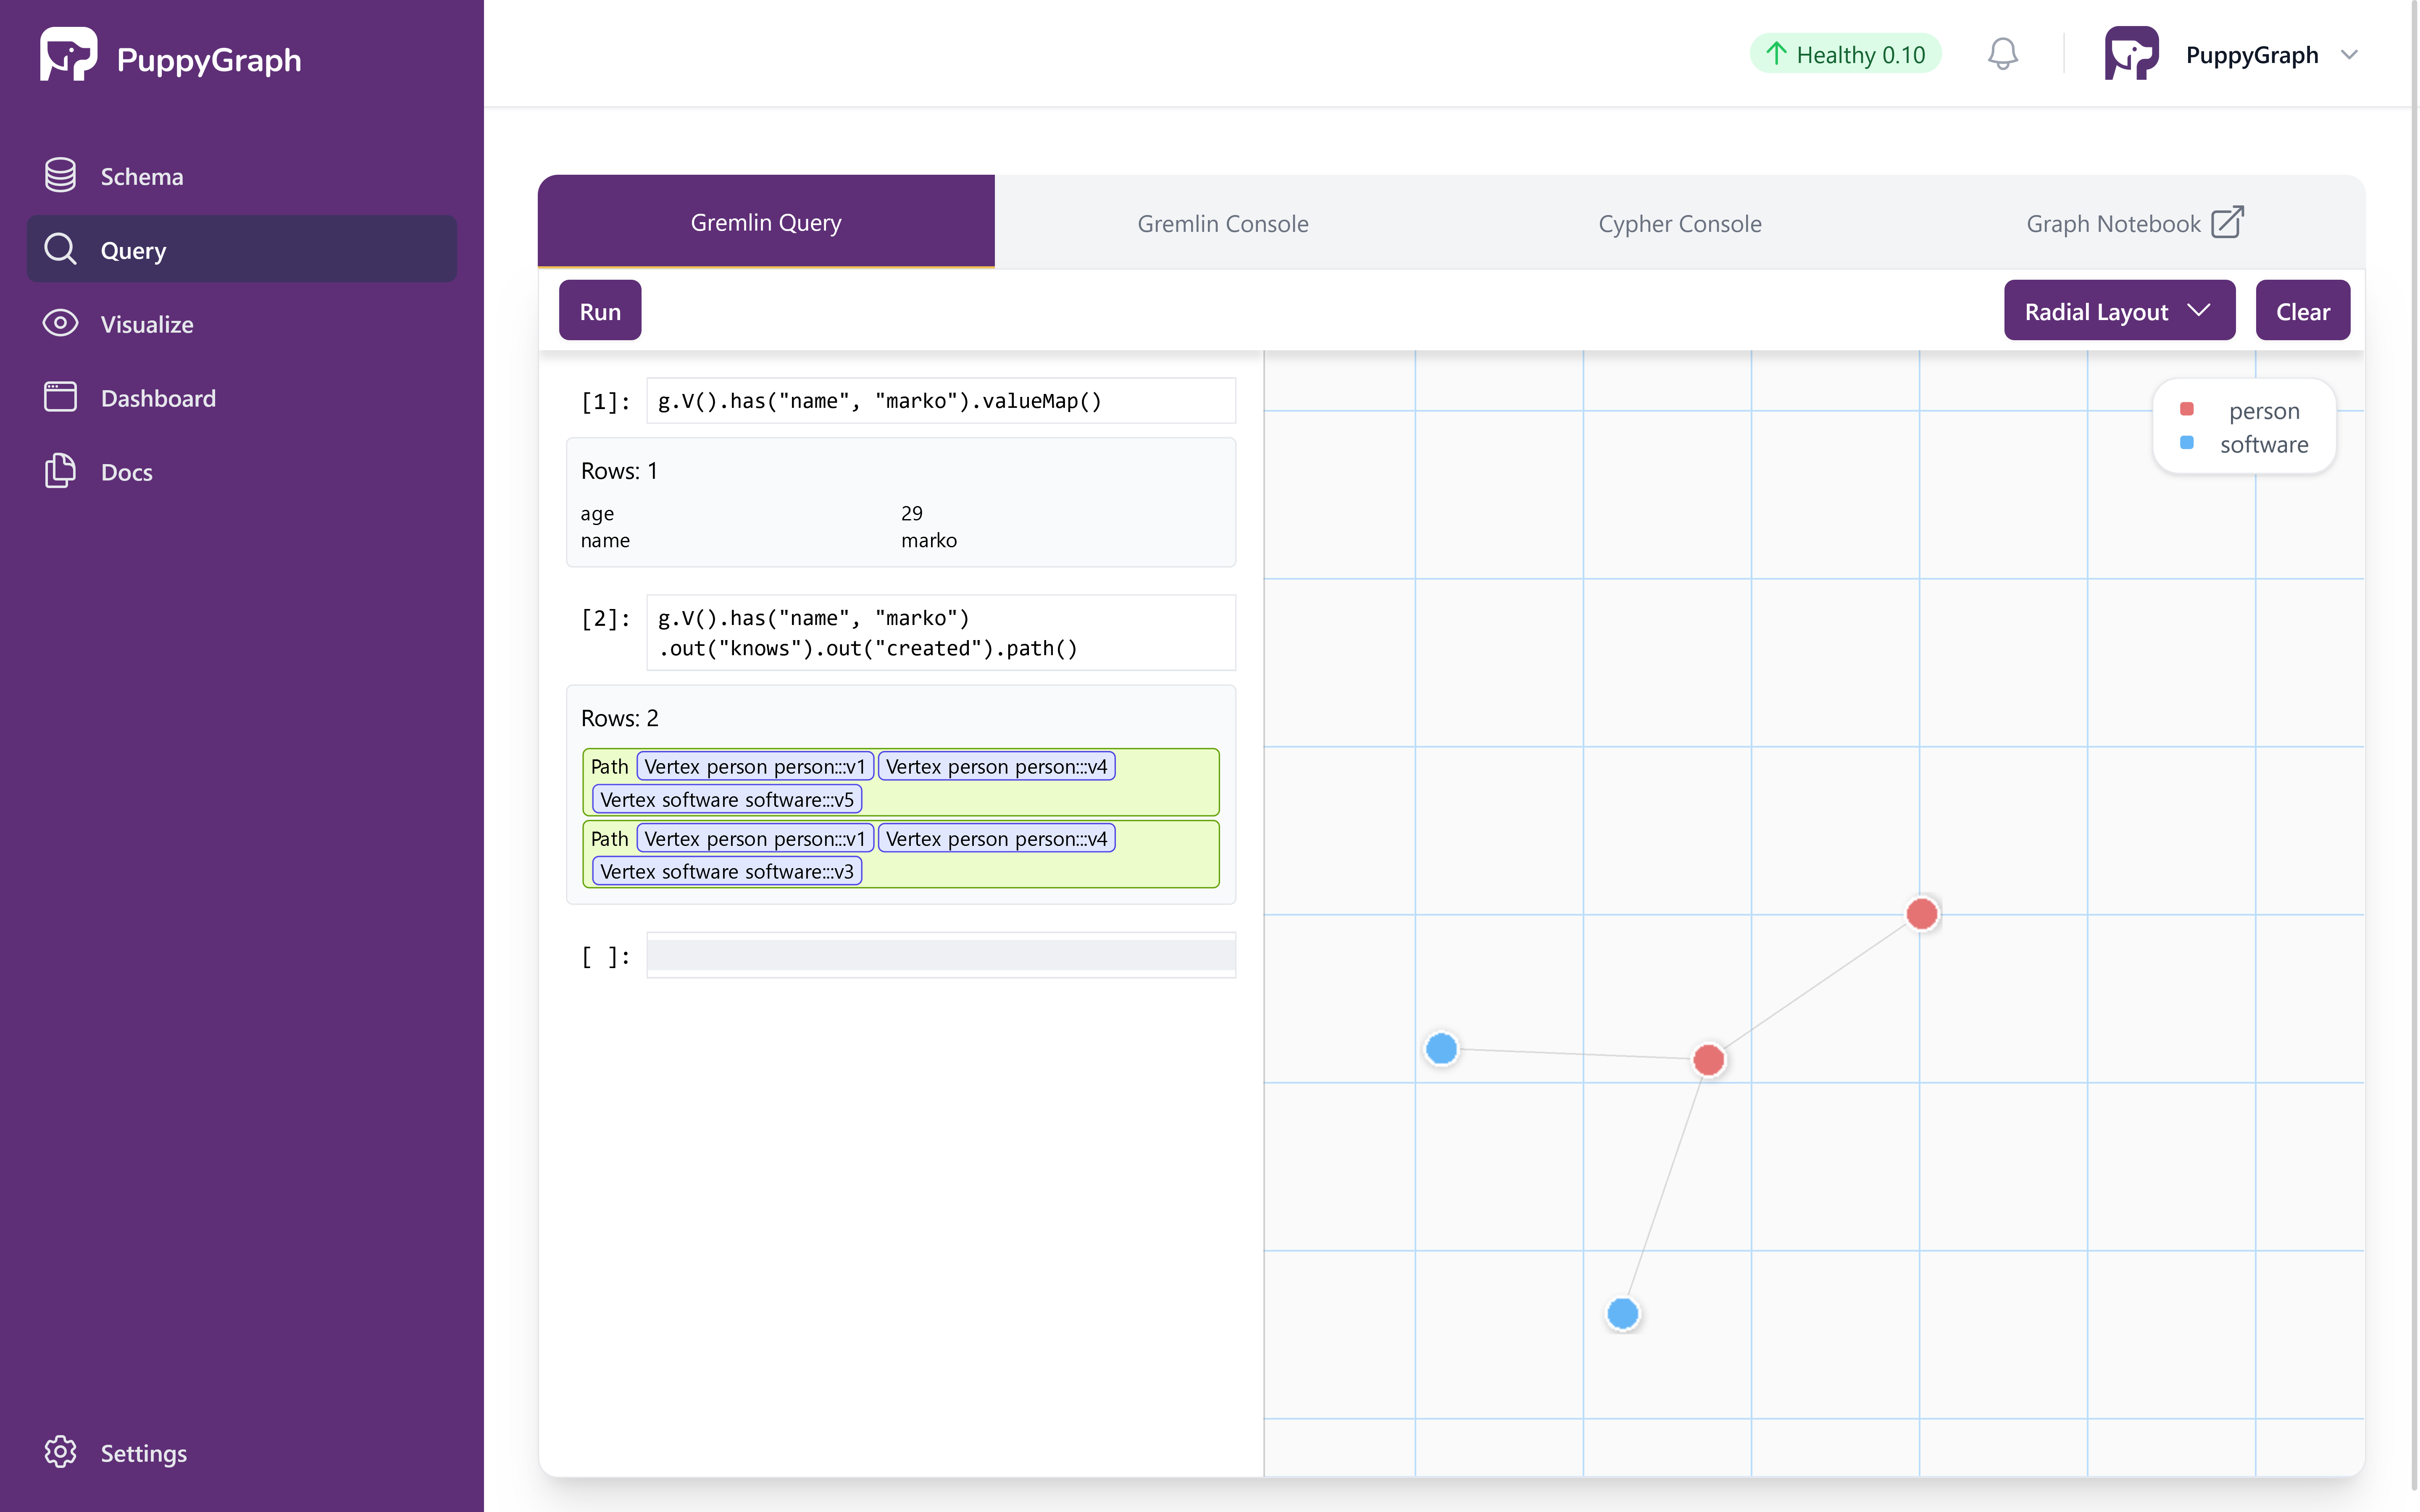
Interactive Query with Results
Alternative: Querying the graph via CLI
Alternatively, we can query the graph via CLI.
Execute the following command to access the PuppyGraph Gremlin Console
The welcome screen appears as follows:
  ____                                     ____                          _
 |  _ \   _   _   _ __    _ __    _   _   / ___|  _ __    __ _   _ __   | |__
 | |_) | | | | | | '_ \  | '_ \  | | | | | |  _  | '__|  / _` | | '_ \  | '_ \
 |  __/  | |_| | | |_) | | |_) | | |_| | | |_| | | |    | (_| | | |_) | | | | |
 |_|      \__,_| | .__/  | .__/   \__, |  \____| |_|     \__,_| | .__/  |_| |_|
                 |_|     |_|      |___/                         |_|
Welcome to PuppyGraph!
version: 0.10

puppy-gremlin>
Run the following queries in the console to query the Graph.
Properties of the person named "marko":
To exit PuppyGraph Gremlin Console, enter the command:
Cleaning up
Run the following command to shut down and remove the services:
You can then remove the tables created in your Databricks workspace.