Connecting to Redshift
Prerequisites
- The Redshift instance is accessible over the network from the PuppyGraph instance.
- The Redshift instance has its username and password configured.
Configuration
| Configuration | Explanation |
|---|---|
| Username | The username of the database |
| Password | The password of the database |
| JDBC URI | A JDBC compatible connection URI of the data source. Read this page for more details on how to construct the URI. |
| JDBC Driver Class | The URL of the Redshift-compatible JDBC Driver. Please choose the version of the driver that is compatible with your PostgreSQL database. |
Demo
In the demo, the Redshift data source stores people and referral information. To query the data as a graph, we model people as nodes (vertices) and the referral relationship between people as edges.
Prerequisites
The demo assumes that PuppyGraph has been deployed at localhost according to the instruction in Launching PuppyGraph from AWS Marketplace or Launching PuppyGraph in Docker. And the firewall rules of the machine and Redshift is set up properly to allow PuppyGraph access Redshift.
In this demo, we use the username puppygraph and password puppygraph123.
Data Preparation (Optional)
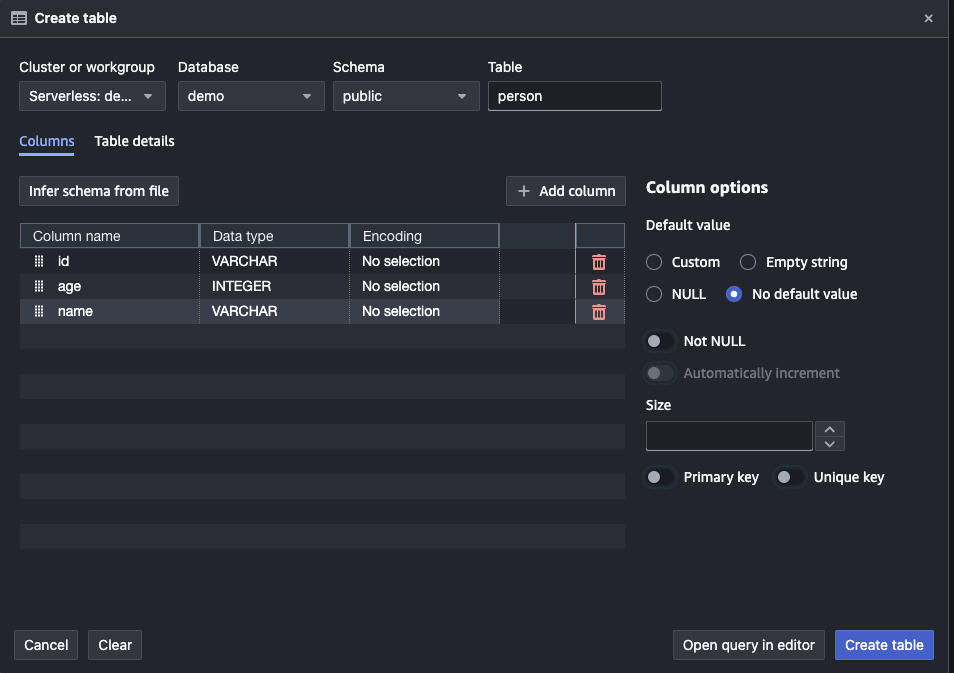
| id | age | name |
|---|---|---|
| v1 | 29 | marko |
| v2 | 27 | vadas |
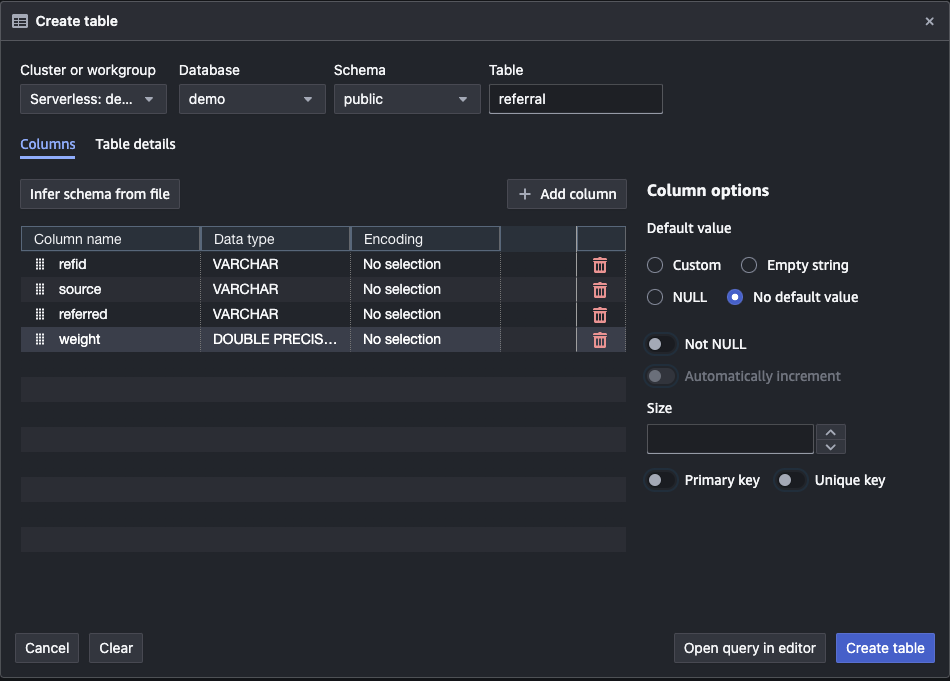
| refid | source | referred | weight |
|---|---|---|---|
| e1 | v1 | v2 | 0.5 |
The demo uses people and referral information as shown above.
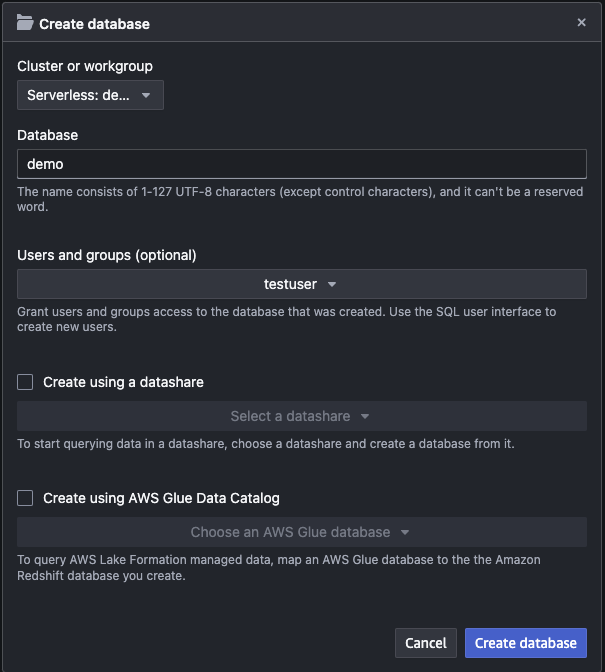
The following steps will create tables and insert data to Redshift in the Amazon Redshift Query editor v2. We assume that the redshift environment has been set up and use user name and password to connect.
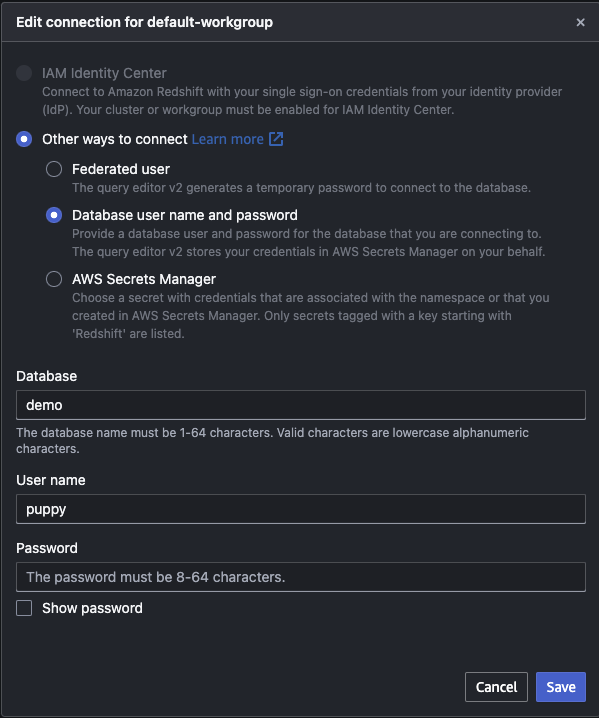
Create a database with the query editor.
Then create tables in the database.
Execute the following SQL in the query editor to insert data into the tables.
insert into demo.public.person values ('v1', 29, 'marko'), ('v2', 27, 'vadas');
insert into demo.public.referral values ('e1', 'v1', 'v2', 0.5);
Upload the schema
Now the data are ready in Redshift. We need a PuppyGraph schema before querying it. Let's create a schema file redshift.json:
{
  "catalog": [
    {
      "name": "jdbc_redshift",
      "type": "redshift",
      "jdbc": {
        "username": "puppy",
        "password": "puppy",
        "jdbcUri": "jdbc:redshift://[group_name].[account_id].[region].redshift-serverless.amazonaws.com:5439/demo",
        "driverClass": "com.amazon.redshift.Driver"
      }
    }
  ],
  "node": [
    {
      "label": "person",
      "dataSourceGroup": {
        "externalDataSource": {
          "enabled": true,
          "catalog": "jdbc_redshift",
          "schema": "public",
          "table": "person",
          "mappedField": [
            { "sourceFieldName": "id",   "targetFieldName": "id"   },
            { "sourceFieldName": "name", "targetFieldName": "name" },
            { "sourceFieldName": "age",  "targetFieldName": "age"  }
          ]
        }
      },
      "id":        [{ "name": "id", "type": "STRING" }],
      "attribute": [
        { "name": "name", "type": "STRING" },
        { "name": "age",  "type": "INT"    }
      ]
    }
  ],
  "edge": [
    {
      "label":         "knows",
      "fromNodeLabel": "person",
      "toNodeLabel":   "person",
      "dataSourceGroup": {
        "externalDataSource": {
          "enabled": true,
          "catalog": "jdbc_redshift",
          "schema": "public",
          "table": "referral",
          "mappedField": [
            { "sourceFieldName": "refid",    "targetFieldName": "id"      },
            { "sourceFieldName": "source",   "targetFieldName": "from_id" },
            { "sourceFieldName": "referred", "targetFieldName": "to_id"   },
            { "sourceFieldName": "weight",   "targetFieldName": "weight"  }
          ]
        }
      },
      "id":        [{ "name": "id",      "type": "STRING" }],
      "fromKey":   [{ "name": "from_id", "type": "STRING" }],
      "toKey":     [{ "name": "to_id",   "type": "STRING" }],
      "attribute": [
        { "name": "from_id", "type": "STRING" },
        { "name": "to_id",   "type": "STRING" },
        { "name": "weight",  "type": "DOUBLE" }
      ]
    }
  ]
}
Here are some notes on this schema:
- A catalog
jdbc_redshiftis added to specify the remote data source in Redshift. - Set
typetoredshift. - Set
driverClasstocom.amazon.redshift.Driver. - Replace the
catalog[].jdbc.usernameandcatalog[].jdbc.passwordvalues with your actual Redshift database username and password. These are separate from the PuppyGraph login used later in thecurl --userexample. - Replace
jdbcUriwith your actual JDBC URL. - The node and edge
labelvalues do not have to match the corresponding Redshift table names. ThedataSourceGroup.externalDataSourceblock on each node and edge points at the actualschema(public) andtable(e.g.person,referral) in Redshift. - The
mappedFieldentries map source columns onto graph fields. For an edge, thefrom_id/to_idtargets (alongsidefromKey/toKey) describe which source columns form the endpoints.
Now we can upload the schema file redshift.json to PuppyGraph with the following shell command, assuming that the PuppyGraph is running on localhost:
curl -XPOST -H "content-type: application/json" --data-binary @./redshift.json --user "puppygraph:puppygraph123" localhost:8081/schema
Query the data
Connecting to PuppyGraph at http://localhost:8081 and start gremlin console from the "Query" section:
[PuppyGraph]> console
         \,,,/
         (o o)
-----oOOo-(3)-oOOo-----
plugin activated: tinkerpop.server
plugin activated: tinkerpop.utilities
plugin activated: tinkerpop.tinkergraph
Now we have connected to the Gremlin Console. We can query the graph: