Launching PuppyGraph from Snowflake Marketplace
PuppyGraph is available on the Snowflake Marketplace as a Native App running on Snowpark Container Services: the engine runs entirely inside your Snowflake account, reads the tables you grant it directly — no ETL, no credentials to configure — and serves its UI through a Snowflake-authenticated URL.
1. Install and activate
- In Snowsight, open Marketplace in the left navigation, search for PuppyGraph, and open the listing.
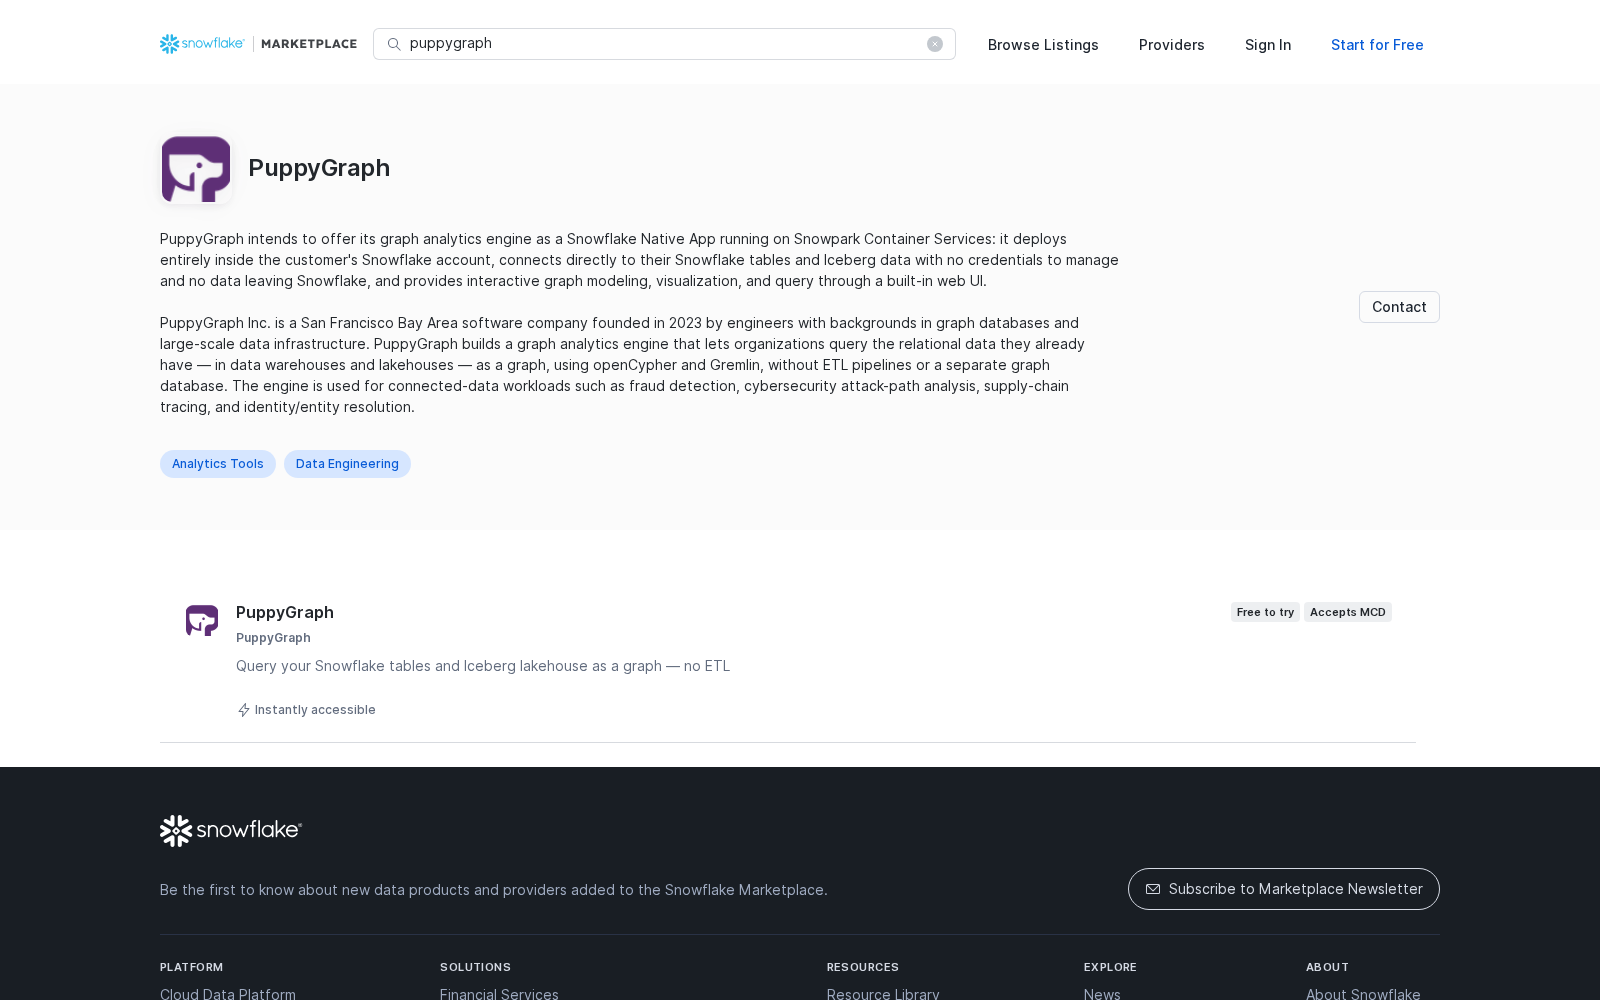
The PuppyGraph listing on the Snowflake Marketplace
- Click Try Now (or Start trial). Snowflake shows the permissions the app needs — a dedicated compute pool to run the engine, a small warehouse for its SQL queries, and a service endpoint for the web UI. Review and click Agree & continue to install.
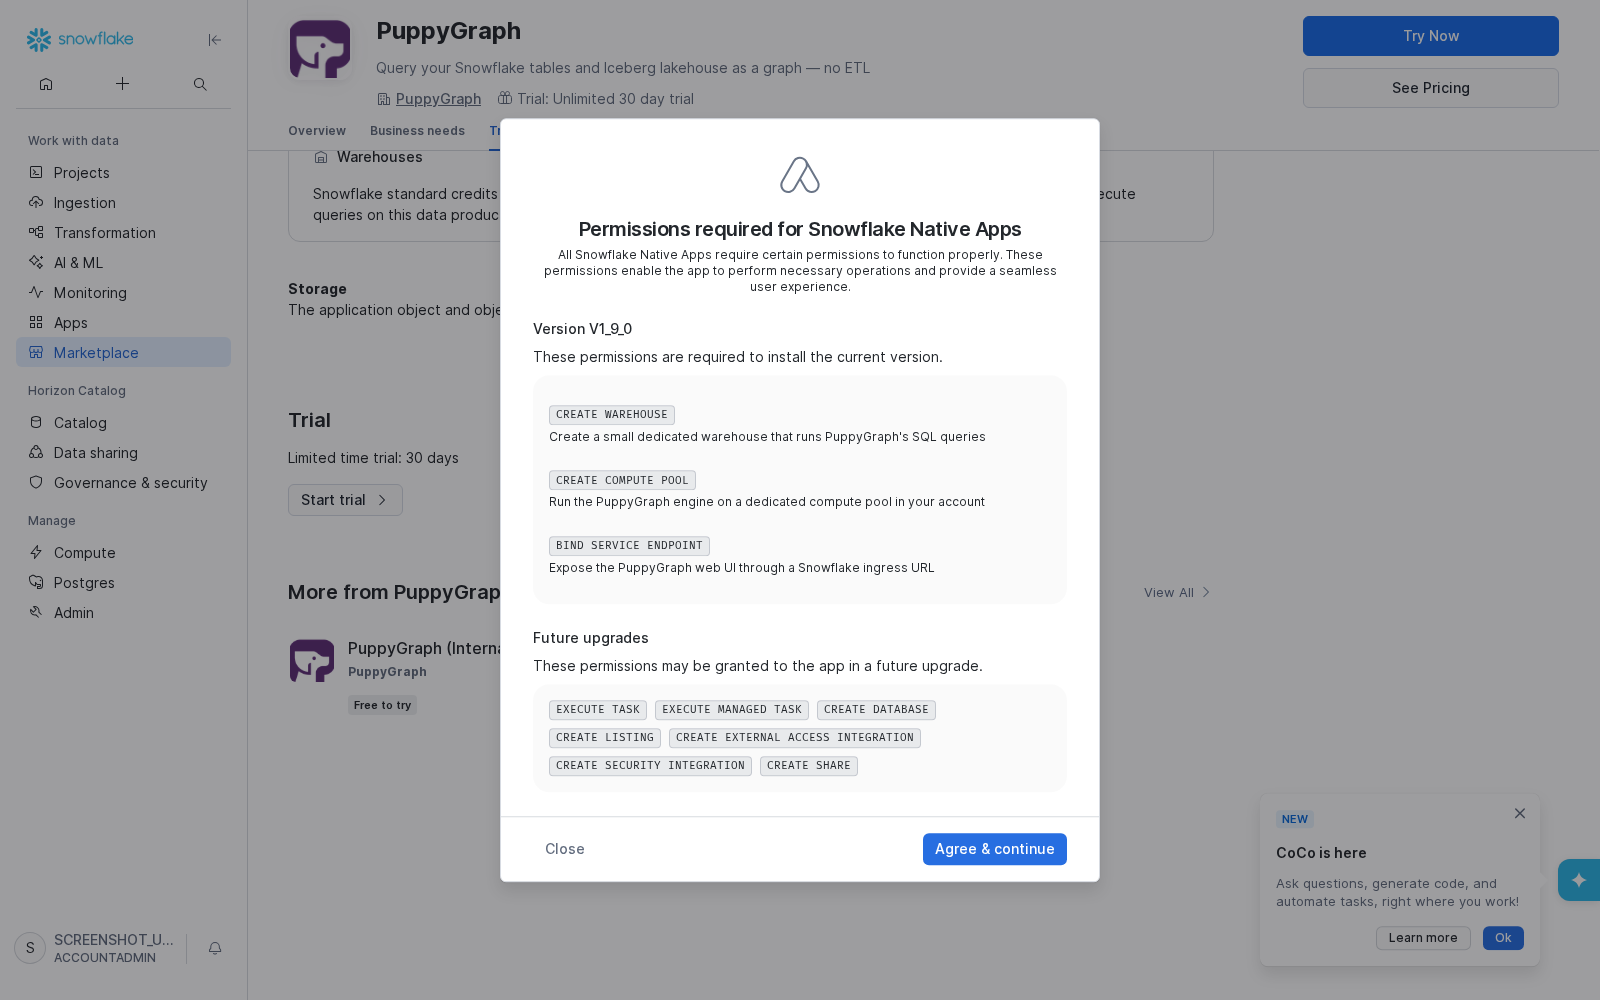
The install consent: exactly what the app may create in your account
Pricing is a compute-pool surcharge with a 30-day trial — see the listing's Pricing tab for details; suspend the engine when idle to stop all costs (see Cost controls).
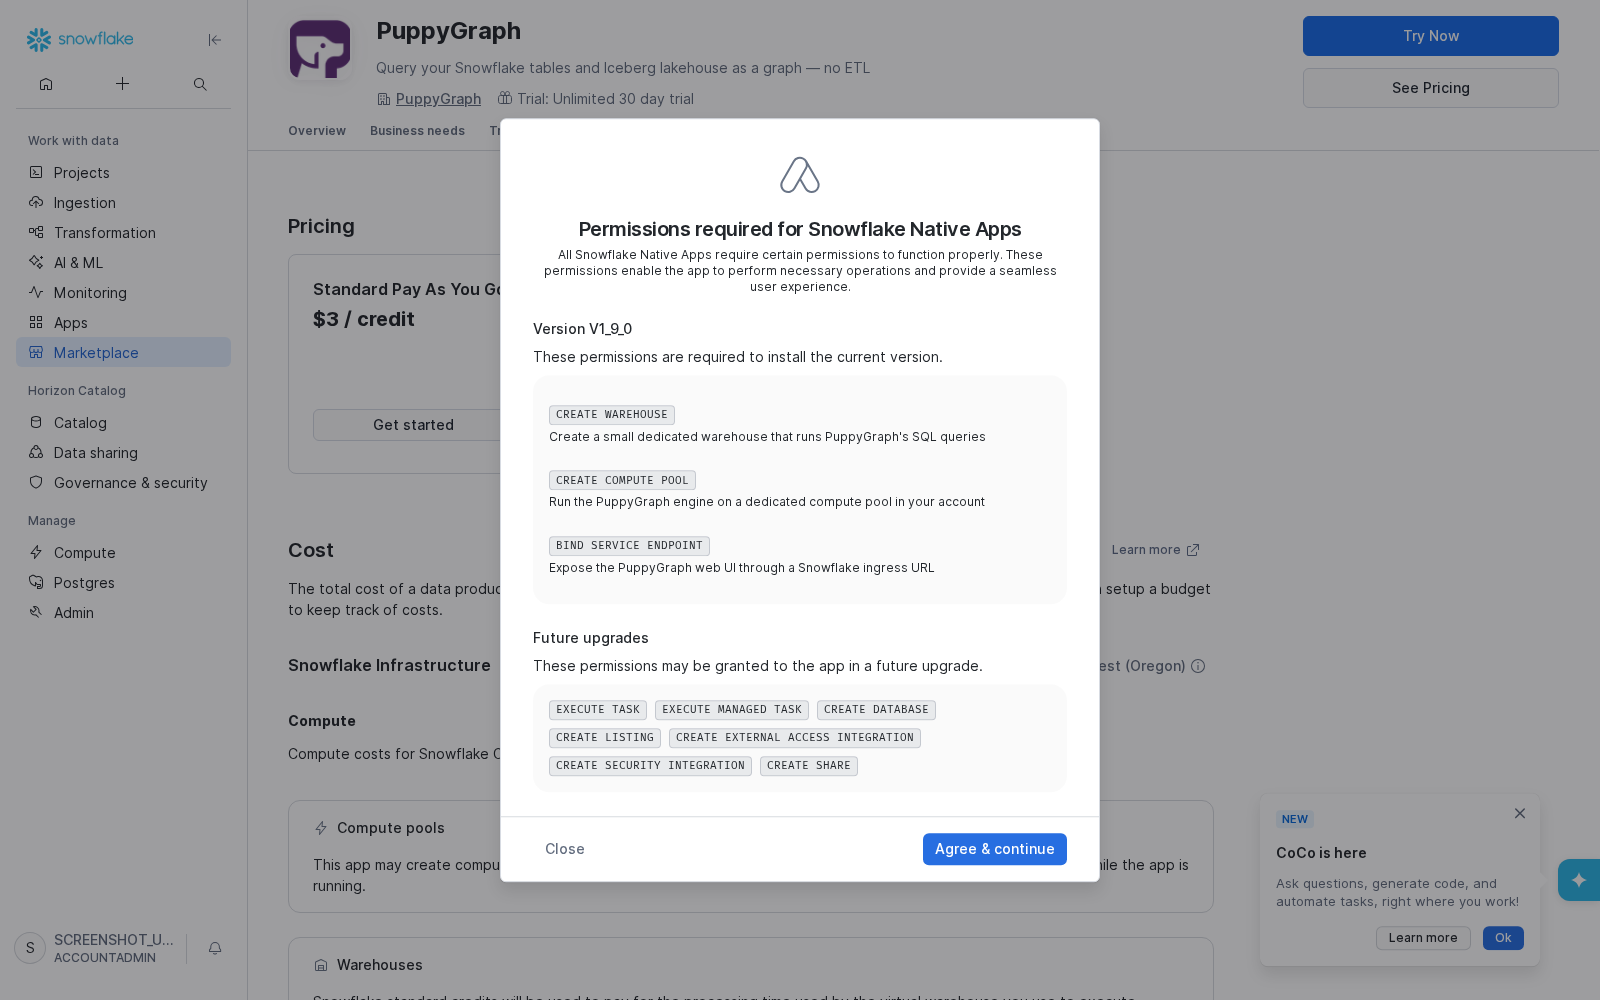
Pricing and cost breakdown on the listing
-
Enable the built-in AI assistant. It runs on Snowflake Cortex, so inference stays in your account, with no external network access and no API keys, and it can build your graph schema for you (see Map tables to nodes and edges). An account admin grants the app access to Cortex once, in a worksheet:
Cortex usage bills to your Snowflake account. The grant is optional and the rest of the app works without it. Until it is granted, the assistant answers every message on the AI page with an error that names this command.
-
Click Launch App. While the engine starts you see a "PuppyGraph is starting up" page that clears automatically — no refresh needed.
2. Give PuppyGraph access to your data
Follow along with this demo dataset (run in a worksheet, replacing
<app_name> with your installed application name — the in-app instructions
show it pre-filled):
CREATE DATABASE IF NOT EXISTS GRAPH_DEMO;
CREATE SCHEMA IF NOT EXISTS GRAPH_DEMO.SOCIAL;
CREATE OR REPLACE TABLE GRAPH_DEMO.SOCIAL.PERSON (ID INT, NAME STRING, AGE INT);
CREATE OR REPLACE TABLE GRAPH_DEMO.SOCIAL.KNOWS  (SRC INT, DST INT);
INSERT INTO GRAPH_DEMO.SOCIAL.PERSON VALUES (1,'marko',29),(2,'vadas',27),(3,'josh',32),(4,'peter',35);
INSERT INTO GRAPH_DEMO.SOCIAL.KNOWS  VALUES (1,2),(1,3);
GRANT USAGE ON DATABASE GRAPH_DEMO TO APPLICATION <app_name>;
GRANT USAGE ON ALL SCHEMAS IN DATABASE GRAPH_DEMO TO APPLICATION <app_name>;
GRANT SELECT ON ALL TABLES IN DATABASE GRAPH_DEMO TO APPLICATION <app_name>;
Until data is granted, the app shows the first-run panel below with a live "Watching for access…" indicator — once you run the grants, it advances to the schema builder by itself within about a minute. That is your confirmation the grant worked.
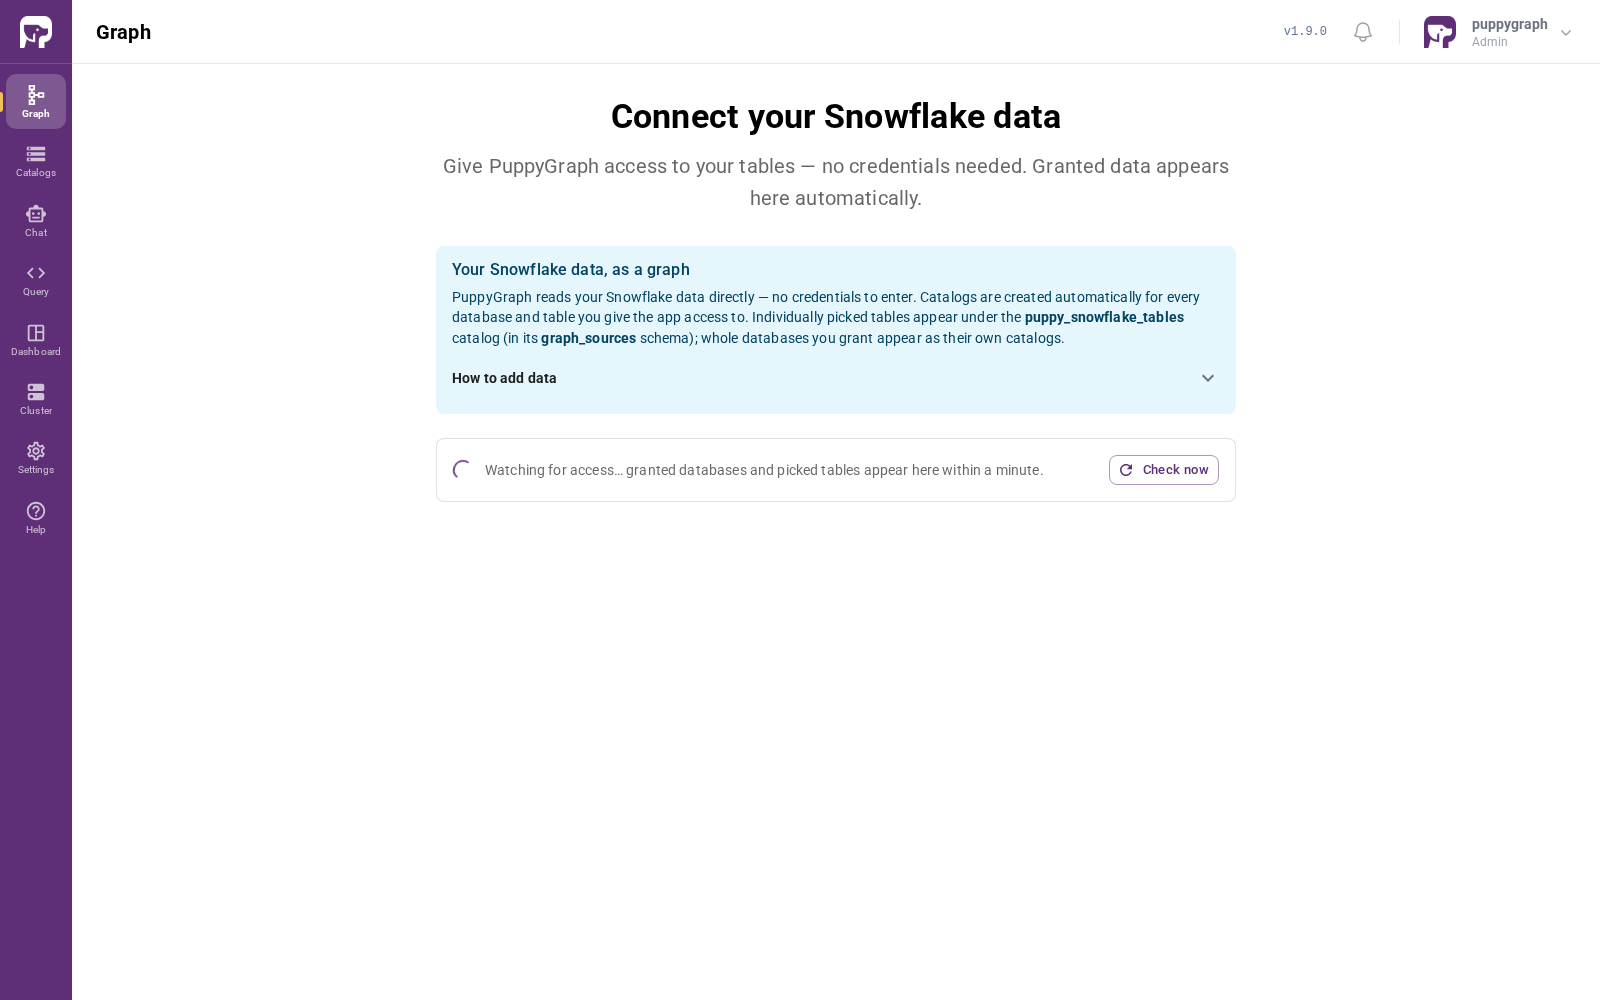
First-run panel before any data is granted
Iceberg tables
GRANT SELECT ON ALL TABLES does not cover Snowflake Iceberg tables —
they are a separate object class. Add
GRANT SELECT ON ALL ICEBERG TABLES IN DATABASE <db> TO APPLICATION <app_name>;
or grant a database role. Tables shared through the Snowsight table picker
(instead of SQL grants) appear under the puppy_snowflake_tables catalog in
its graph_sources schema.
Each granted database appears in the left catalog panel as a catalog named
after it in lowercase — for the demo, expand graph_demo → SOCIAL to see
PERSON and KNOWS. If a schema shows "No tables found", the table-level
grant is missing.
3. Map tables to nodes and edges
Tables whose rows are entities become nodes; tables that connect two entities become edges.
Let the AI assistant build it
If you granted Cortex access in Install and activate, open the AI page and ask the assistant to build a graph schema from your catalog. It explores your tables and proposes nodes and edges for you. The manual steps below do the same thing by hand.
- Click Add Node in the toolbar. In the Select Table for Node dialog,
expand
graph_demothenSOCIAL, pickPERSON, and click Next. In the Add Node wizard, click Add to ID and pickIDto make it the node identifier;NAMEandAGEremain under Attribute Columns — set their aliases to lowercasenameandage(property lookup is case-sensitive, and unquoted Snowflake columns are uppercase). Set the Node Label topersonand submit. - Click Add Edge in the toolbar and pick
KNOWSthe same way. In the Add Edge wizard, turn Enable ID off (the table has no edge-ID column), set the label toknows, choosepersonas the From node usingSRCandpersonas the To node usingDST, then click Next and Add Edge.
The schema canvas now shows person —knows→ person. Changes apply
immediately — no re-upload or restart.
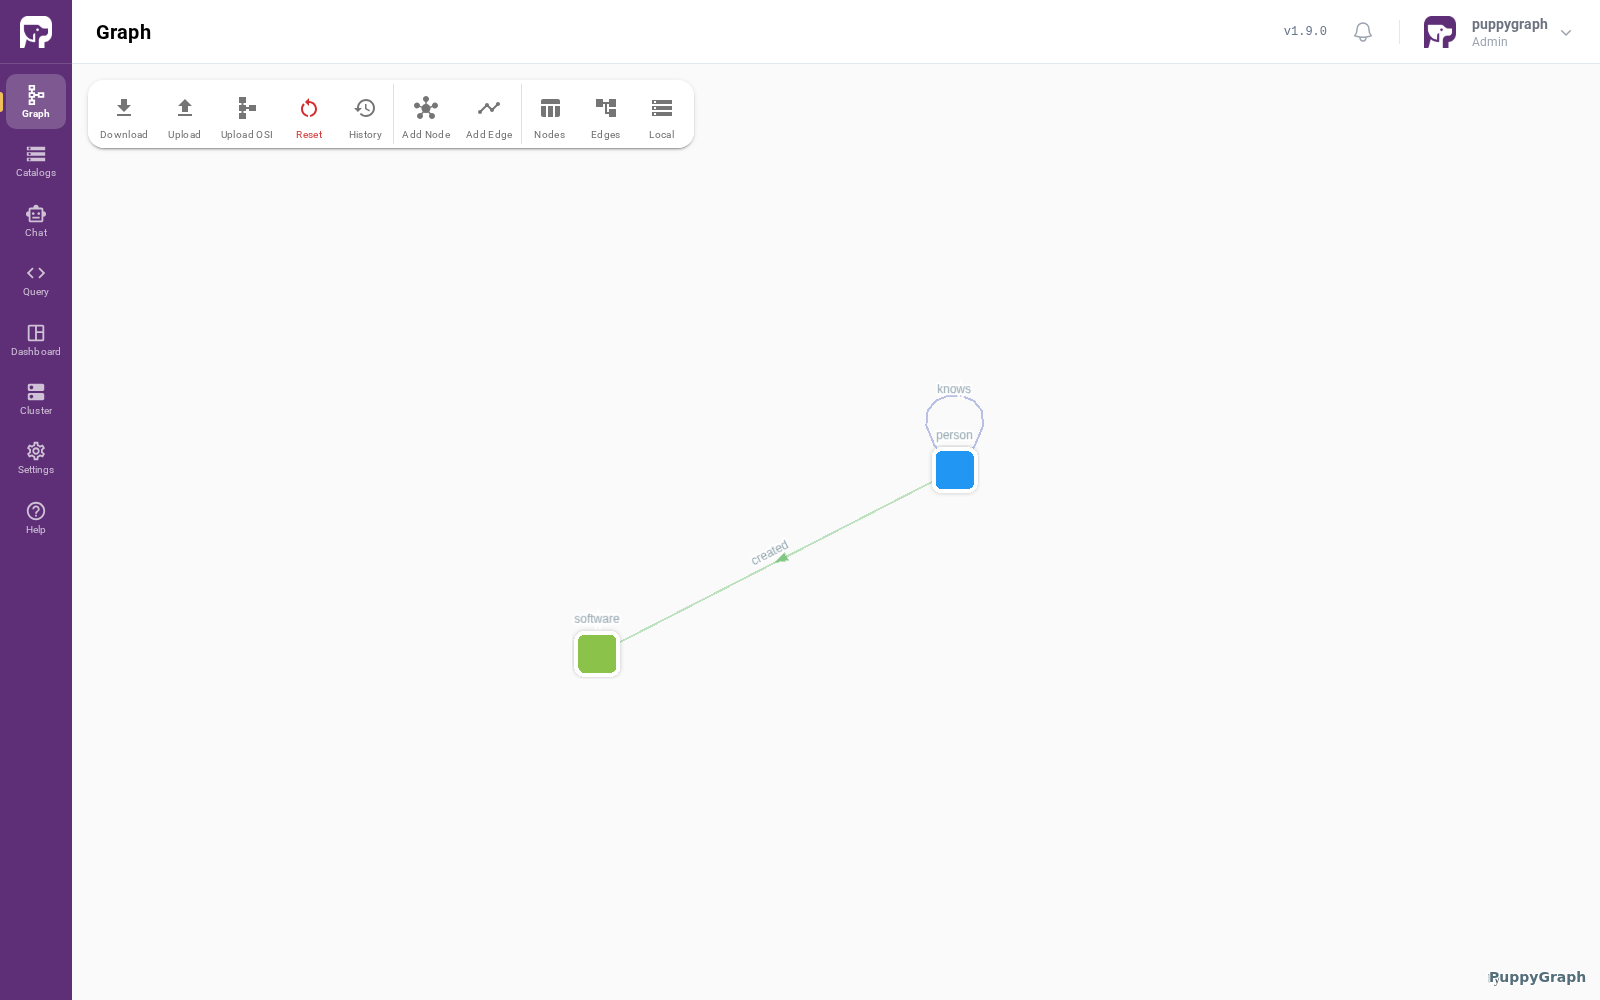
The schema canvas after mapping tables to nodes and edges
4. Run your first query
Open Query in the left navigation and execute:
Expected result with the demo data — two rows: marko | vadas and
marko | josh. The graph view renders the same result visually.
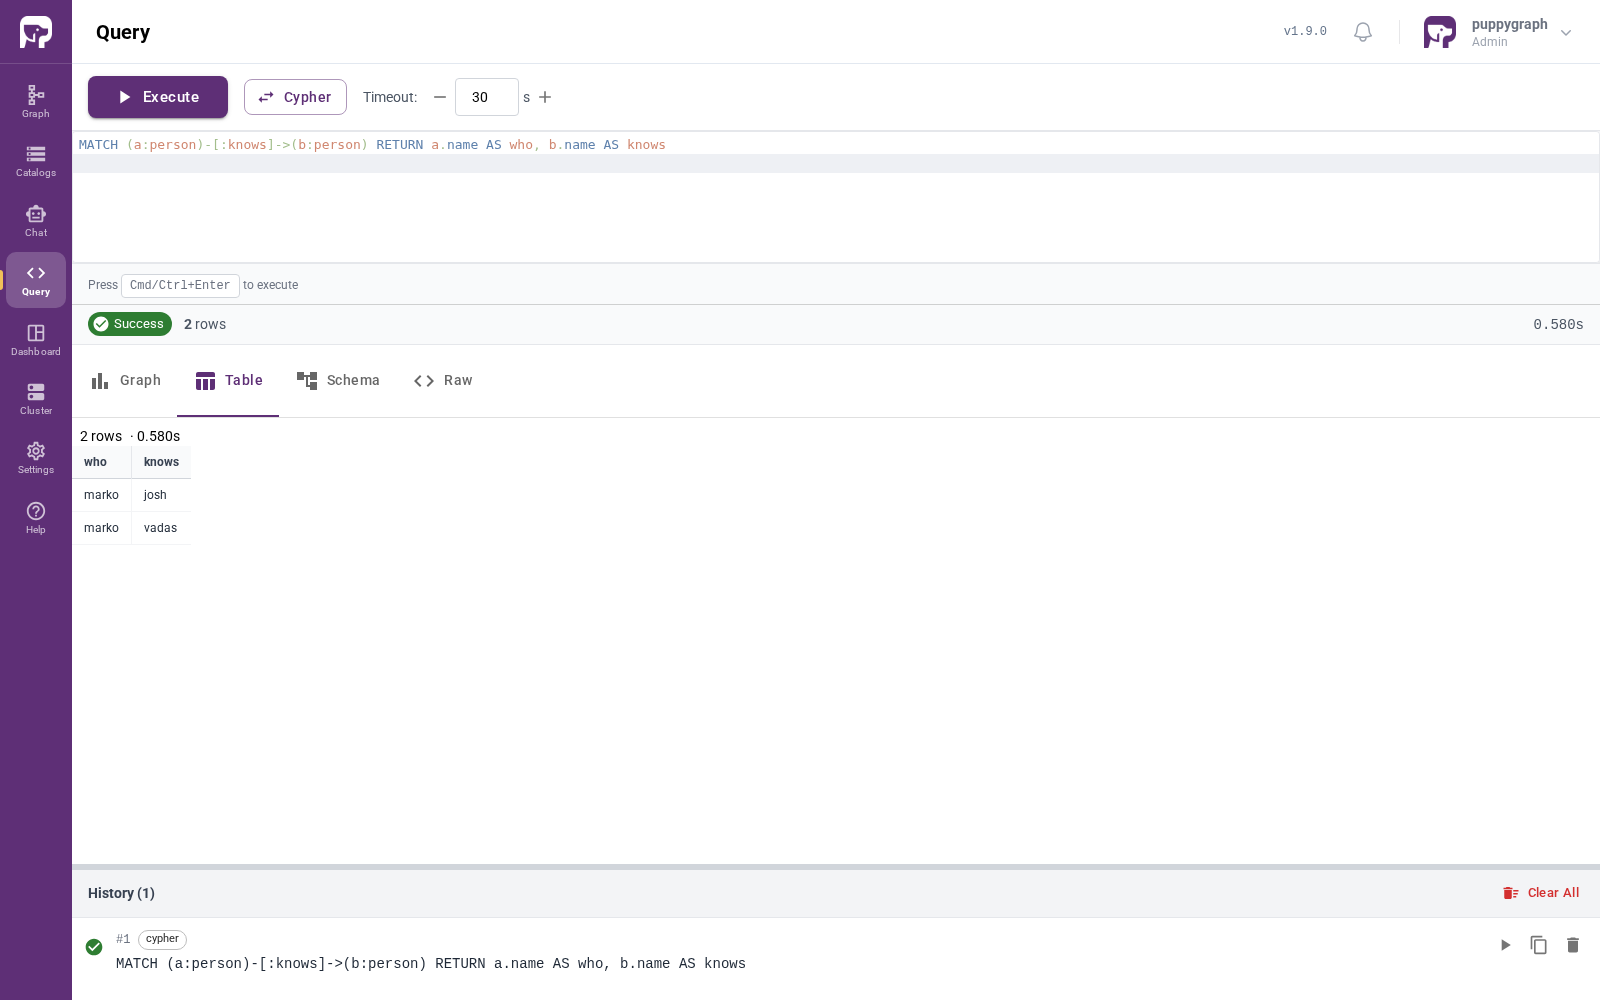
The expected result: Success, 2 rows
You can also query from any worksheet or Snowpark session:
SELECT <app_name>.api.cypher(
  'MATCH (a:person)-[:knows]->(b:person) RETURN a.name AS who, b.name AS knows');
This returns the records as a VARIANT array ({"Keys": [...], "Values": [...]}
per row) — use LATERAL FLATTEN to project columns.
5. Graph analytics on your data
Once tables are mapped, the full openCypher and Gremlin languages are available for connected-data analysis — every query reads your live Snowflake tables. A few patterns to build on (using the demo schema):
-- Friends of friends: who is reachable in exactly two hops?
MATCH (a:person)-[:knows]->()-[:knows]->(c:person)
RETURN a.name, c.name

-- Variable-length paths: everyone reachable within 3 hops of marko
MATCH (a:person {name:'marko'})-[:knows*1..3]->(b:person)
RETURN DISTINCT b.name

-- Most-connected people (out-degree)
MATCH (a:person)-[:knows]->(b:person)
RETURN a.name, count(b) AS connections ORDER BY connections DESC
The same patterns scale to real workloads — fraud rings (cycles among accounts), entity resolution (shared attributes between records), and dependency analysis (transitive reachability) — with no data movement out of your account. See the openCypher reference for the full language surface.
Cost controls and troubleshooting
- Suspend the engine and its compute pool when idle:
CALL <app_name>.config.suspend_engine();— state is preserved; resume withCALL <app_name>.config.resume_engine();(about 2 minutes). - "Watching for access…" never advances: the grant likely targeted a different application name — use the exact name shown in the in-app instructions.
- Query returns "no healthy leader": the engine is still starting or was suspended; wait for the startup page to clear or resume the engine.