Querying Iceberg Data as a Graph
Archived PuppyGraph 0.x documentation
This is the archived 0.x documentation. For new deployments, use puppygraph/puppygraph:latest (PuppyGraph 1.x) and the current docs. The 0.x schemas and UI described here don't apply to 1.x; see Migrating from v0.
Summary
In this tutorial, you will:
- Create an Apache Iceberg (Iceberg) data lake and load it with example data;
- Start a PuppyGraph Docker container and query the Iceberg data as a graph.
Prerequisites
Please ensure that docker compose is available. The installation can be verified by running:
See https://docs.docker.com/compose/install/ for Docker Compose installation instructions and https://www.docker.com/get-started/ for more details on Docker.
Accessing the PuppyGraph Web UI requires a browser. However, the tutorial offers alternative instructions for those who wish to exclusively use the CLI.
Deployment
 Create a file
docker-compose.yaml with the following content.
docker-compose.yaml
# reference: https://iceberg.apache.org/spark-quickstart/

services:
  spark-iceberg:
    image: tabulario/spark-iceberg
    container_name: spark-iceberg
    networks:
      iceberg_net:
    depends_on:
      rest:
        condition: service_started
      rustfs-init:
        condition: service_completed_successfully
    volumes:
      - ./warehouse:/home/iceberg/warehouse
      - ./notebooks:/home/iceberg/notebooks/notebooks
    environment:
      - AWS_ACCESS_KEY_ID=admin
      - AWS_SECRET_ACCESS_KEY=password
      - AWS_REGION=us-east-1
    ports:
      - 8888:8888
      - 8180:8080
      - 10000:10000
      - 10001:10001
  rest:
    depends_on:
      rustfs-init:
        condition: service_completed_successfully
    image: tabulario/iceberg-rest
    container_name: iceberg-rest
    networks:
      iceberg_net:
    ports:
      - 8181:8181
    environment:
      - AWS_ACCESS_KEY_ID=admin
      - AWS_SECRET_ACCESS_KEY=password
      - AWS_REGION=us-east-1
      - CATALOG_WAREHOUSE=s3://warehouse/
      - CATALOG_IO__IMPL=org.apache.iceberg.aws.s3.S3FileIO
      - CATALOG_S3_ENDPOINT=http://rustfs:9000
  rustfs:
    image: rustfs/rustfs:latest
    container_name: rustfs
    environment:
      - RUSTFS_ACCESS_KEY=admin
      - RUSTFS_SECRET_KEY=password
      - RUSTFS_SERVER_DOMAINS=rustfs
      - RUSTFS_CONSOLE_ENABLE=true
    networks:
      iceberg_net:
        aliases:
          - warehouse.rustfs
    ports:
      - "9000:9000"
      - "9001:9001"
    healthcheck:
      test: ["CMD", "curl", "-fsS", "http://localhost:9000/health"]
      interval: 2s
      timeout: 5s
      retries: 30
      start_period: 10s
  rustfs-init:
    image: rustfs/rustfs:latest
    depends_on:
      rustfs:
        condition: service_healthy
    networks:
      - iceberg_net
    entrypoint:
      - /bin/sh
      - -ec
      - |
        curl -fsS --aws-sigv4 aws:amz:us-east-1:s3 --user admin:password \
          --head http://rustfs:9000/warehouse >/dev/null 2>&1 ||
        curl -fsS --aws-sigv4 aws:amz:us-east-1:s3 --user admin:password \
          -X PUT http://rustfs:9000/warehouse
  puppygraph:
    image: puppygraph/puppygraph:stable
    container_name: puppygraph
    networks:
      iceberg_net:
    environment:
      - PUPPYGRAPH_USERNAME=puppygraph
      - PUPPYGRAPH_PASSWORD=puppygraph123
    ports:
      - "8081:8081"
      - "8182:8182"
      - "7687:7687"
    depends_on:
      - spark-iceberg
networks:
  iceberg_net:
    name: puppy-iceberg
The docker-compose file is based on Iceberg Spark quick start.
Then run the following command to start Iceberg services and PuppyGraph:
[+] Running 6/6
 ✔ Network puppy-iceberg    Created
 ✔ Container rustfs         Started
 ✔ Container rustfs-init    Exited
 ✔ Container iceberg-rest   Started
 ✔ Container spark-iceberg  Started
 ✔ Container puppygraph     Started
The rustfs-init service creates the bucket with a signed S3 request before the catalog starts. The bucket stays private; the clients use the credentials configured above.
The Spark commands below explicitly set the RustFS endpoint and path-style access to override the endpoint bundled in the Spark image.
Data Preparation
This tutorial is designed to be comprehensive and standalone, so it includes steps to populate data in Iceberg. In practical scenarios, PuppyGraph can query data directly from your existing Iceberg tables.
Run the following command to start a Spark-SQL shell to access Iceberg.
docker exec -it spark-iceberg spark-sql \
  --conf spark.sql.catalog.demo.s3.endpoint=http://rustfs:9000 \
  --conf spark.sql.catalog.demo.s3.path-style-access=true
The shell will be like this:
Then execute the following SQL statements in the shell to create tables and insert data:
CREATE DATABASE demo.modern;

CREATE EXTERNAL TABLE demo.modern.person (
  id string,
  name string,
  age int
) USING iceberg;

INSERT INTO demo.modern.person VALUES
  ('v1', 'marko', 29),
  ('v2', 'vadas', 27),
  ('v4', 'josh', 32),
  ('v6', 'peter', 35);

CREATE EXTERNAL TABLE demo.modern.software (
  id string,
  name string,
  lang string
) USING iceberg;

INSERT INTO demo.modern.software VALUES
  ('v3', 'lop', 'java'),
  ('v5', 'ripple', 'java');

CREATE EXTERNAL TABLE demo.modern.created (
  id string,
  from_id string,
  to_id string,
  weight double
) USING iceberg;

INSERT INTO demo.modern.created VALUES
  ('e9', 'v1', 'v3', 0.4),
  ('e10', 'v4', 'v5', 1.0),
  ('e11', 'v4', 'v3', 0.4),
  ('e12', 'v6', 'v3', 0.2);

CREATE EXTERNAL TABLE demo.modern.knows (
  id string,
  from_id string,
  to_id string,
  weight double
) USING iceberg;

INSERT INTO demo.modern.knows VALUES
  ('e7', 'v1', 'v2', 0.5),
  ('e8', 'v1', 'v4', 1.0);
The above SQL creates the following tables:
| id | name | age |
|---|---|---|
| v1 | marko | 29 |
| v2 | vadas | 27 |
| v4 | josh | 32 |
| v6 | peter | 35 |
| id | name | lang |
|---|---|---|
| v3 | lop | java |
| v5 | ripple | java |
| id | from_id | to_id | weight |
|---|---|---|---|
| e7 | v1 | v2 | 0.5 |
| e8 | v1 | v4 | 1.0 |
| id | from_id | to_id | weight |
|---|---|---|---|
| e9 | v1 | v3 | 0.4 |
| e10 | v4 | v5 | 1.0 |
| e11 | v4 | v3 | 0.4 |
| e12 | v6 | v3 | 0.2 |
Modeling a Graph
We then define a graph on top of the data tables we just created. Actually, this is the "Modern" graph defined by Apache Tinkerpop.
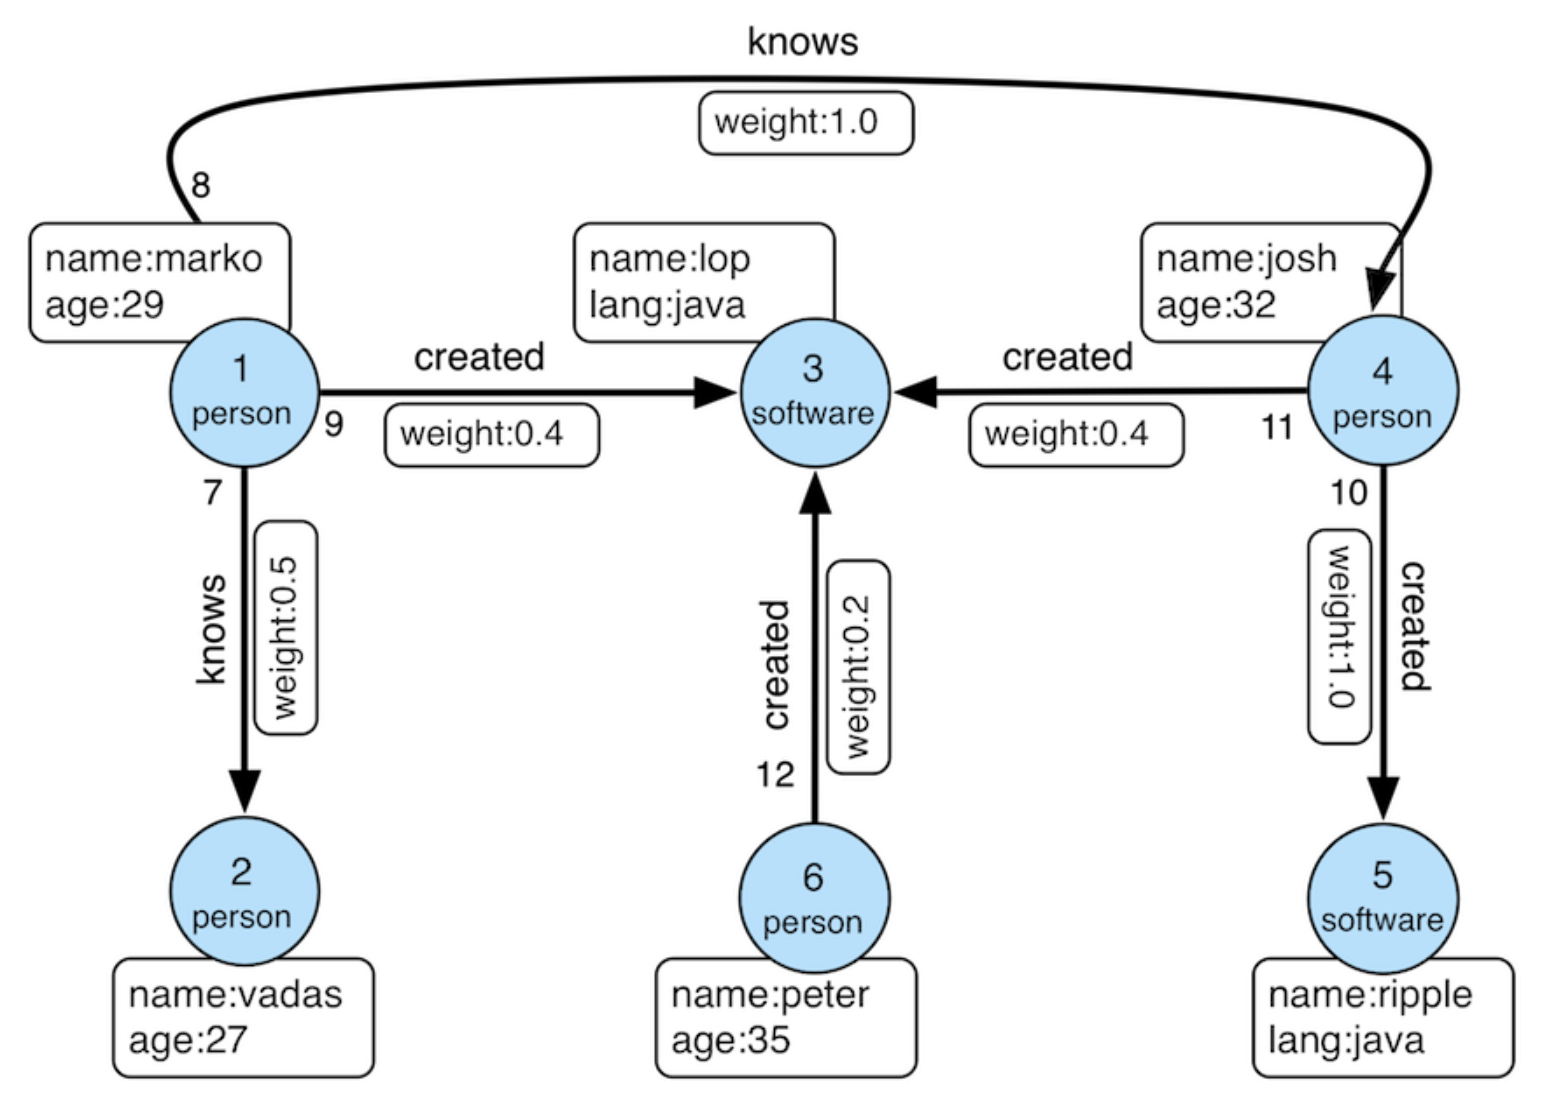
Modern Graph
A schema instructs PuppyGraph on mapping data from the Iceberg into a graph. PuppyGraph offers various methods for schema creation. For this tutorial, we've already prepared a schema to help save time.
Create a PuppyGraph schema file schema.json with the following content:
schema.json
{
  "catalogs": [
    {
      "name": "iceberg_test",
      "type": "iceberg",
      "metastore": {
        "type": "rest",
        "uri": "http://iceberg-rest:8181"
      },
      "storage": {
        "useInstanceProfile": "false",
        "accessKey": "admin",
        "secretKey": "password",
        "enableSsl": "false",
        "endpoint": "http://rustfs:9000",
        "enablePathStyleAccess": "true"
      }
    }
  ],
  "graph": {
    "vertices": [
      {
        "label": "person",
        "oneToOne": {
          "tableSource": {
            "catalog": "iceberg_test",
            "schema": "modern",
            "table": "person"
          },
          "id": {
            "fields": [
              {
                "type": "String",
                "field": "id",
                "alias": "id"
              }
            ]
          },
          "attributes": [
            {
              "type": "Int",
              "field": "age",
              "alias": "age"
            },
            {
              "type": "String",
              "field": "name",
              "alias": "name"
            }
          ]
        }
      },
      {
        "label": "software",
        "oneToOne": {
          "tableSource": {
            "catalog": "iceberg_test",
            "schema": "modern",
            "table": "software"
          },
          "id": {
            "fields": [
              {
                "type": "String",
                "field": "id",
                "alias": "id"
              }
            ]
          },
          "attributes": [
            {
              "type": "String",
              "field": "lang",
              "alias": "lang"
            },
            {
              "type": "String",
              "field": "name",
              "alias": "name"
            }
          ]
        }
      }
    ],
    "edges": [
      {
        "label": "knows",
        "fromVertex": "person",
        "toVertex": "person",
        "tableSource": {
          "catalog": "iceberg_test",
          "schema": "modern",
          "table": "knows"
        },
        "id": {
          "fields": [
            {
              "type": "String",
              "field": "id",
              "alias": "id"
            }
          ]
        },
        "fromId": {
          "fields": [
            {
              "type": "String",
              "field": "from_id",
              "alias": "from_id"
            }
          ]
        },
        "toId": {
          "fields": [
            {
              "type": "String",
              "field": "to_id",
              "alias": "to_id"
            }
          ]
        },
        "attributes": [
          {
            "type": "Double",
            "field": "weight",
            "alias": "weight"
          }
        ]
      },
      {
        "label": "created",
        "fromVertex": "person",
        "toVertex": "software",
        "tableSource": {
          "catalog": "iceberg_test",
          "schema": "modern",
          "table": "created"
        },
        "id": {
          "fields": [
            {
              "type": "String",
              "field": "id",
              "alias": "id"
            }
          ]
        },
        "fromId": {
          "fields": [
            {
              "type": "String",
              "field": "from_id",
              "alias": "from_id"
            }
          ]
        },
        "toId": {
          "fields": [
            {
              "type": "String",
              "field": "to_id",
              "alias": "to_id"
            }
          ]
        },
        "attributes": [
          {
            "type": "Double",
            "field": "weight",
            "alias": "weight"
          }
        ]
      }
    ]
  }
}
Log into PuppyGraph Web UI at http://localhost:8081 with username puppygraph and password puppygraph123.
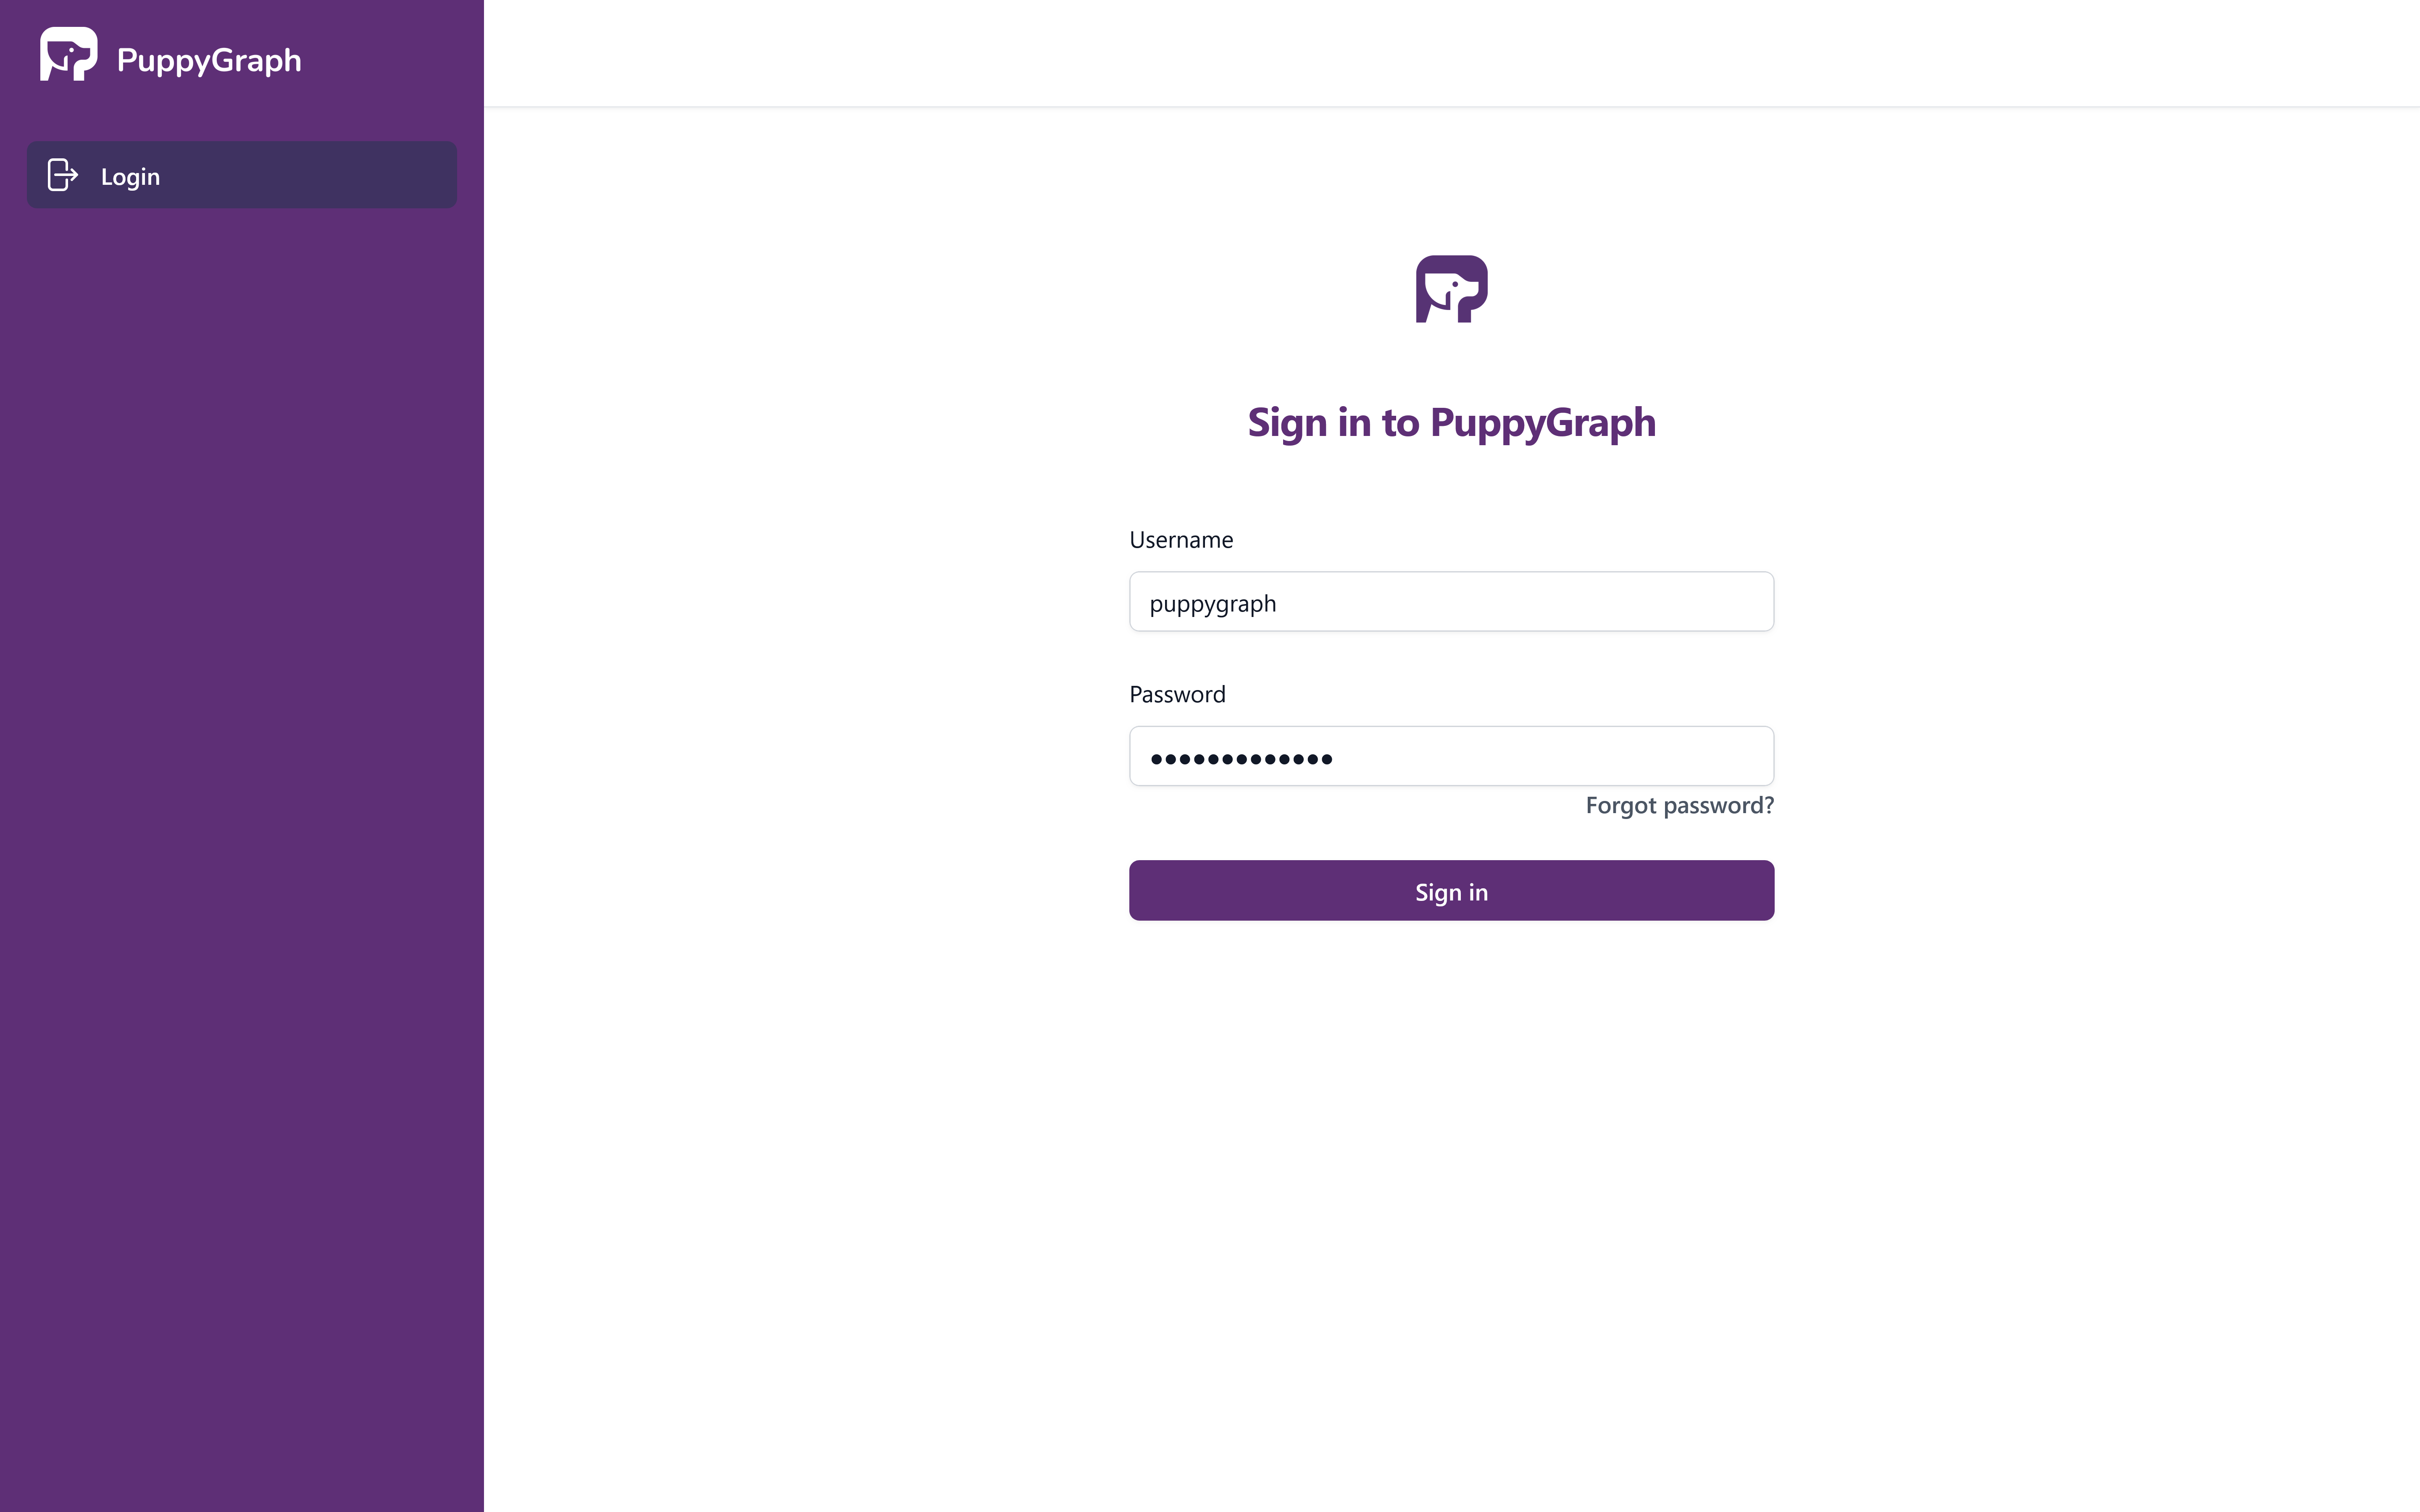
PuppyGraph Login
Upload the schema by selecting the file schema.json in the Upload Graph Schema JSON block and clicking on Upload.
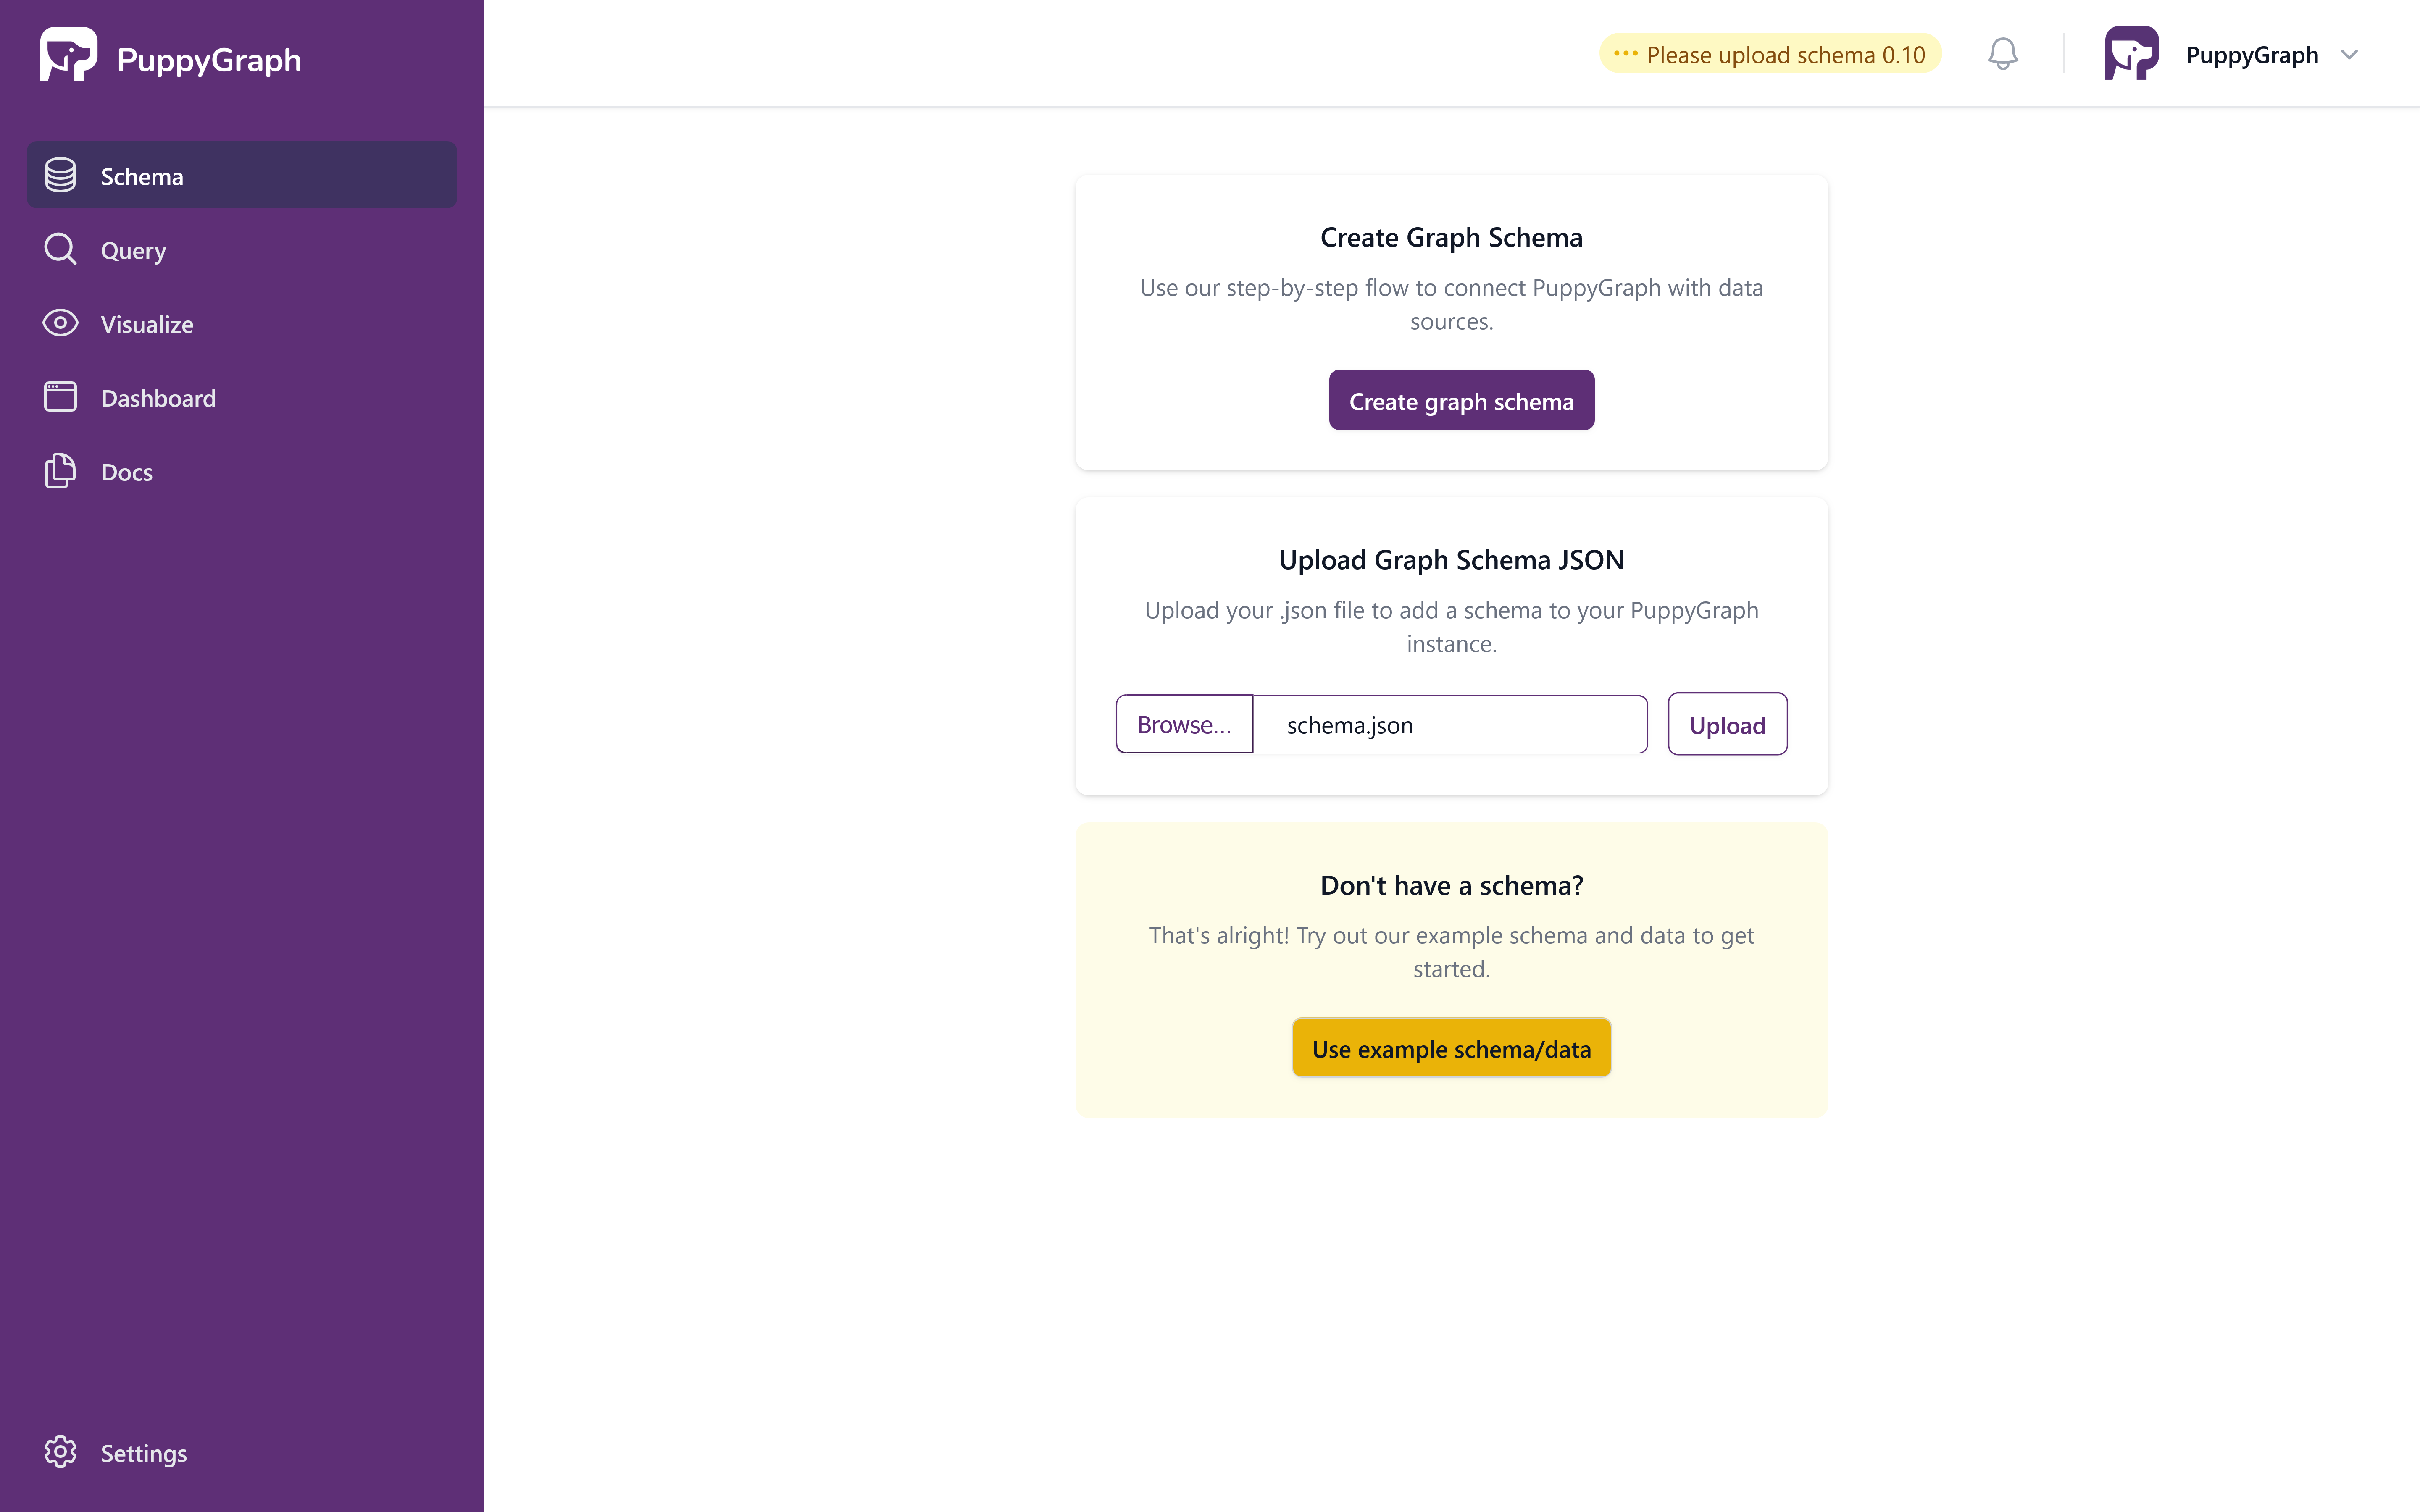
Upload Schema Page
Once the schema is uploaded, the schema page shows the visualized graph schema as follows.
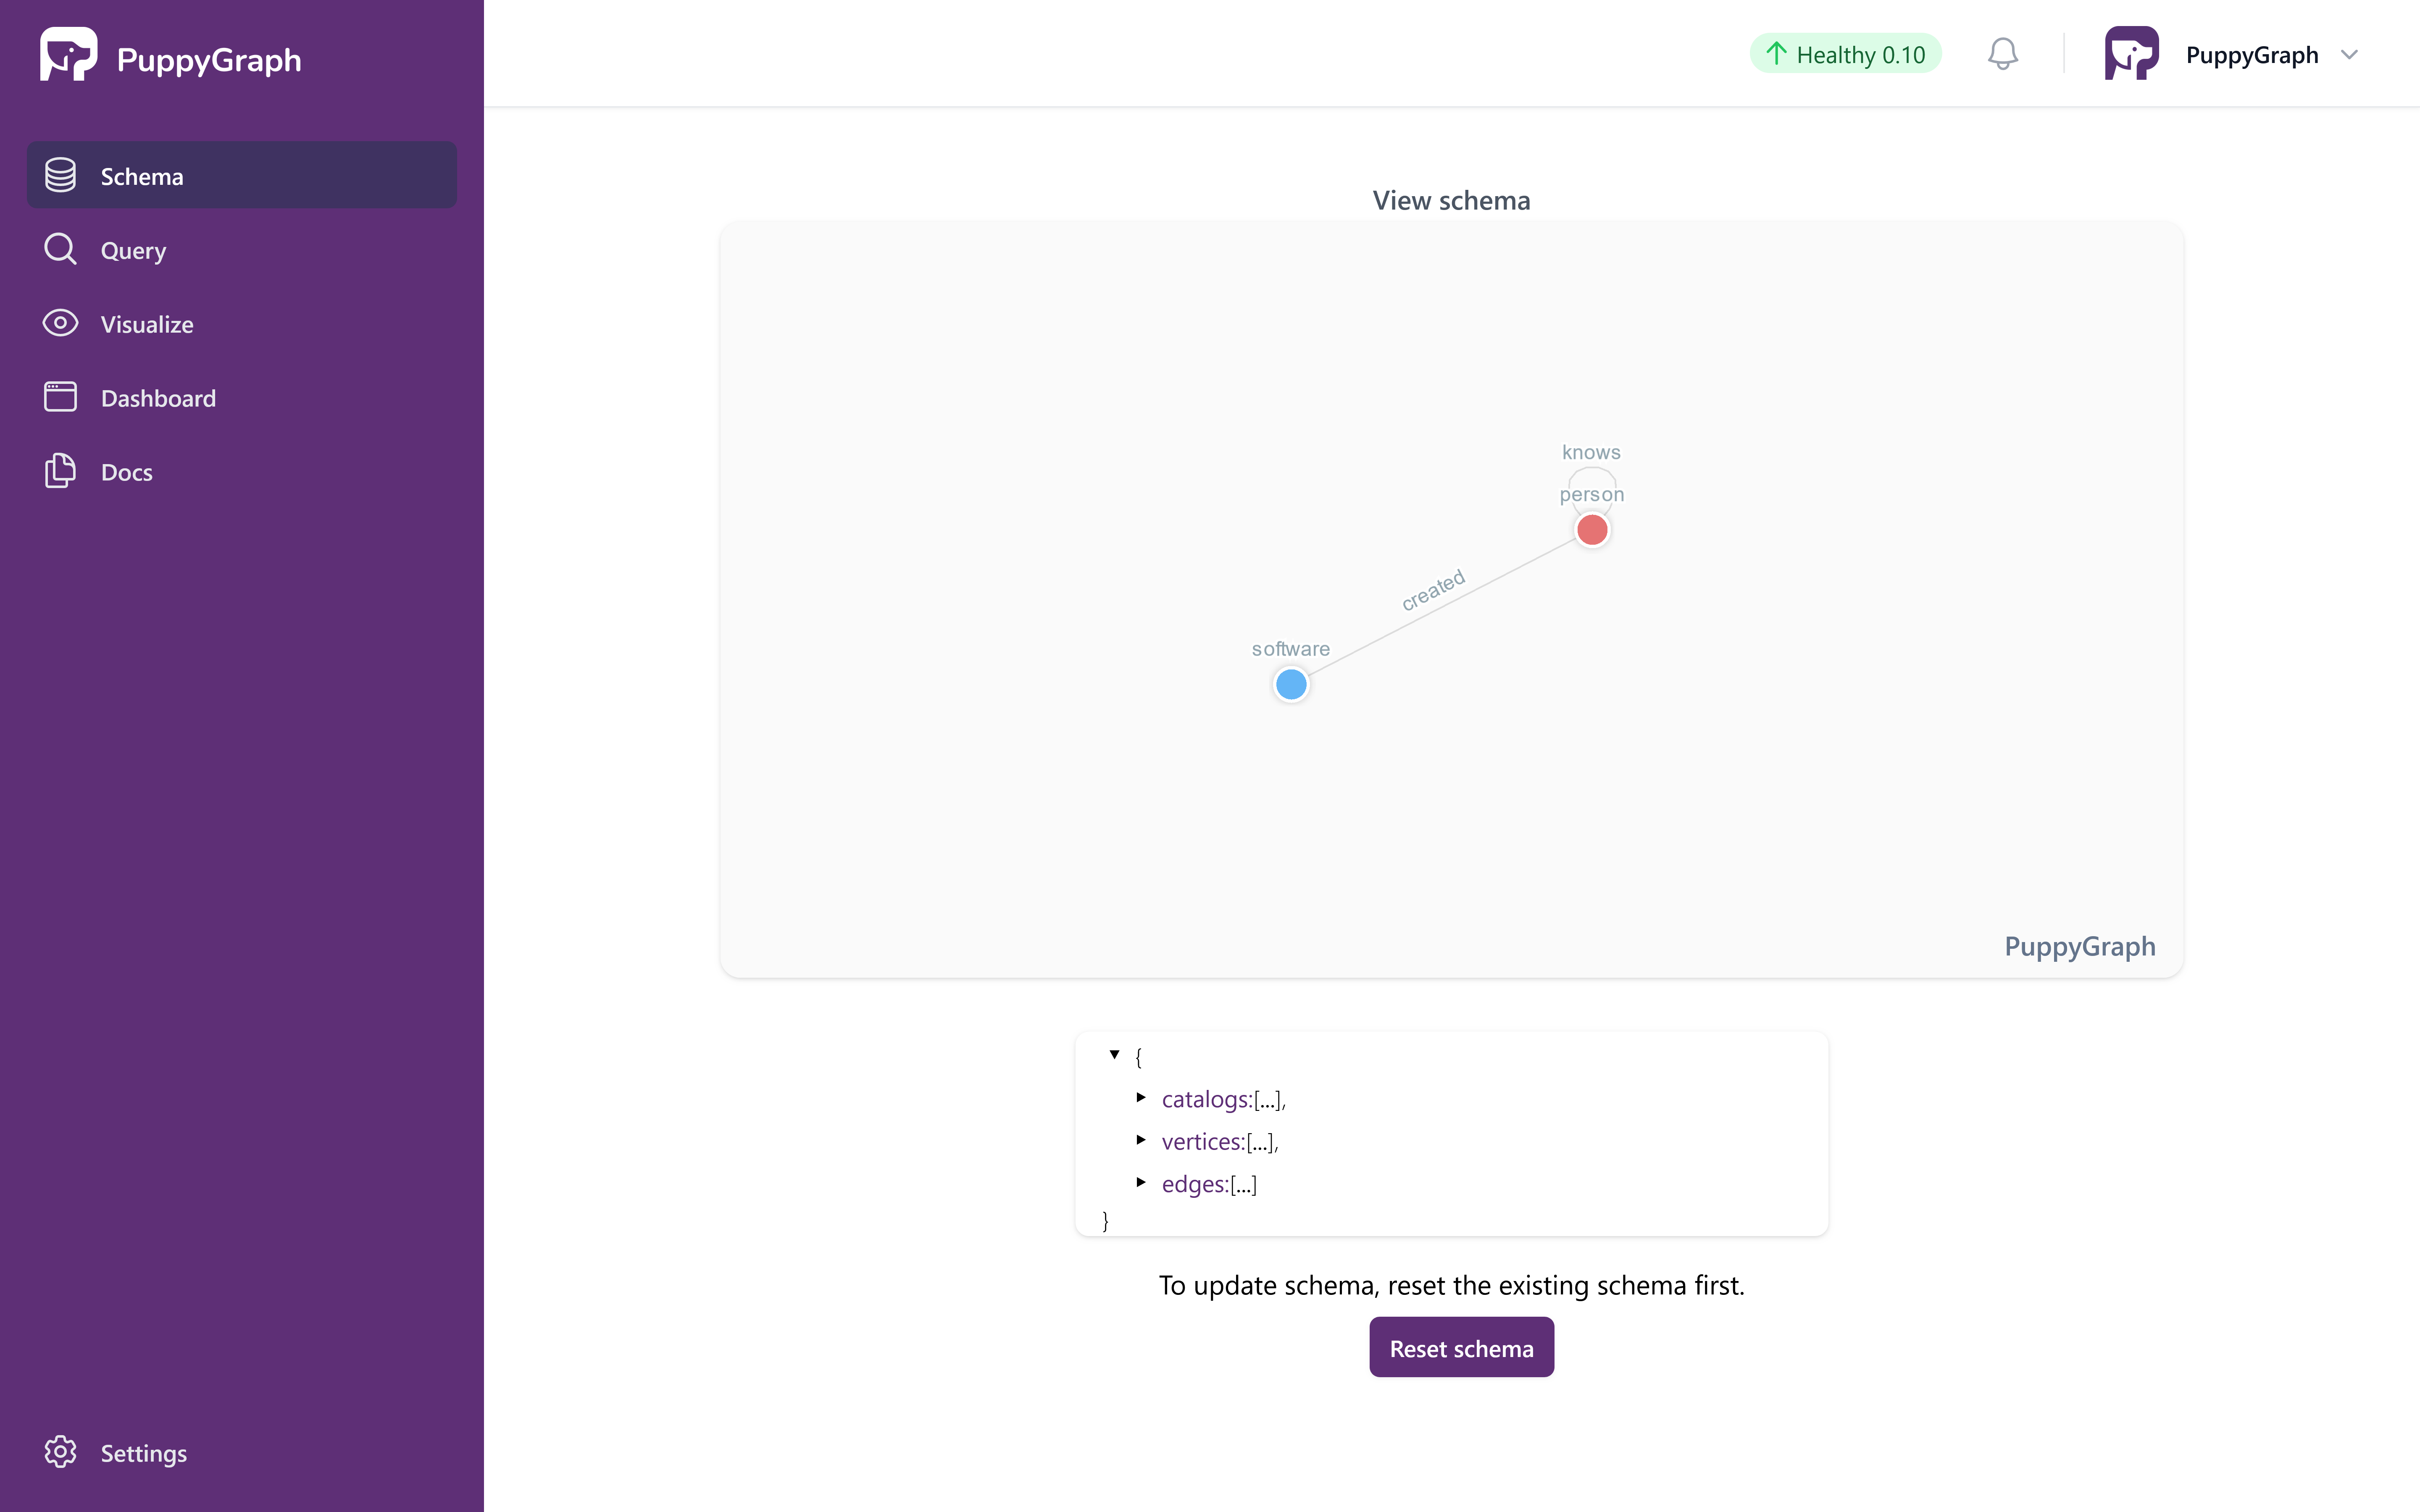
Visualized Schema
Alternative: Schema Uploading via CLI
Alternatively, run the following command to upload the schema file:
curl -XPOST -H "content-type: application/json" --data-binary @./schema.json --user "puppygraph:puppygraph123" localhost:8081/schema
The response shows that graph schema has been uploaded successfully:
Querying the Graph
In this tutorial we will use the Gremlin query language to query the Graph. Gremlin is a graph query language developed by Apache TinkerPop. Prior knowledge of Gremlin is not necessary to follow the tutorial. To learn more about it, visit https://tinkerpop.apache.org/gremlin.html.
Click on the Query panel the left side. The Gremlin Query tab offers an interactive environment for querying the graph using Gremlin.
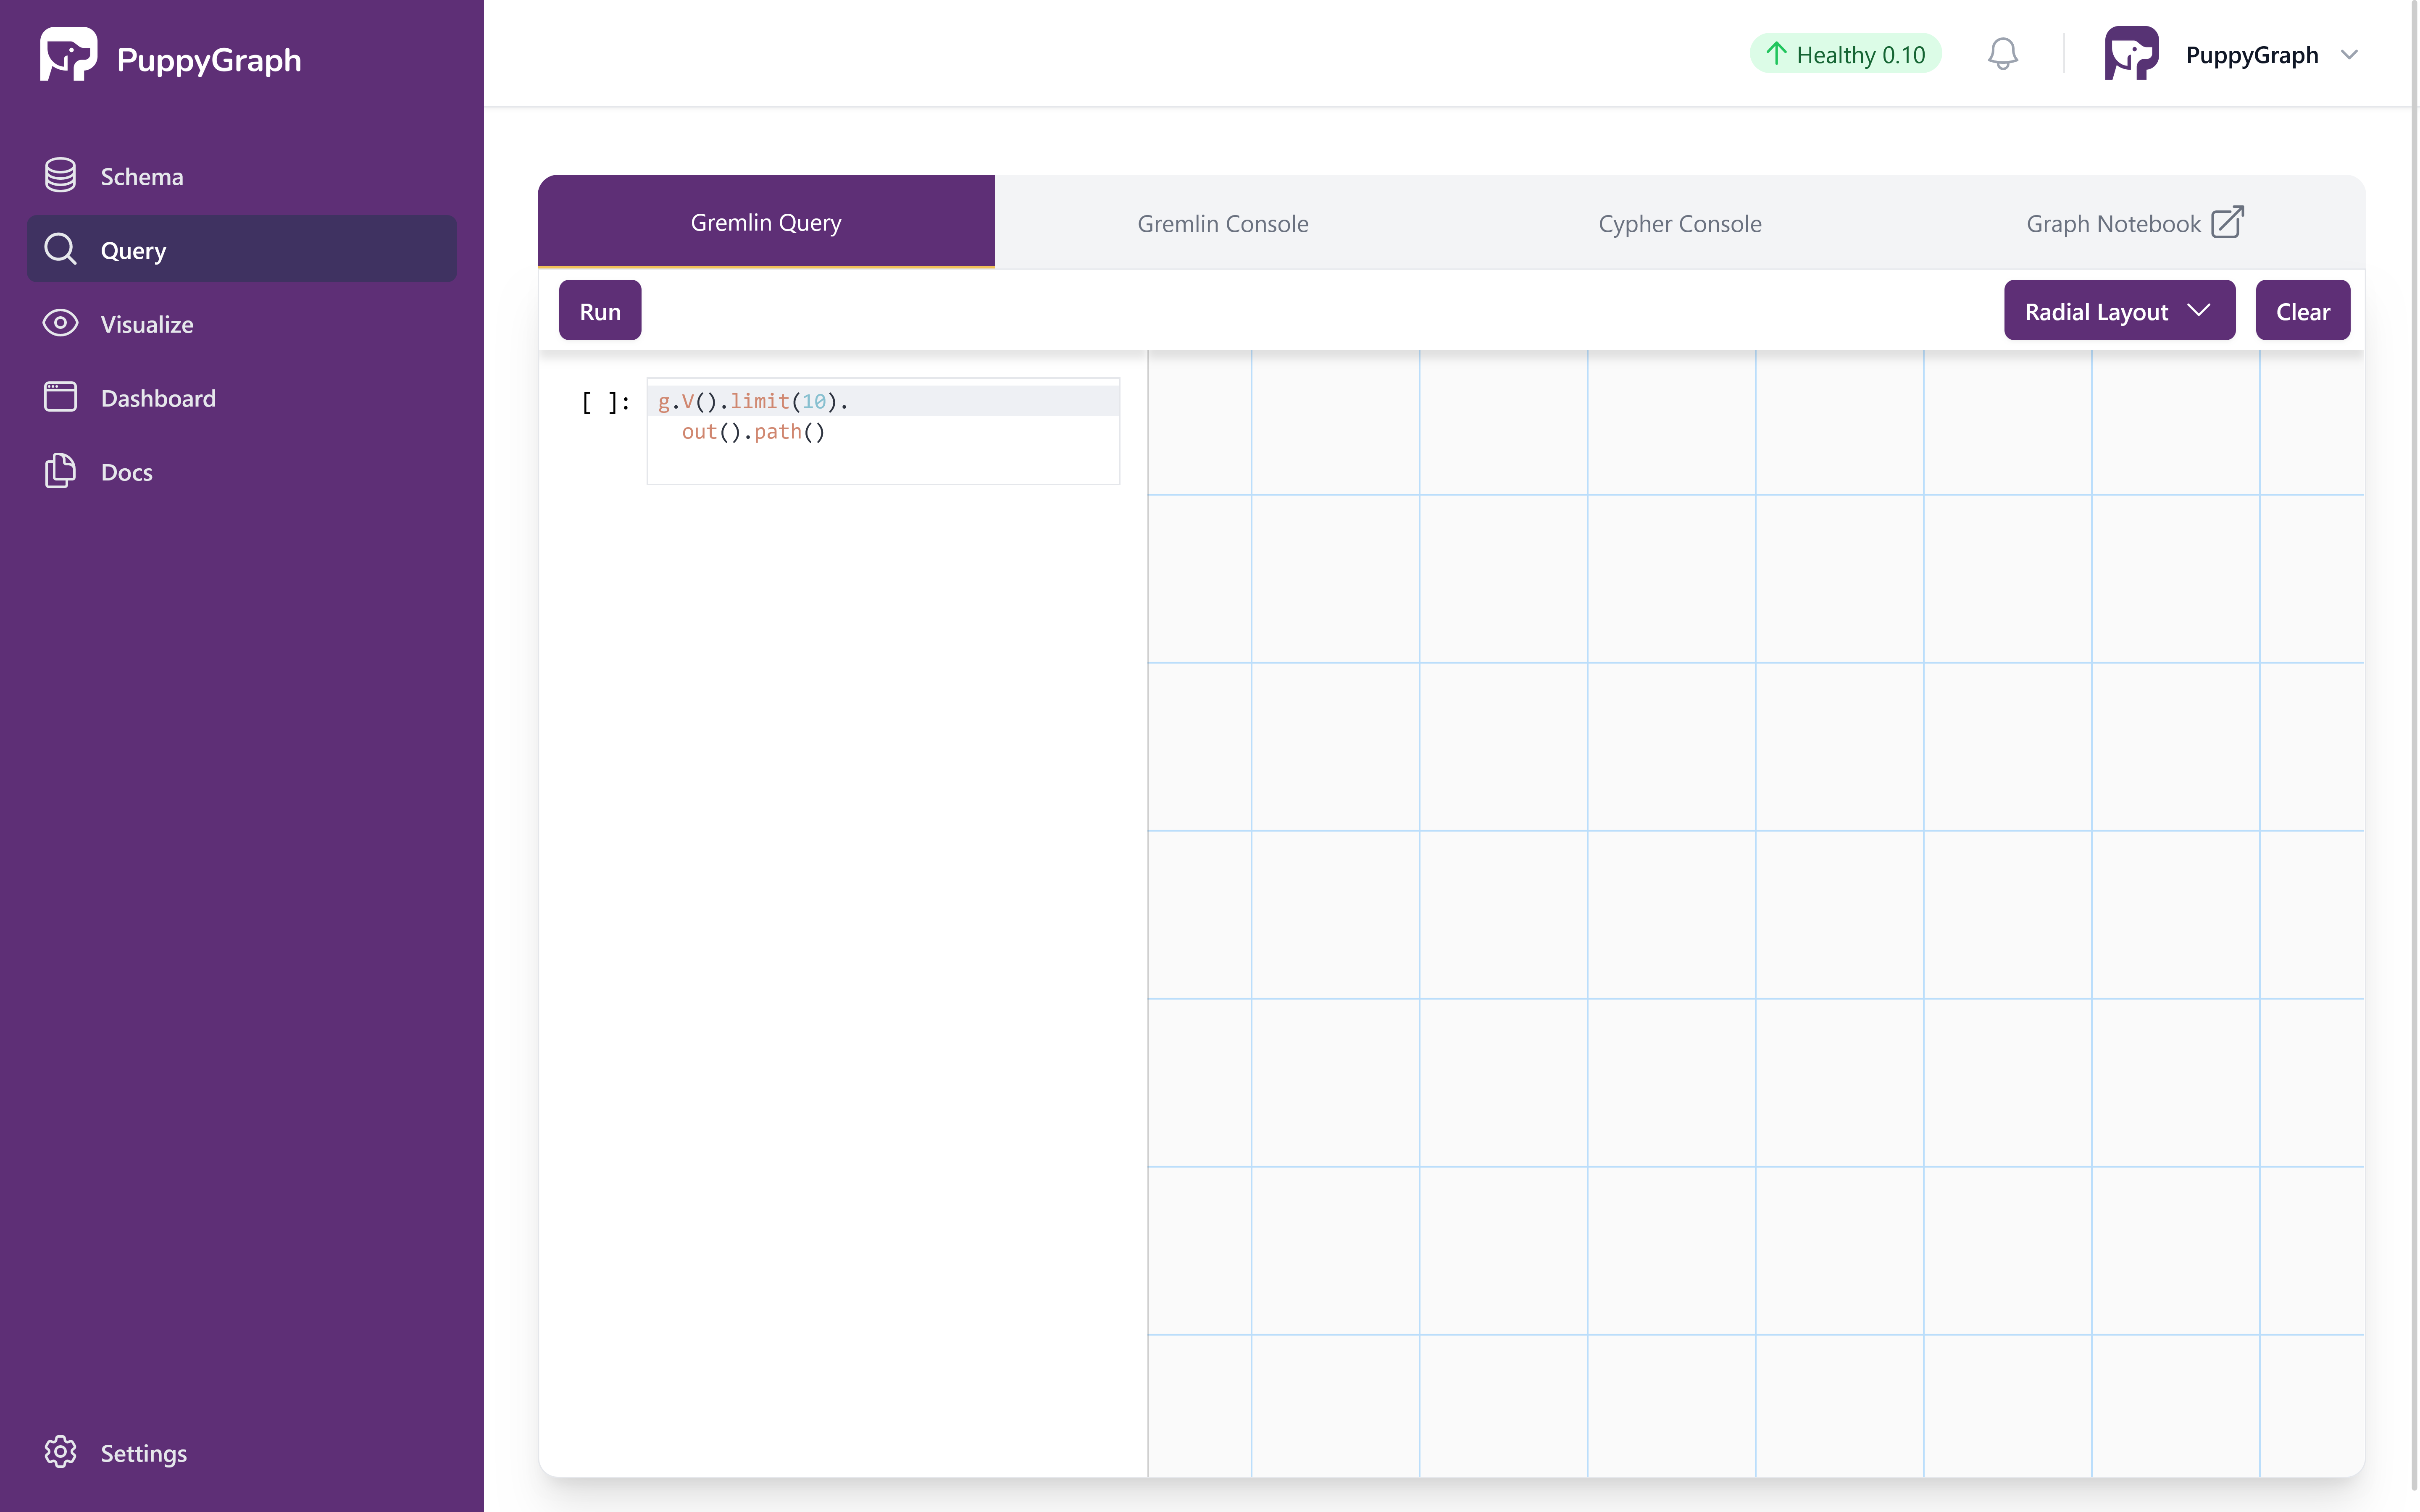
Interactive Gremlin Query Page
Queries are entered on the left side, and the right side displays the graph visualization.
The first query retrieves the property of the person named "marko".
Copy the following query, paste it in the query input, and click on the run button.
The output is plain text like the following:
Now let's also leverage the visualization. The next query gets all the software created by people known to "marko".
Copy the following query, paste it in the query input, and click on the run button.
The output is as follows. There are two paths in the result as "marko" knows "josh" who created "lop" and "ripple".
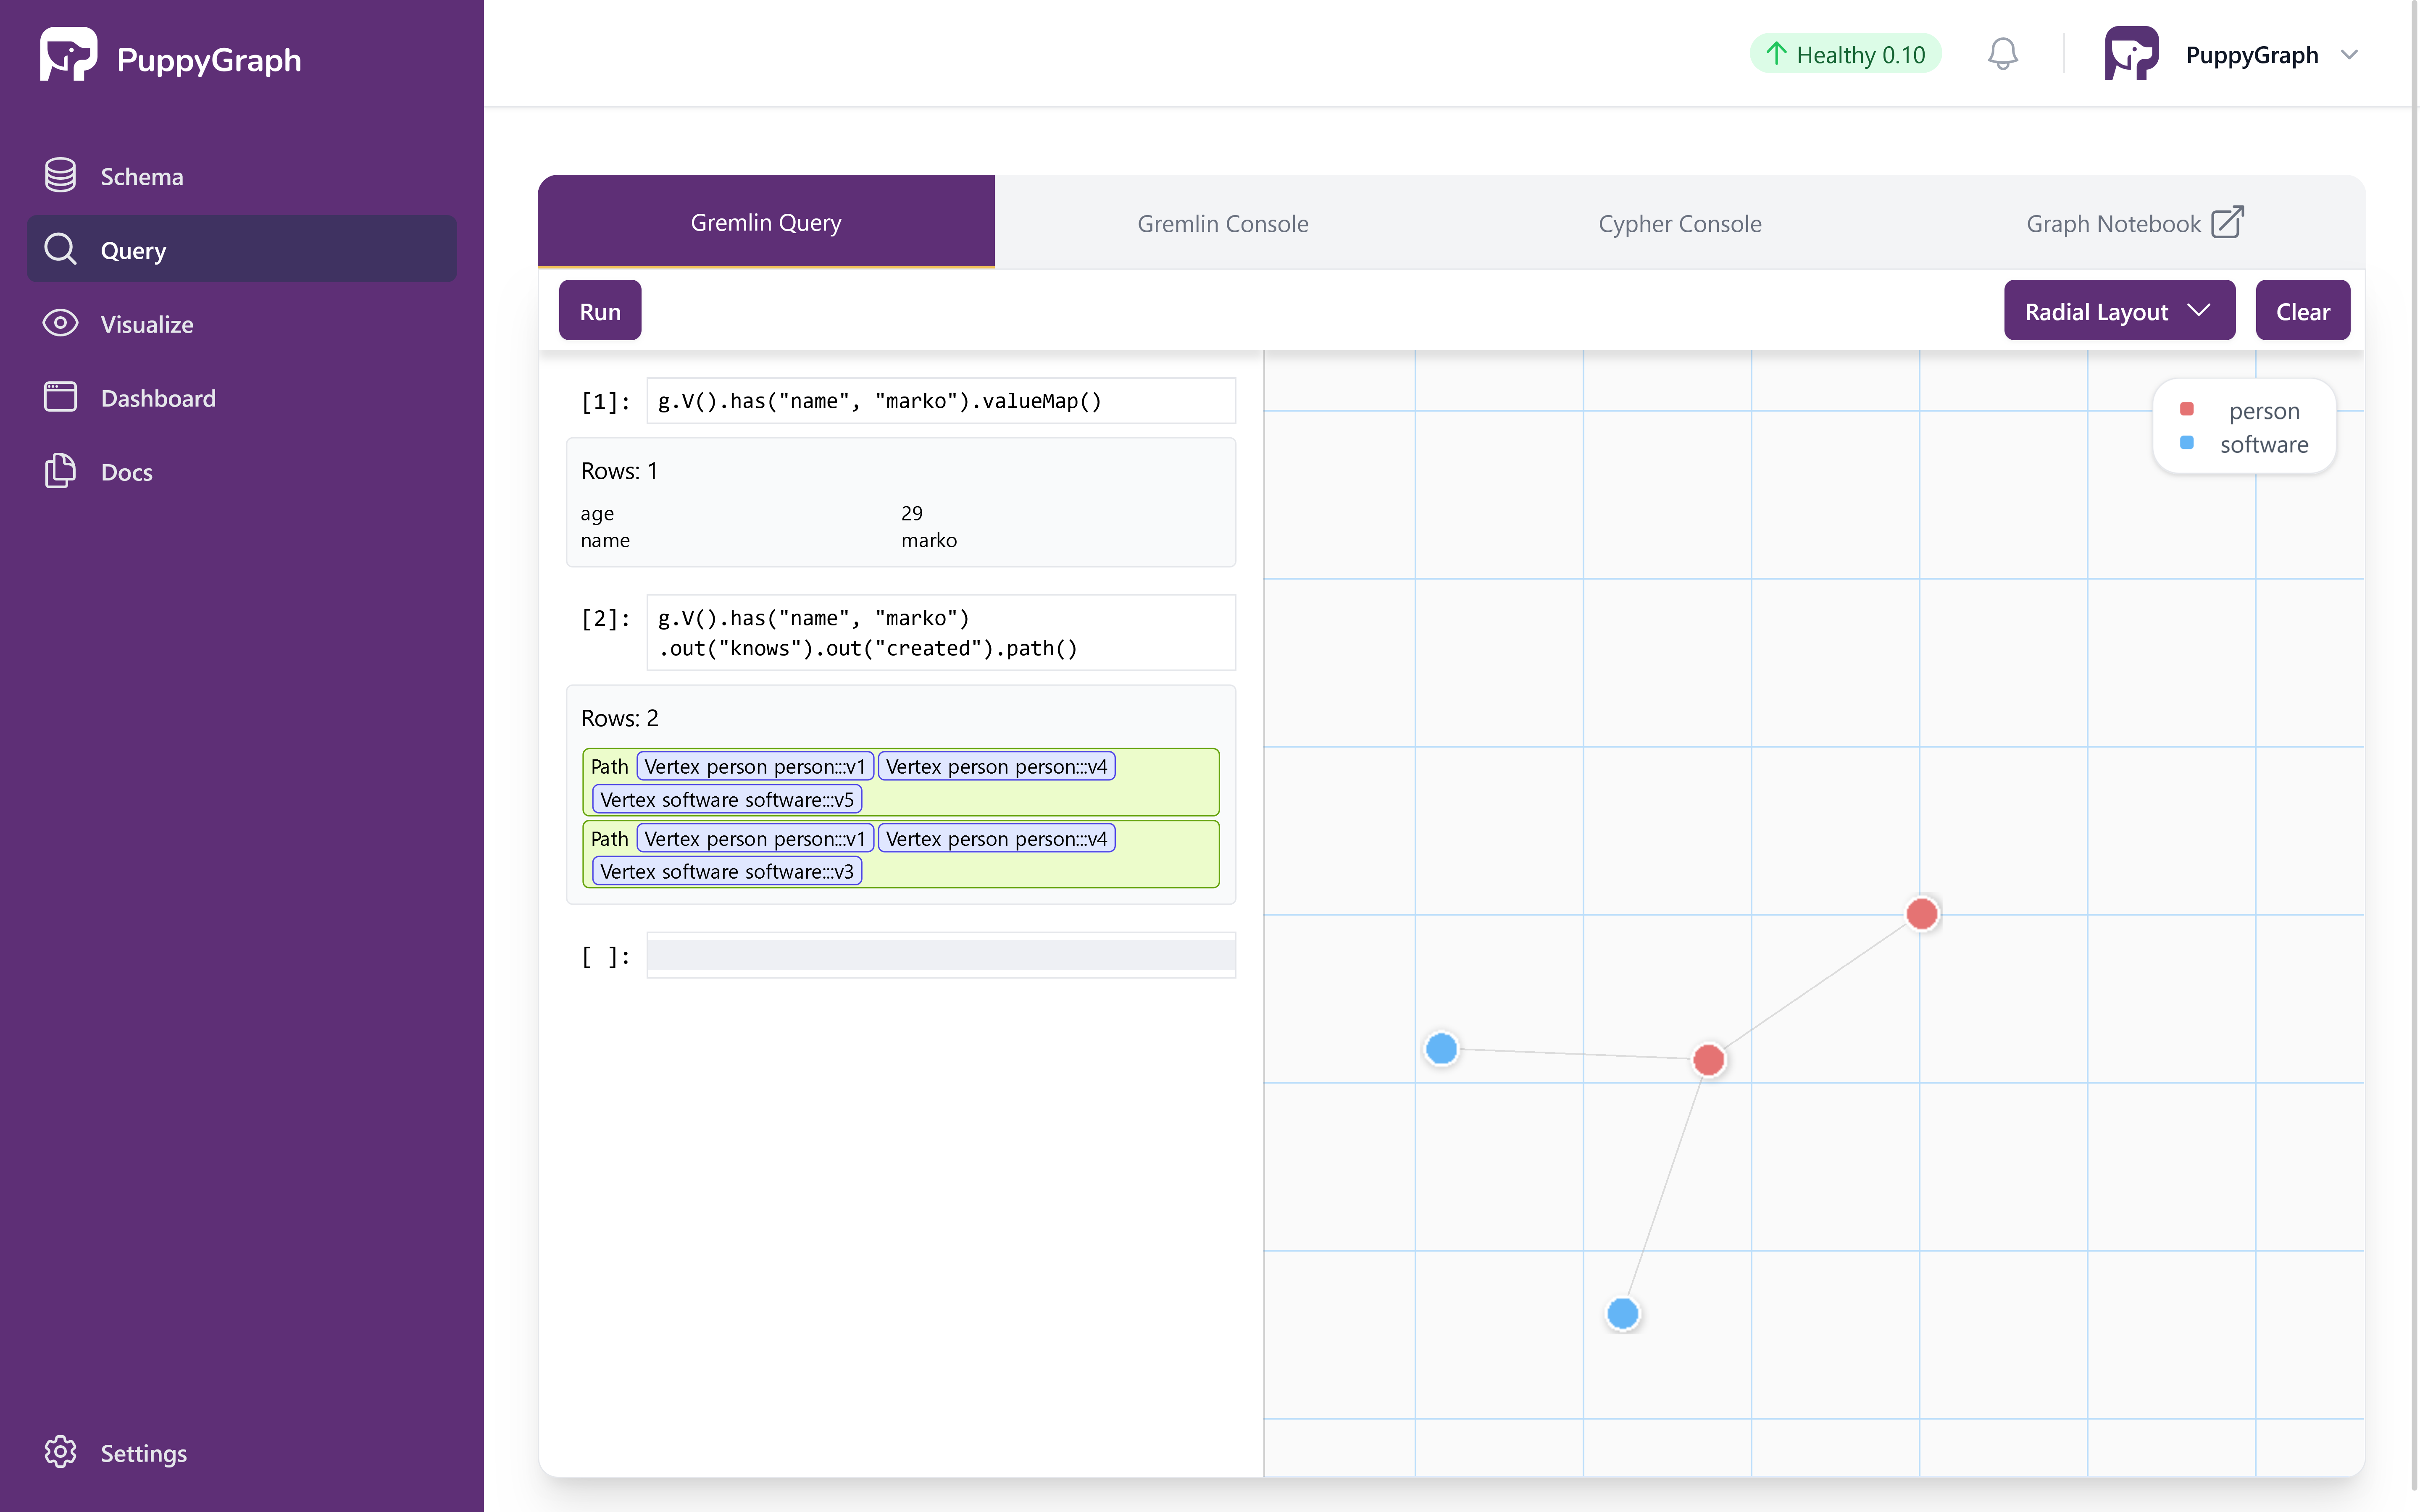
Interactive Query with Results
Alternative: Querying the graph via CLI
Alternatively, we can query the graph via CLI.
Execute the following command to access the PuppyGraph Gremlin Console
The welcome screen appears as follows:
  ____                                     ____                          _
 |  _ \   _   _   _ __    _ __    _   _   / ___|  _ __    __ _   _ __   | |__
 | |_) | | | | | | '_ \  | '_ \  | | | | | |  _  | '__|  / _` | | '_ \  | '_ \
 |  __/  | |_| | | |_) | | |_) | | |_| | | |_| | | |    | (_| | | |_) | | | | |
 |_|      \__,_| | .__/  | .__/   \__, |  \____| |_|     \__,_| | .__/  |_| |_|
                 |_|     |_|      |___/                         |_|
Welcome to PuppyGraph!
version: 0.10

puppy-gremlin>
Run the following queries in the console to query the Graph.
Properties of the person named "marko":
To exit PuppyGraph Gremlin Console, enter the command:
Cleaning up
Run the following command to shut down and remove the services:
See Also
Please refer to Connecting to Apache Iceberg for connecting to different implementations of Iceberg.