Querying Databricks Delta Lake Data as a Graph
Summary
In this tutorial, you will:
- Create Delta tables under your Databricks workspace's Unity Catalog and load them with example data.
- Start a PuppyGraph container and connect it to the Databricks workspace.
- Run Cypher and Gremlin queries against the Delta Lake data as a graph.
Requires a real Databricks workspace
This tutorial points at a Databricks workspace you already have access to (Databricks on AWS, Azure, or GCP all work the same way for the parts that matter here). PuppyGraph reads Delta tables through Databricks Unity Catalog, so the schema shape mirrors the Unity Catalog tutorial; only the metastore host and authentication differ.
Prerequisites
dockeris available on the host where you'll run PuppyGraph.- A Databricks workspace with a Unity Catalog and a SQL Warehouse (Serverless or Classic).
- Either a Personal Access Token (PAT) or an OAuth M2M service principal for authentication.
- Credential vending must be configured in your Databricks workspace before PuppyGraph can read Delta tables. Follow Configure Databricks to support credential vending to complete this one-time setup.
External storage location required
PuppyGraph reads Delta Lake data through Databricks credential vending, which requires the Unity Catalog to be backed by an external storage location (for example, an S3 bucket or Azure Data Lake Gen2 container that you manage). Databricks blocks credential vending for tables stored in the default managed storage, so PuppyGraph will not be able to read those tables. Make sure your catalog is configured with an external storage location before proceeding.
Setup
Data Preparation
 In your Databricks workspace, open the SQL Editor, pick the target Unity Catalog, then paste the following SQL into the editor. (Replace
 <catalog> with the Databricks catalog you want to load the tables into; the modern schema is created under it.)
modern.sql
CREATE SCHEMA IF NOT EXISTS modern;

CREATE TABLE modern.software (
  id   string,
  name string,
  lang string
) USING DELTA;
INSERT INTO modern.software VALUES
  ('v3', 'lop',    'java'),
  ('v5', 'ripple', 'java');

CREATE TABLE modern.person (
  id   string,
  name string,
  age  int
) USING DELTA;
INSERT INTO modern.person VALUES
  ('v1', 'marko', 29),
  ('v2', 'vadas', 27),
  ('v4', 'josh',  32),
  ('v6', 'peter', 35);

CREATE TABLE modern.created (
  id      string,
  from_id string,
  to_id   string,
  weight  double
) USING DELTA;
INSERT INTO modern.created VALUES
  ('e9',  'v1', 'v3', 0.4),
  ('e10', 'v4', 'v5', 1.0),
  ('e11', 'v4', 'v3', 0.4),
  ('e12', 'v6', 'v3', 0.2);

CREATE TABLE modern.knows (
  id      string,
  from_id string,
  to_id   string,
  weight  double
) USING DELTA;
INSERT INTO modern.knows VALUES
  ('e7', 'v1', 'v2', 0.5),
  ('e8', 'v1', 'v4', 1.0);
| id | name | age |
|---|---|---|
| v1 | marko | 29 |
| v2 | vadas | 27 |
| v4 | josh | 32 |
| v6 | peter | 35 |
| id | name | lang |
|---|---|---|
| v3 | lop | java |
| v5 | ripple | java |
| id | from_id | to_id | weight |
|---|---|---|---|
| e9 | v1 | v3 | 0.4 |
| e10 | v4 | v5 | 1.0 |
| e11 | v4 | v3 | 0.4 |
| e12 | v6 | v3 | 0.2 |
| id | from_id | to_id | weight |
|---|---|---|---|
| e7 | v1 | v2 | 0.5 |
| e8 | v1 | v4 | 1.0 |
Databricks authentication
PuppyGraph supports two authentication modes against Databricks:
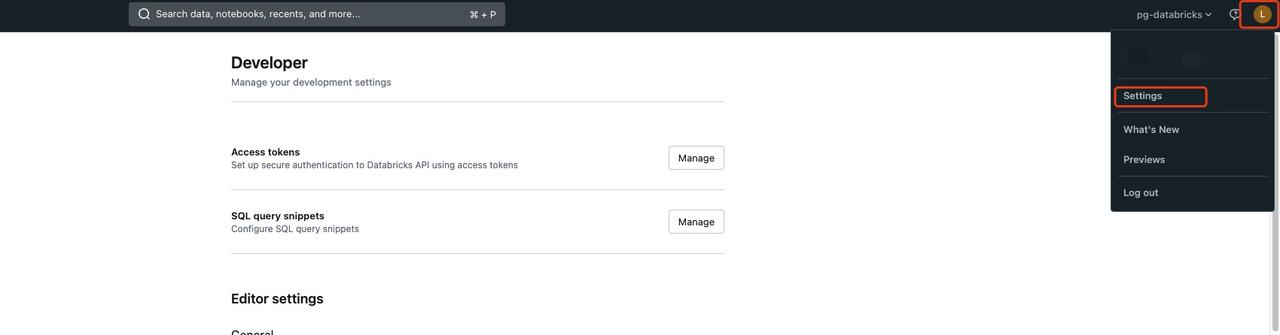
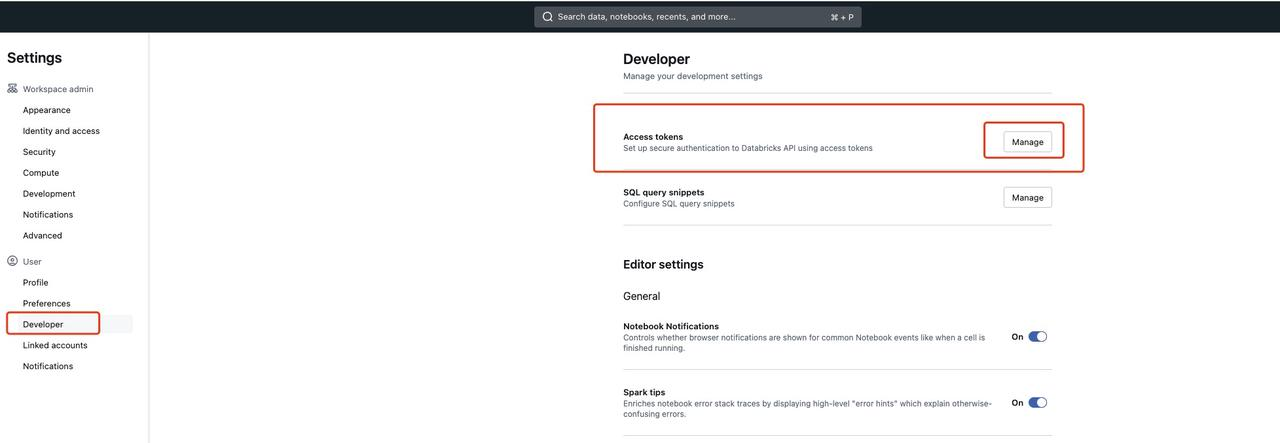
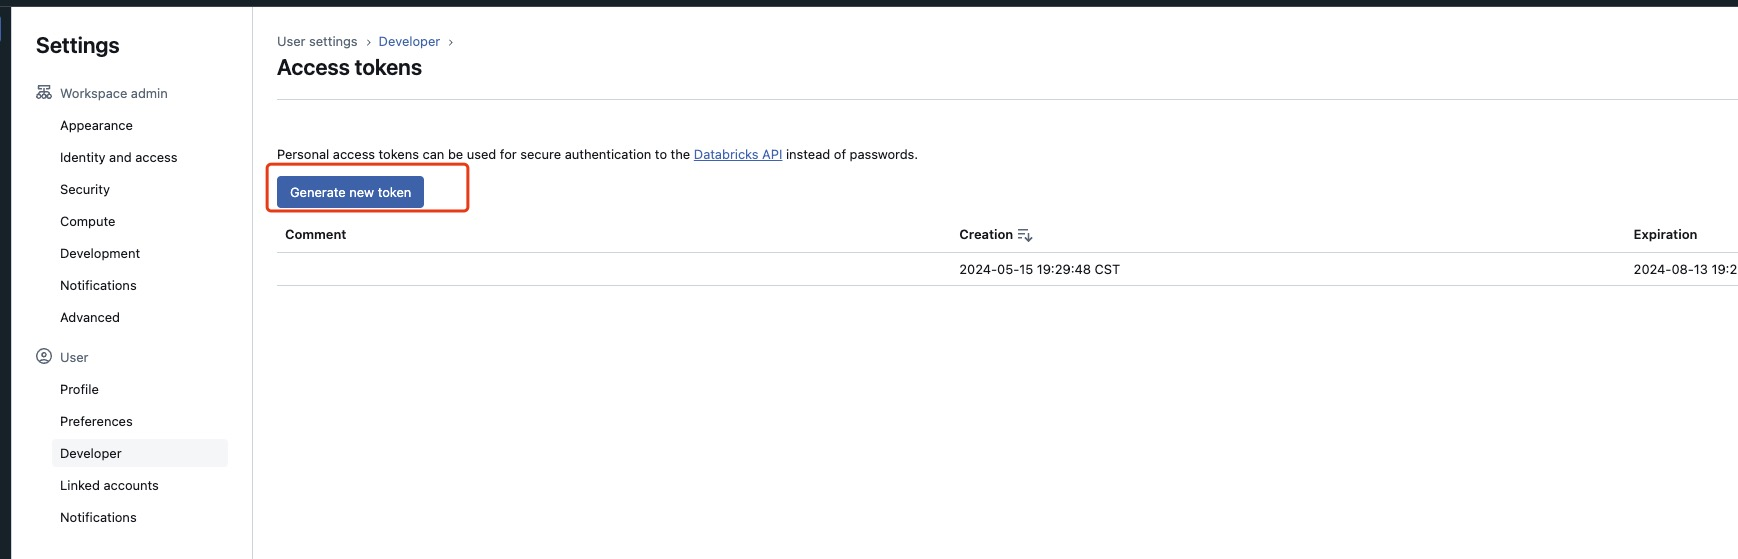
- Personal Access Token (PAT): Open Databricks workspace Settings > Developer > Access tokens, click Generate new token, save the value.
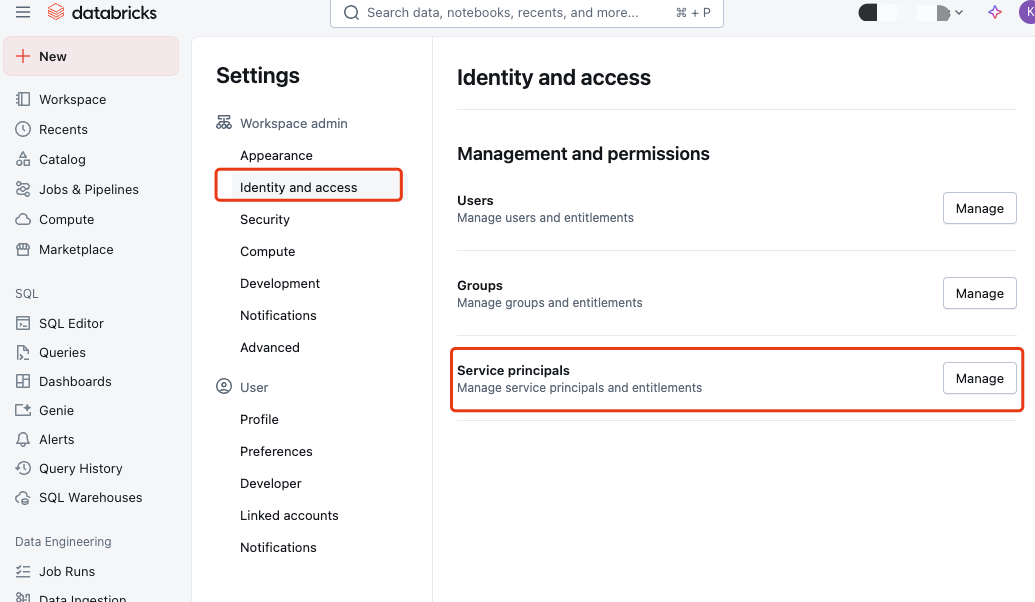
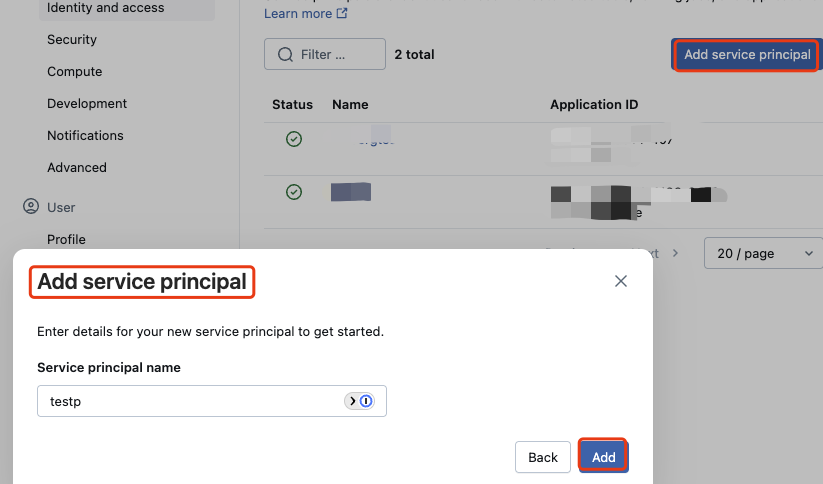
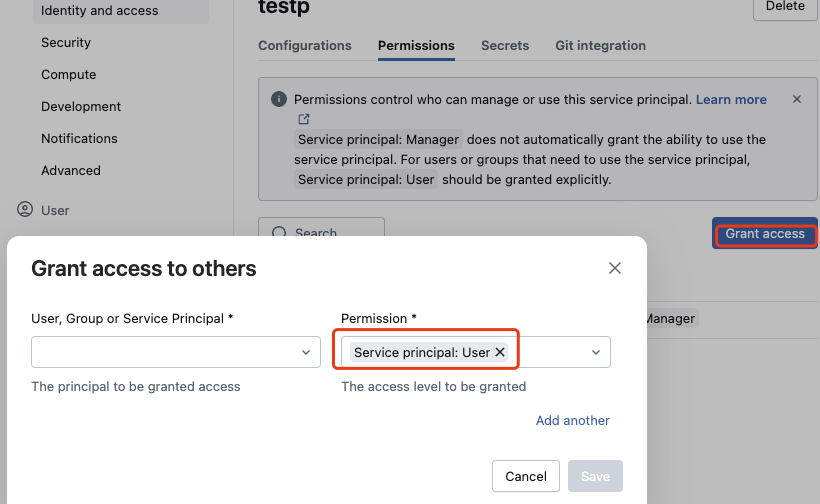
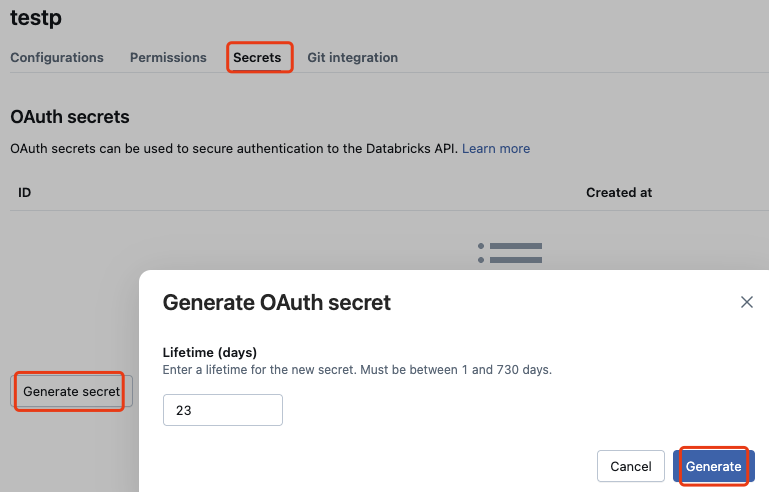
- OAuth M2M (service principal): Create a service principal in Workspace settings > Identity and access > Service principals, generate OAuth credentials, save the client ID and secret.
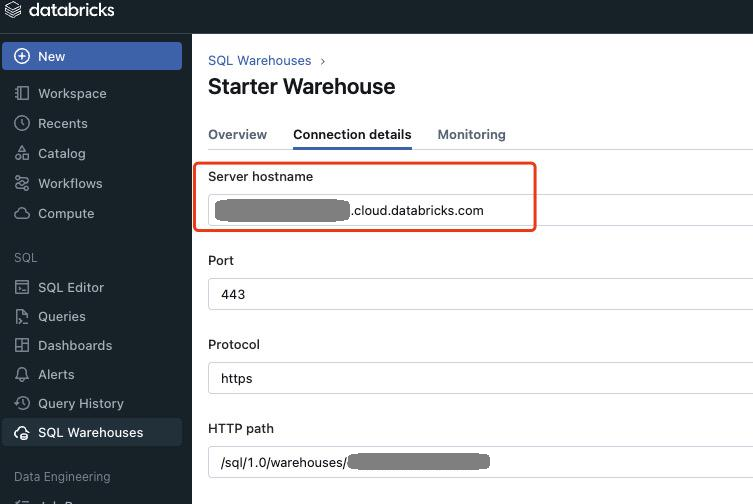
Also note your workspace's Server Hostname from the SQL Warehouse's Connection details tab.
For PAT authentication, open workspace Settings, then Developer > Access tokens.
For OAuth M2M authentication, open Identity and access > Service principals, then create or select a service principal.
Start PuppyGraph
Start the PuppyGraph container:
docker run -d --name puppygraph \
  -p 8081:8081 -p 8182:8182 -p 7687:7687 \
  -e PUPPYGRAPH_USERNAME=puppygraph \
  -e PUPPYGRAPH_PASSWORD=puppygraph123 \
  --pull=always puppygraph/puppygraph:latest
Default password
Change PUPPYGRAPH_PASSWORD before running on a publicly accessible machine.
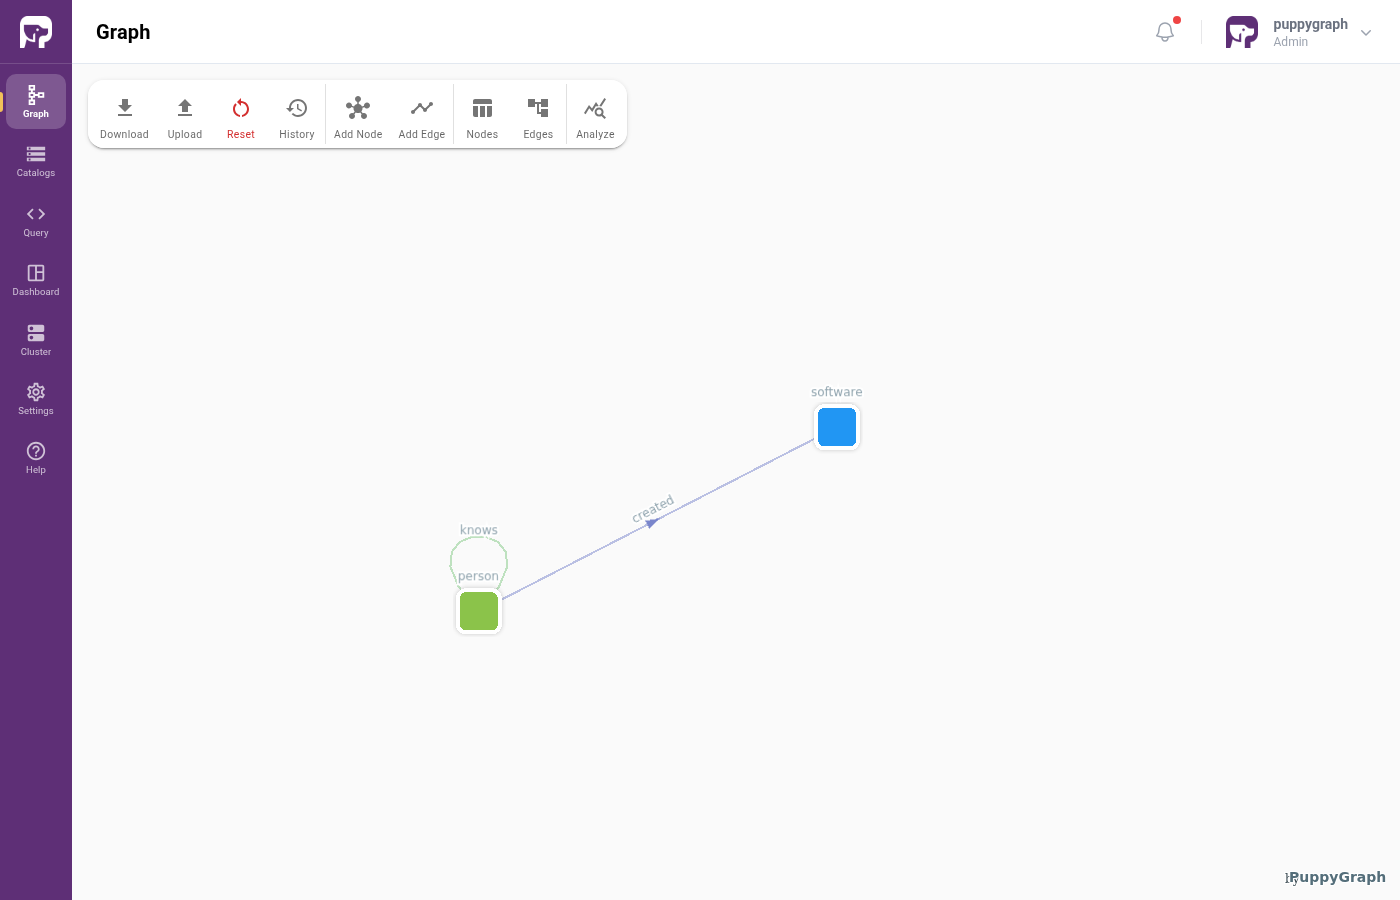
Modeling a Graph
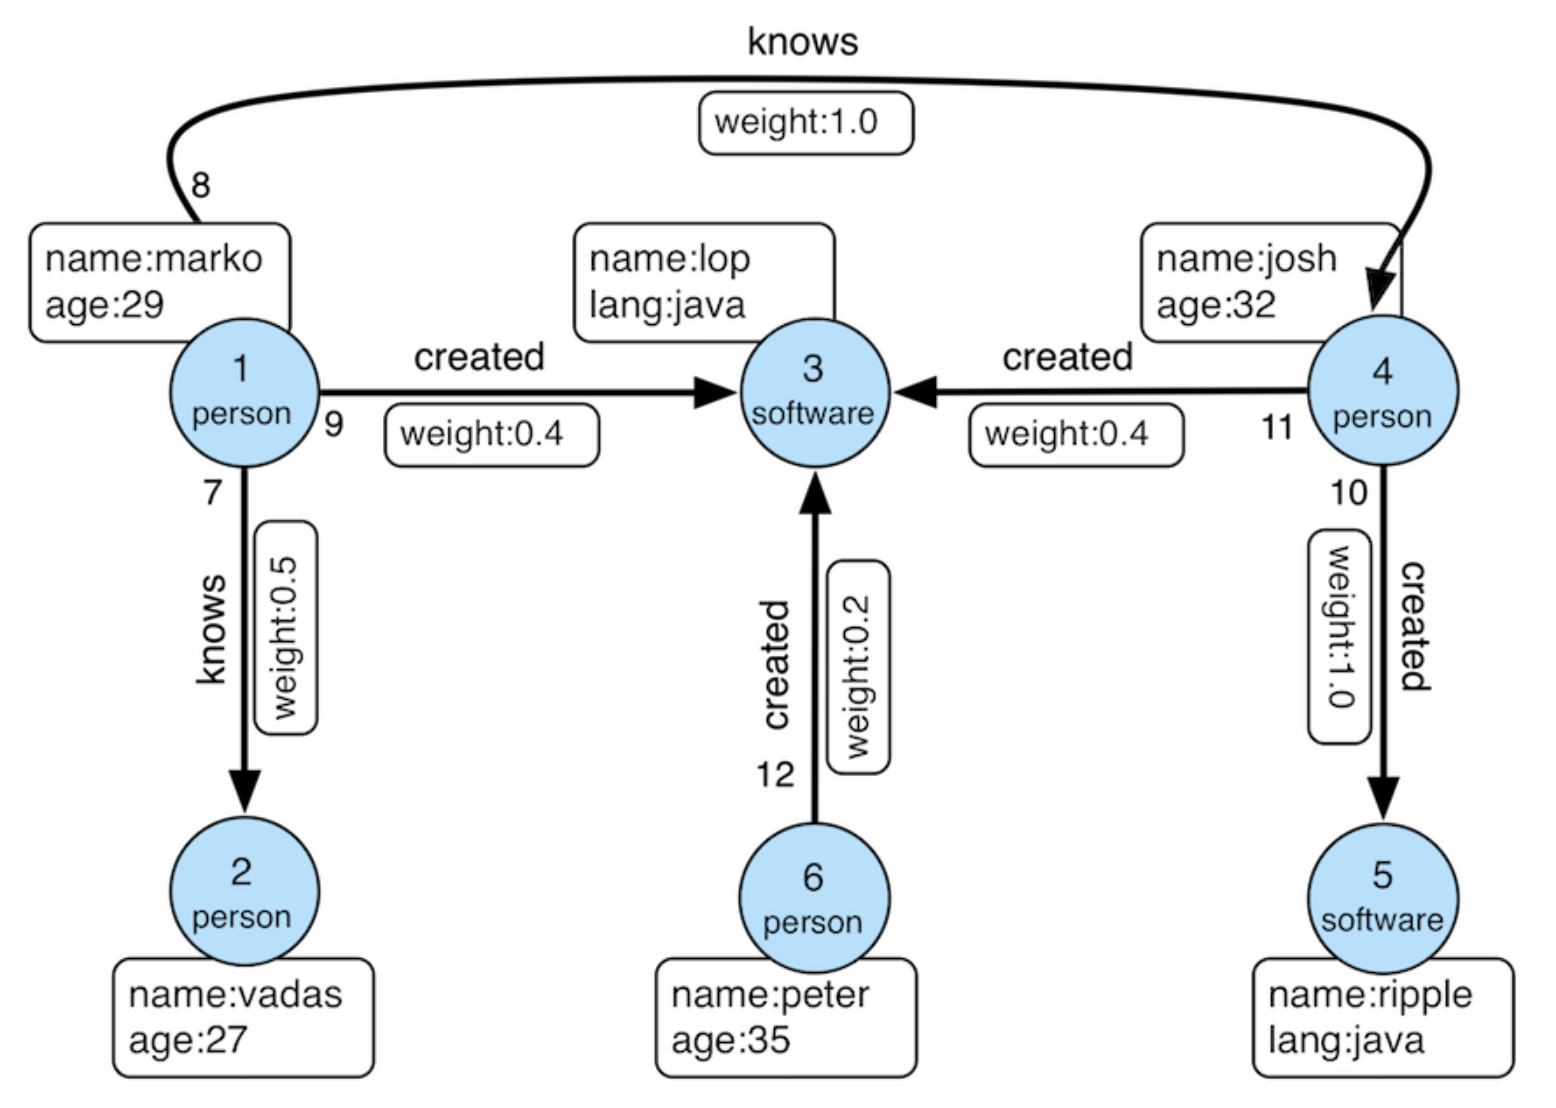
We model the data as the TinkerPop modern graph: two node types (person, software) and two edge types (knows, created).
Log into the PuppyGraph Web UI at http://localhost:8081:
| Field | Value |
|---|---|
| Username | puppygraph |
| Password | puppygraph123 |
Build the graph in the Schema Builder
The Schema Builder is the visual editor in the PuppyGraph Web UI for adding catalogs, nodes, and edges step by step. For a deeper visual walkthrough of every dialog and field, see Modeling a Graph through the Schema Builder. The summary below covers what's needed to build the modern graph against Databricks Delta Lake.
Connecting to Databricks
Click Create Catalog, then expand Data Lakes and pick Delta Lake.
Fill in the connection form. The relevant fields depend on the auth mode:
| Field | Value |
|---|---|
| Catalog name | databricks_data |
| Databricks Auth Type | Personal access tokens (PATs) |
| Databricks Host | https://<workspace>.cloud.databricks.com |
| Databricks Catalog Name | <unity_catalog_name> (e.g. pg_databricks) |
| Personal Access Token | (your PAT) |
| Storage type | Get from metastore |
| Field | Value |
|---|---|
| Catalog name | databricks_data |
| Databricks Auth Type | OAuth for service principals (OAuth M2M) |
| Databricks Host | https://<workspace>.cloud.databricks.com |
| Databricks Catalog Name | <unity_catalog_name> |
| OAuth Client ID | (service principal client ID) |
| OAuth Secret | (service principal client secret) |
| Storage type | Get from metastore |

Click Create Catalog.
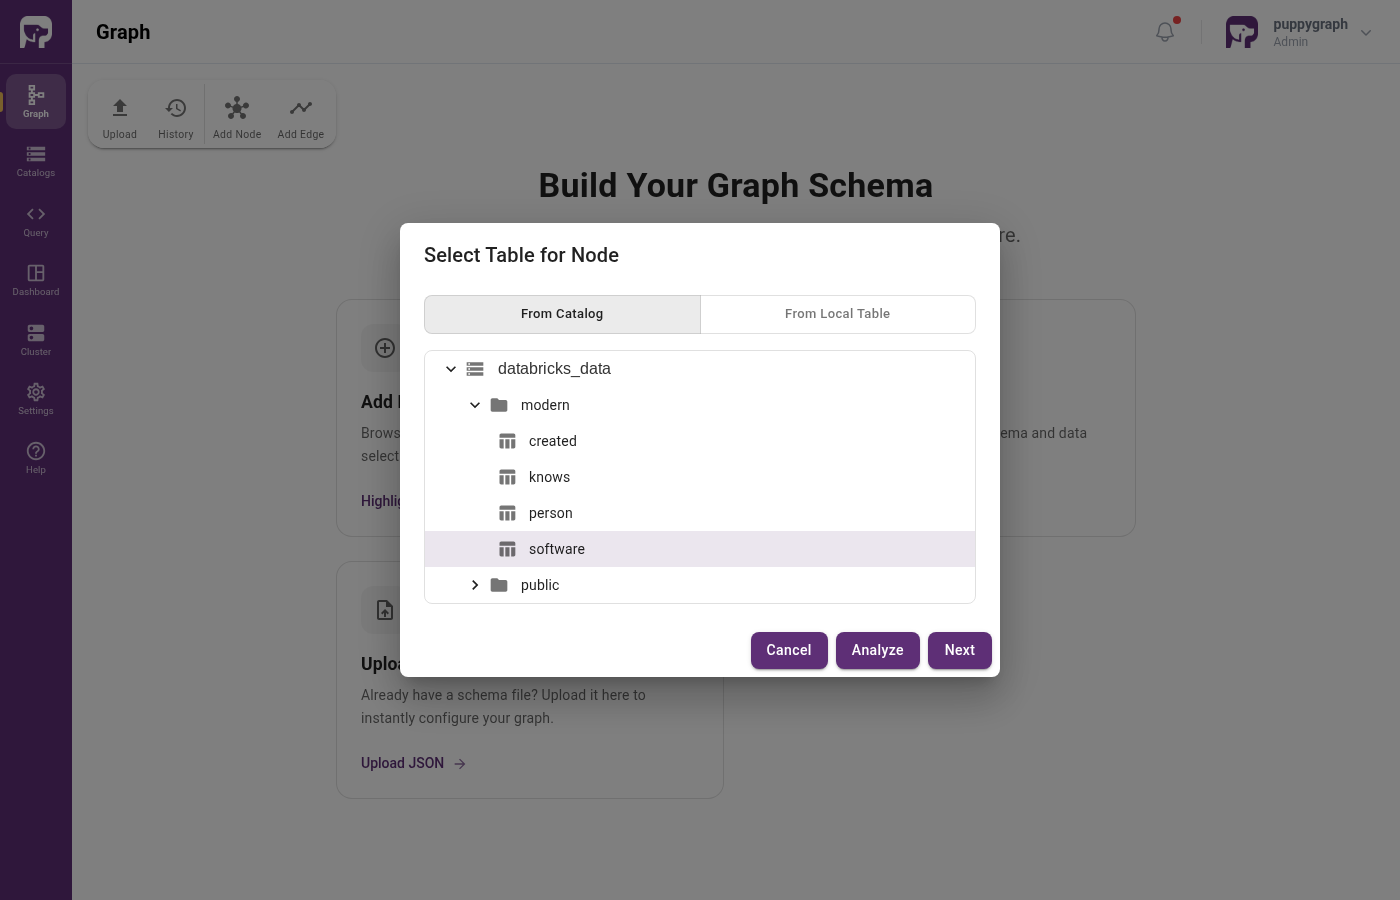
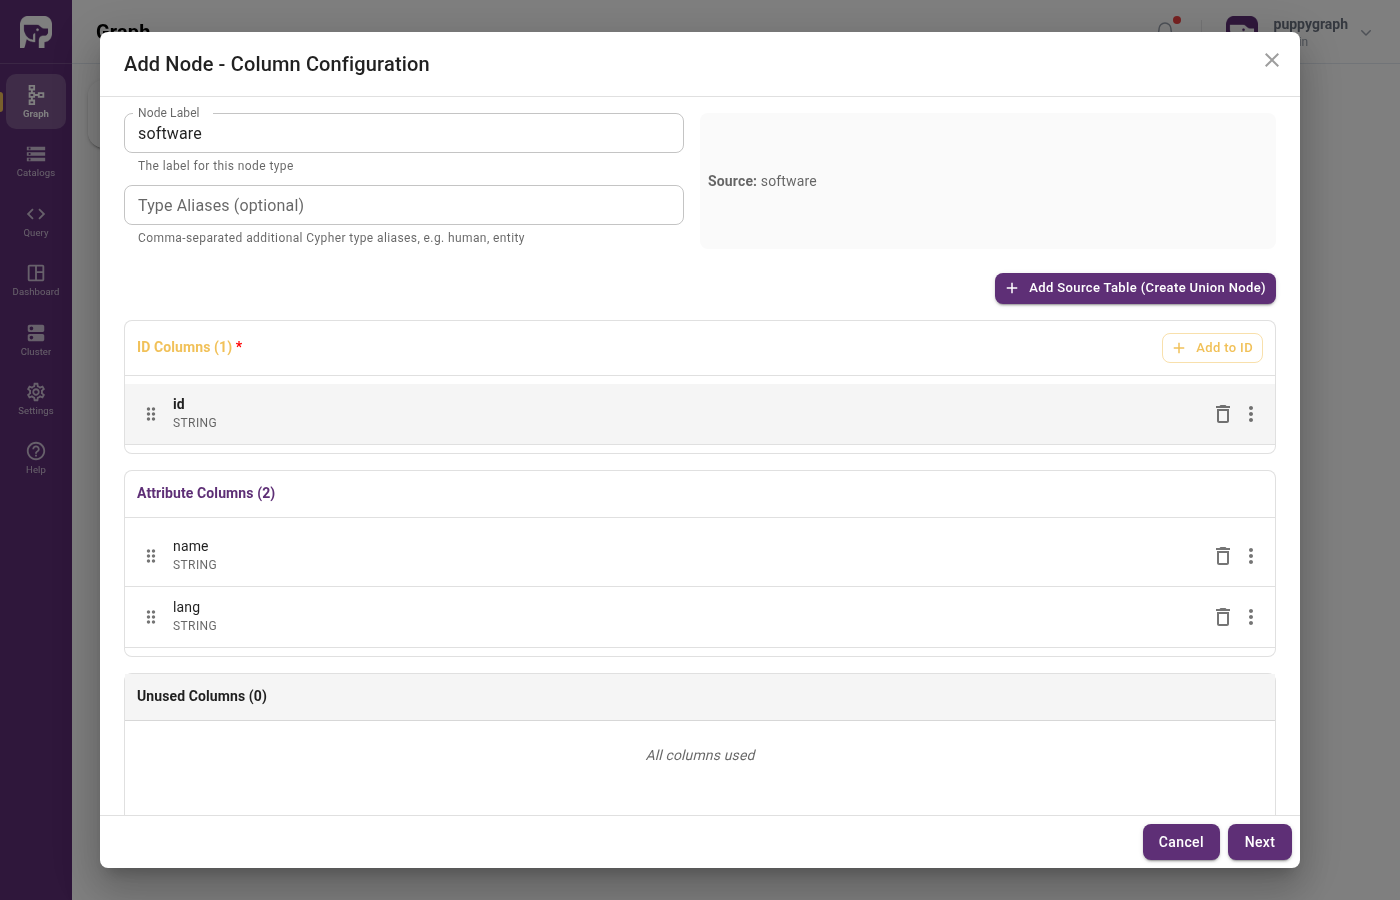
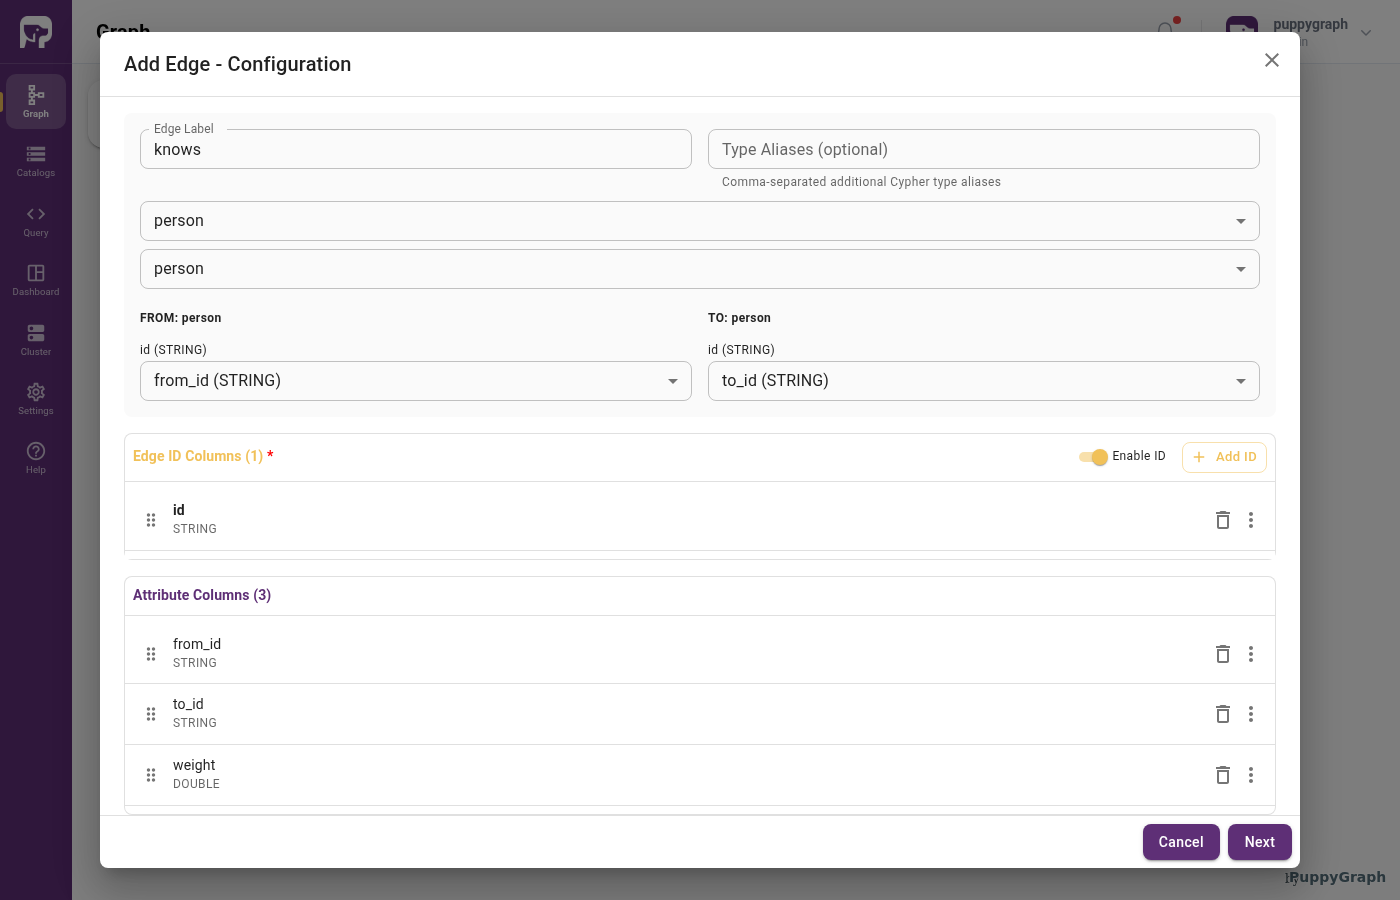
Adding nodes and edges
Add the software and person nodes, then the created and knows edges, the same way as in the Unity Catalog tutorial. The catalog tree shows the source under databricks_data > modern. For each edge, set the From / To Node, map from_id and to_id as the FROM / TO Select Column, and assign id as the edge identifier.
Upload a schema file
If you've already built the graph in the Schema Builder above, you can skip this section. The resulting schema is the same.
This method writes the full schema to a JSON file and uploads it directly. It's useful when you already have a schema for an environment and want to recreate it elsewhere (e.g. for CI, scripted setup, or copy-pasting between PuppyGraph instances).
Create a file schema.json with the following content. Replace the host, catalog name, and credentials with your workspace's values:
schema.json (PAT auth)
{
  "catalog": [
    {
      "name": "databricks_data",
      "type": "deltalake",
      "metastore": {
        "type": "unity",
        "host": "https://<workspace>.cloud.databricks.com",
        "token": "<your_databricks_pat>",
        "databricksCatalogName": "<unity_catalog_name>"
      }
    }
  ],
  "node": [
    {
      "label": "software",
      "dataSourceGroup": {
        "externalDataSource": {
          "enabled": true,
          "catalog": "databricks_data",
          "schema": "modern",
          "table": "software",
          "mappedField": [
            { "sourceFieldName": "id",   "targetFieldName": "id"   },
            { "sourceFieldName": "name", "targetFieldName": "name" },
            { "sourceFieldName": "lang", "targetFieldName": "lang" }
          ]
        }
      },
      "id":        [{ "name": "id",   "type": "STRING" }],
      "attribute": [
        { "name": "name", "type": "STRING" },
        { "name": "lang", "type": "STRING" }
      ]
    },
    {
      "label": "person",
      "dataSourceGroup": {
        "externalDataSource": {
          "enabled": true,
          "catalog": "databricks_data",
          "schema": "modern",
          "table": "person",
          "mappedField": [
            { "sourceFieldName": "id",   "targetFieldName": "id"   },
            { "sourceFieldName": "name", "targetFieldName": "name" },
            { "sourceFieldName": "age",  "targetFieldName": "age"  }
          ]
        }
      },
      "id":        [{ "name": "id",   "type": "STRING" }],
      "attribute": [
        { "name": "name", "type": "STRING" },
        { "name": "age",  "type": "INT"    }
      ]
    }
  ],
  "edge": [
    {
      "label":         "created",
      "fromNodeLabel": "person",
      "toNodeLabel":   "software",
      "dataSourceGroup": {
        "externalDataSource": {
          "enabled": true,
          "catalog": "databricks_data",
          "schema": "modern",
          "table": "created",
          "mappedField": [
            { "sourceFieldName": "id",      "targetFieldName": "id"      },
            { "sourceFieldName": "from_id", "targetFieldName": "from_id" },
            { "sourceFieldName": "to_id",   "targetFieldName": "to_id"   },
            { "sourceFieldName": "weight",  "targetFieldName": "weight"  }
          ]
        }
      },
      "id":        [{ "name": "id",      "type": "STRING" }],
      "fromKey":   [{ "name": "from_id", "type": "STRING" }],
      "toKey":     [{ "name": "to_id",   "type": "STRING" }],
      "attribute": [
        { "name": "from_id", "type": "STRING" },
        { "name": "to_id",   "type": "STRING" },
        { "name": "weight",  "type": "DOUBLE" }
      ]
    },
    {
      "label":         "knows",
      "fromNodeLabel": "person",
      "toNodeLabel":   "person",
      "dataSourceGroup": {
        "externalDataSource": {
          "enabled": true,
          "catalog": "databricks_data",
          "schema": "modern",
          "table": "knows",
          "mappedField": [
            { "sourceFieldName": "id",      "targetFieldName": "id"      },
            { "sourceFieldName": "from_id", "targetFieldName": "from_id" },
            { "sourceFieldName": "to_id",   "targetFieldName": "to_id"   },
            { "sourceFieldName": "weight",  "targetFieldName": "weight"  }
          ]
        }
      },
      "id":        [{ "name": "id",      "type": "STRING" }],
      "fromKey":   [{ "name": "from_id", "type": "STRING" }],
      "toKey":     [{ "name": "to_id",   "type": "STRING" }],
      "attribute": [
        { "name": "from_id", "type": "STRING" },
        { "name": "to_id",   "type": "STRING" },
        { "name": "weight",  "type": "DOUBLE" }
      ]
    }
  ]
}
For OAuth M2M, replace the catalog's metastore block with:
"metastore": {
  "type": "unity",
  "host": "https://<workspace>.cloud.databricks.com",
  "databricksCatalogName": "<unity_catalog_name>",
  "oauthClientId": "<service_principal_client_id>",
  "oauthClientSecret": "<service_principal_client_secret>"
}
In the Web UI, click Graph in the sidebar, then Upload Schema, and select schema.json.
Upload via CLI
Querying the Graph
In the PuppyGraph Web UI, click Query in the sidebar. You can run graph queries in either Cypher or Gremlin.
The following query answers "What software was created by people that marko knows?"
There are two paths in the result: marko knows josh, who created lop and ripple.
Cleanup
Stop the PuppyGraph container:
Drop the demo Delta tables from Databricks when you're done.