Querying Unity Catalog Data as a Graph
Summary
In this tutorial, you will:
- Build and start an open-source Unity Catalog server.
- Create Delta tables under Unity Catalog and load example data through its CLI.
- Start a PuppyGraph container, connect it to Unity Catalog, and query the Delta tables as a graph.
Self-contained Unity Catalog Data
This tutorial uses the open-source Unity Catalog server, which you build from source and run on the host alongside the PuppyGraph container. PuppyGraph reads Delta tables registered with Unity Catalog directly.
In real deployments, PuppyGraph points at your existing Unity Catalog (open source or Databricks-hosted) using the same schema shape. See Connecting to Delta Lake for the connection reference.
Prerequisites
-
dockeris available on the host. Verify with: -
A working JVM toolchain (JDK 11+) and
gitso you can build the Unity Catalog server from source. -
Accessing the PuppyGraph Web UI requires a browser. The schema upload and query steps also have CLI alternatives via
curland the bundled Gremlin console.
Setup
Build and start Unity Catalog
 Clone and build Unity Catalog:
From the same unitycatalog/ directory, start the server on port 9000:
Leave this running in its own shell.
Data Preparation
Open a new shell so the server keeps running, then step back to the parent of the cloned unitycatalog/ directory. The setup script below resolves storage paths relative to that parent, so it must be run from there:
Create a file setup-uc.sh with the following content. The script provisions a Unity Catalog catalog, schema, four Delta tables, and seeds each table with modern-shaped sample data:
setup-uc.sh
#!/usr/bin/env bash
set -euo pipefail

unity_dir="$(pwd)/unitycatalog"
cli="${unity_dir}/bin/uc --server http://localhost:9000"

${cli} catalog create --name puppygraph
${cli} schema create --name modern --catalog puppygraph

${cli} table create \
  --full_name puppygraph.modern.software \
  --columns "id STRING, name STRING, lang STRING" \
  --storage_location "file://${unity_dir}/etc/data/external/puppygraph/modern/software/" \
  --format DELTA
${cli} table create \
  --full_name puppygraph.modern.person \
  --columns "id STRING, name STRING, age INT" \
  --storage_location "file://${unity_dir}/etc/data/external/puppygraph/modern/person/" \
  --format DELTA
${cli} table create \
  --full_name puppygraph.modern.created \
  --columns "id STRING, from_id STRING, to_id STRING, weight DOUBLE" \
  --storage_location "file://${unity_dir}/etc/data/external/puppygraph/modern/created/" \
  --format DELTA
${cli} table create \
  --full_name puppygraph.modern.knows \
  --columns "id STRING, from_id STRING, to_id STRING, weight DOUBLE" \
  --storage_location "file://${unity_dir}/etc/data/external/puppygraph/modern/knows/" \
  --format DELTA

${cli} table write --full_name puppygraph.modern.software
${cli} table write --full_name puppygraph.modern.person
${cli} table write --full_name puppygraph.modern.created
${cli} table write --full_name puppygraph.modern.knows
Run it:
The Unity Catalog table write command populates the tables with auto-generated rows. The Unity Catalog repo's random value generator is configured to produce a small range of values, so the rows form a connected graph that matches the modern shape. The schema below uses the same column names regardless of the specific generated values.
| id | name | age |
|---|---|---|
| STRING | STRING | INT |
| id | name | lang |
|---|---|---|
| STRING | STRING | STRING |
| id | from_id | to_id | weight |
|---|---|---|---|
| STRING | STRING | STRING | DOUBLE |
| id | from_id | to_id | weight |
|---|---|---|---|
| STRING | STRING | STRING | DOUBLE |
Start PuppyGraph
Start PuppyGraph and mount the Unity Catalog data directory into the container so it can read the Delta files referenced by Unity Catalog:
docker run -d --name puppygraph --rm \
  -p 8081:8081 -p 8182:8182 -p 7687:7687 \
  -e PUPPYGRAPH_USERNAME=puppygraph \
  -e PUPPYGRAPH_PASSWORD=puppygraph123 \
  -v "$(pwd)/unitycatalog:$(pwd)/unitycatalog" \
  --pull=always puppygraph/puppygraph:latest
The host bind for unitycatalog/ is mounted at the same path inside the container so the file:// storage locations in Unity Catalog resolve identically from both sides.
Default password
PUPPYGRAPH_PASSWORD ships as puppygraph123 for convenience. Change it before running on a publicly accessible machine.
Modeling a Graph
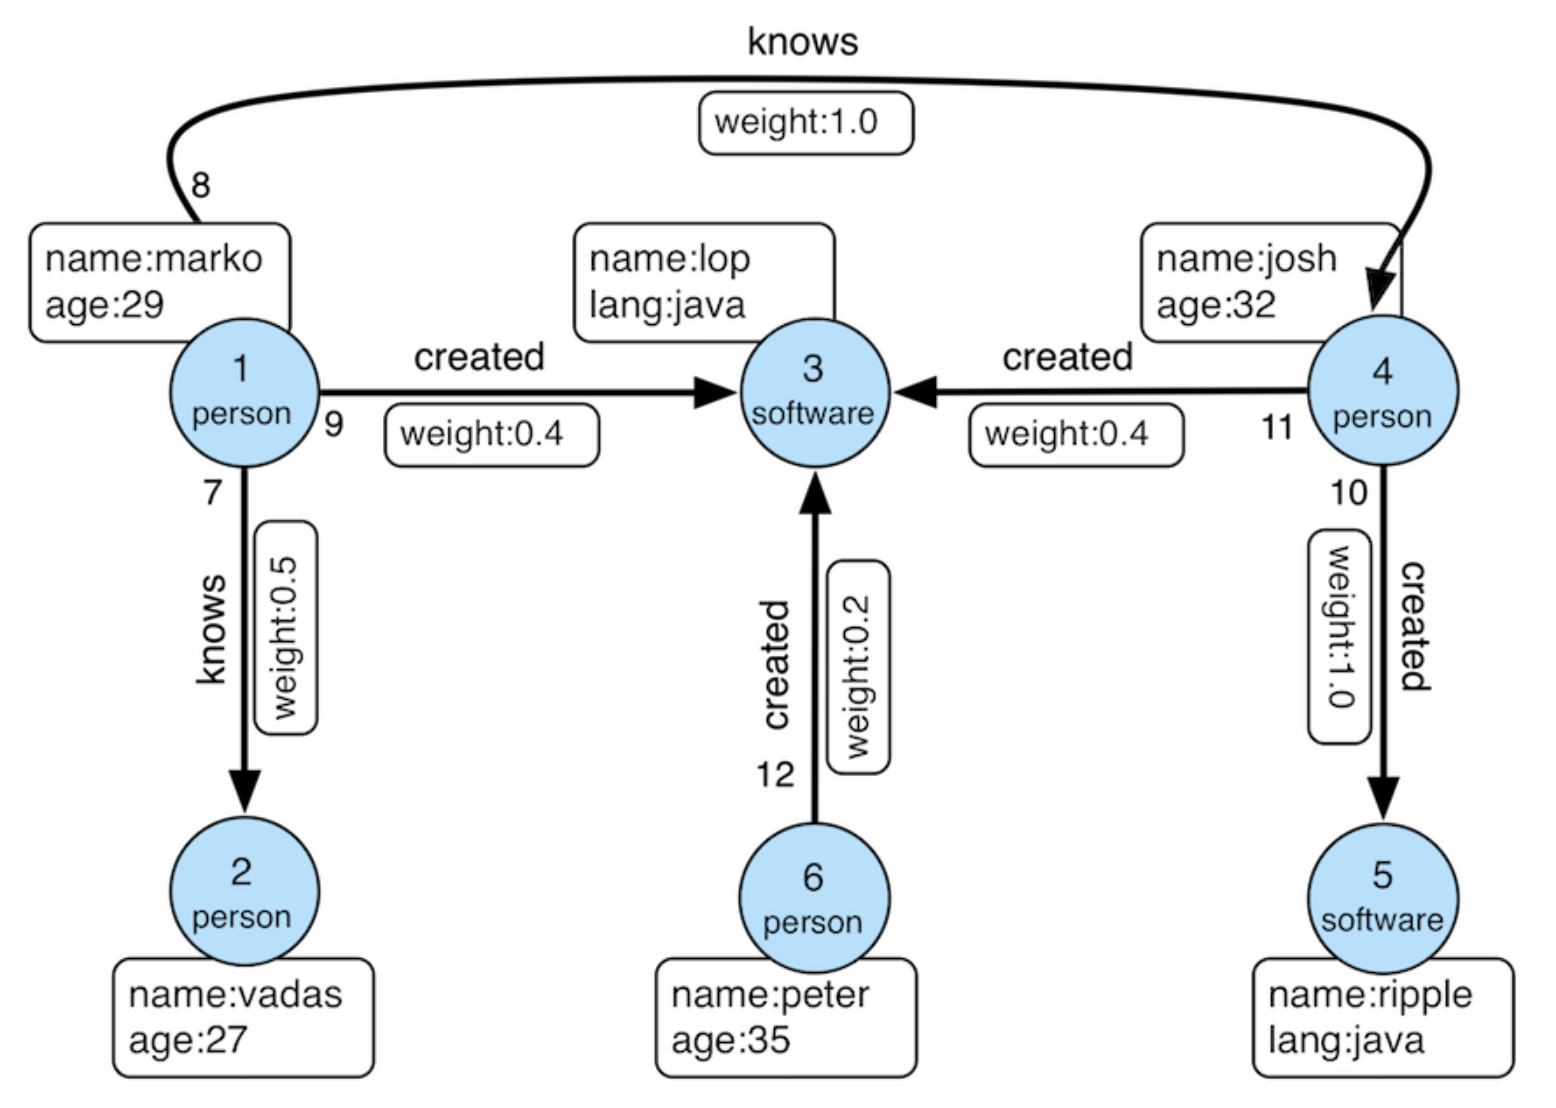
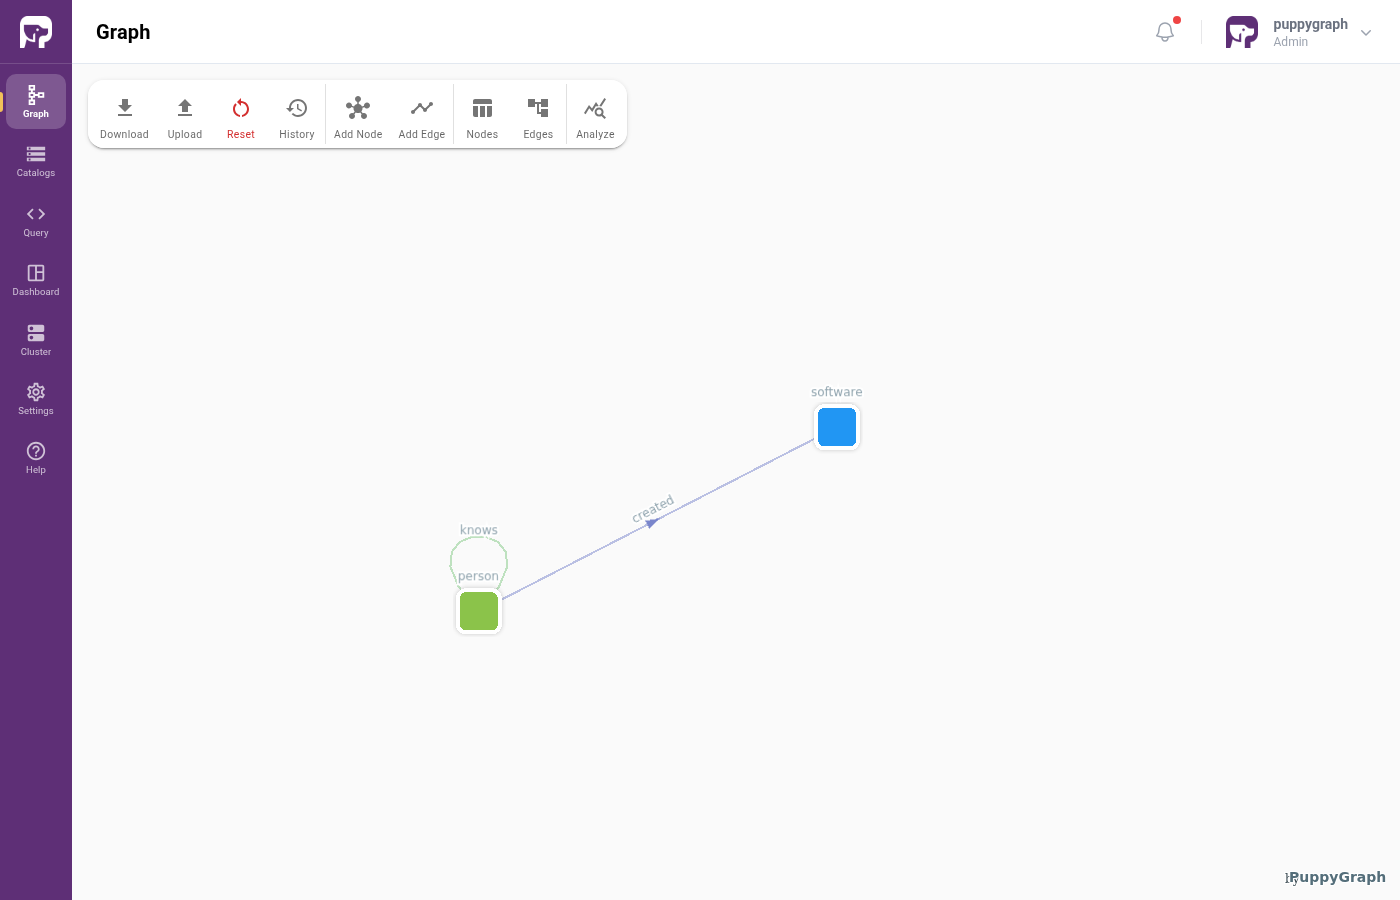
We model the data as the TinkerPop modern graph: two node types (person, software) and two edge types (knows, created).
First, log into the PuppyGraph Web UI at http://localhost:8081 with the credentials configured above:
| Field | Value |
|---|---|
| Username | puppygraph |
| Password | puppygraph123 |
There are two ways to define the schema in PuppyGraph: build it interactively in the Schema Builder, or upload a JSON file directly. Pick whichever you prefer; both produce the same graph.
Build the graph in the Schema Builder
The Schema Builder is the visual editor in the PuppyGraph Web UI for adding catalogs, nodes, and edges step by step. It's the recommended path when you're modeling a graph for the first time or want to inspect what each click produces. For a deeper visual walkthrough of every dialog and field, see Modeling a Graph through the Schema Builder. The summary below covers what's needed to build the modern graph against this tutorial's Unity Catalog-managed Delta tables.
PuppyGraph treats Unity Catalog as a Delta Lake catalog with a Unity metastore.
Connecting to Unity Catalog
Click Create Catalog, then expand Data Lakes and pick Delta Lake.
Fill in the connection form:
| Field | Value |
|---|---|
| Catalog name | uc_data |
| Metastore type | Unity Catalog |
| Host | http://host.docker.internal:9000 |
| Token | test |
| Databricks Catalog Name | puppygraph |
| Storage type | Get from metastore |
The host.docker.internal hostname lets the PuppyGraph container reach the Unity Catalog server running on the host. On Linux, you may need to add --add-host=host.docker.internal:host-gateway to the docker run command above.
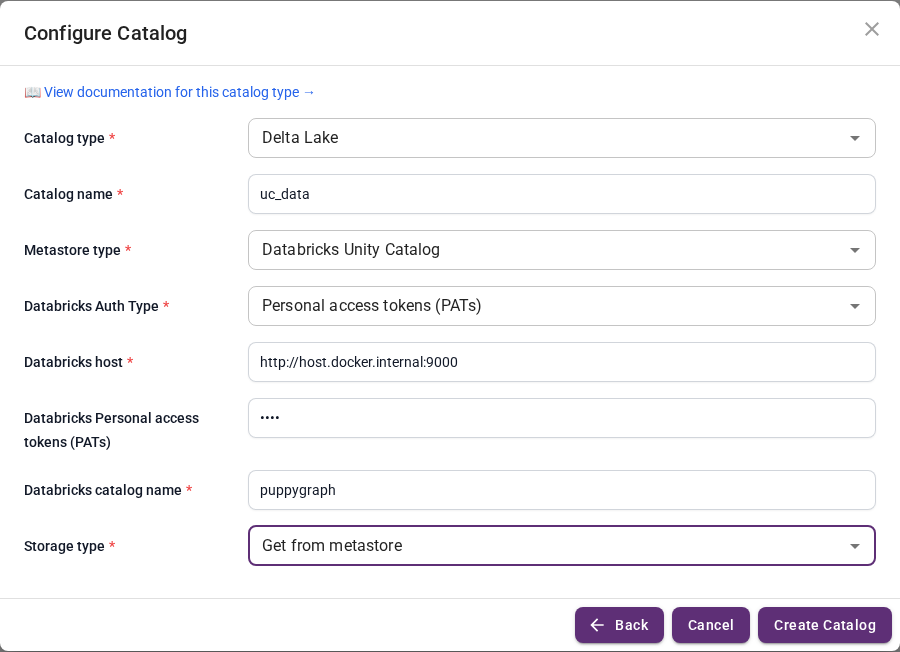
Click Create Catalog.
Adding nodes and edges
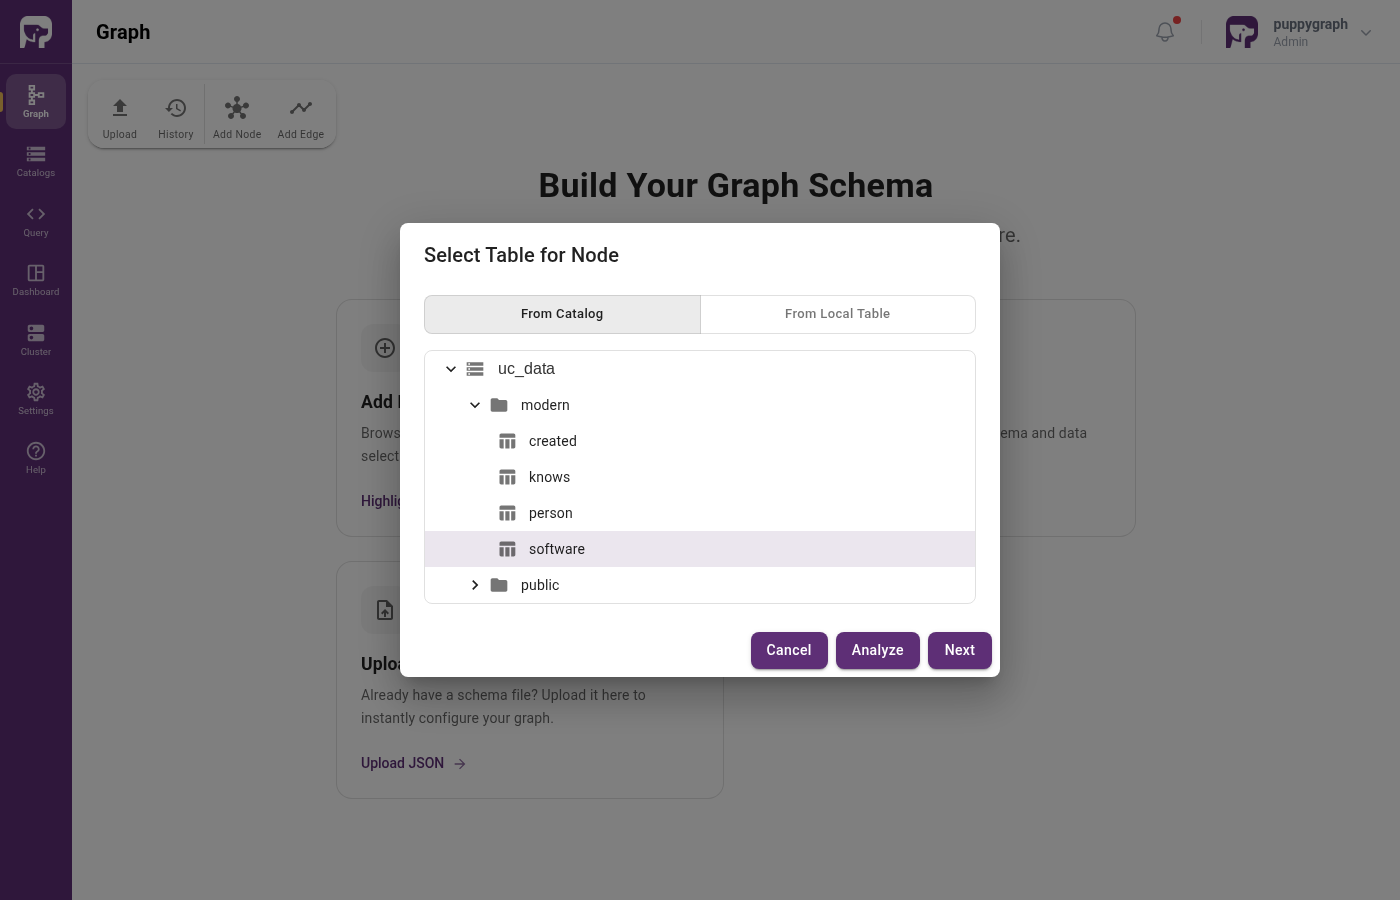
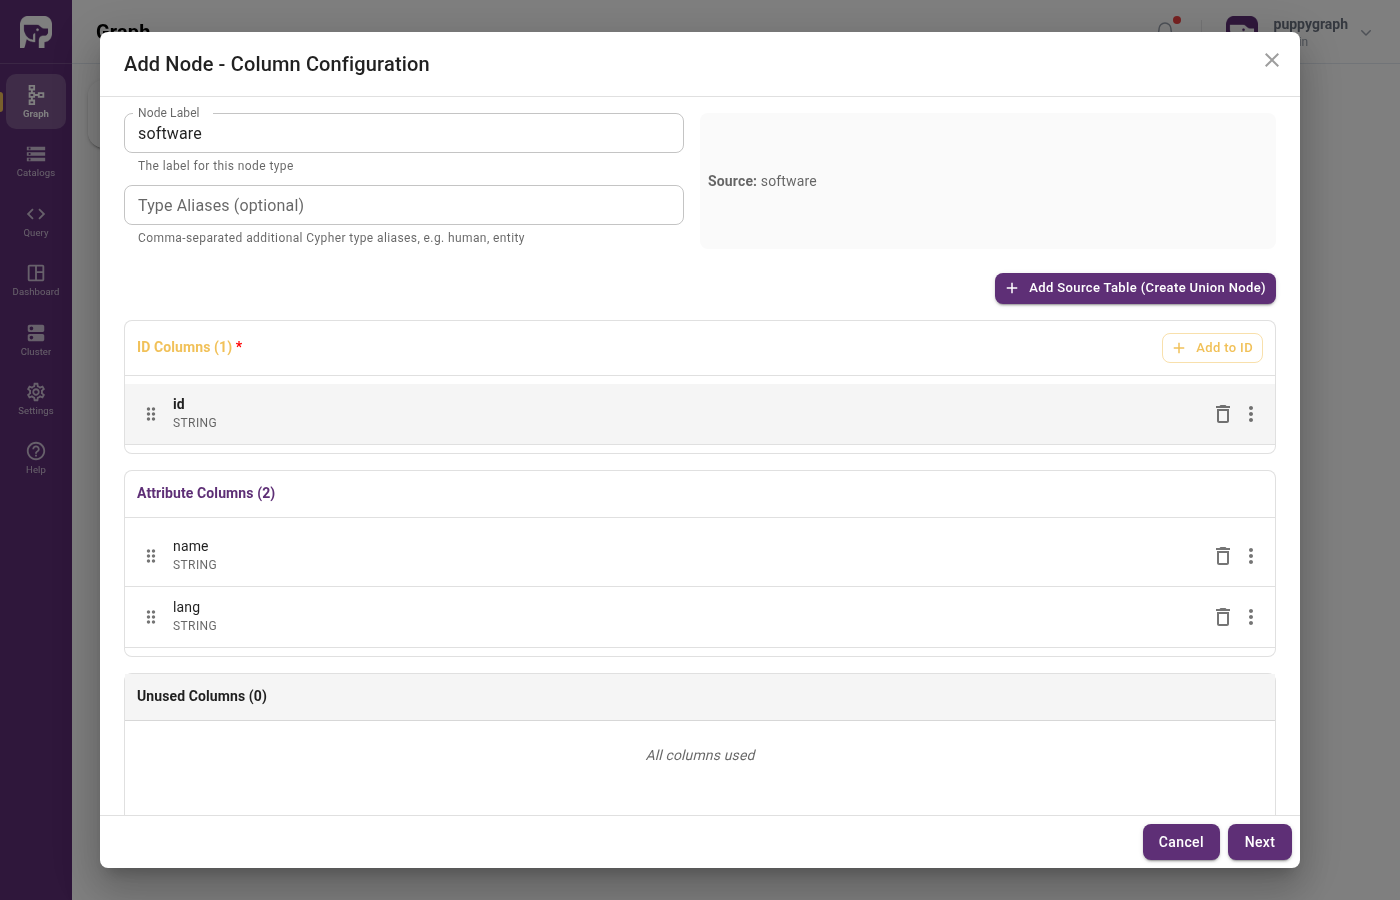
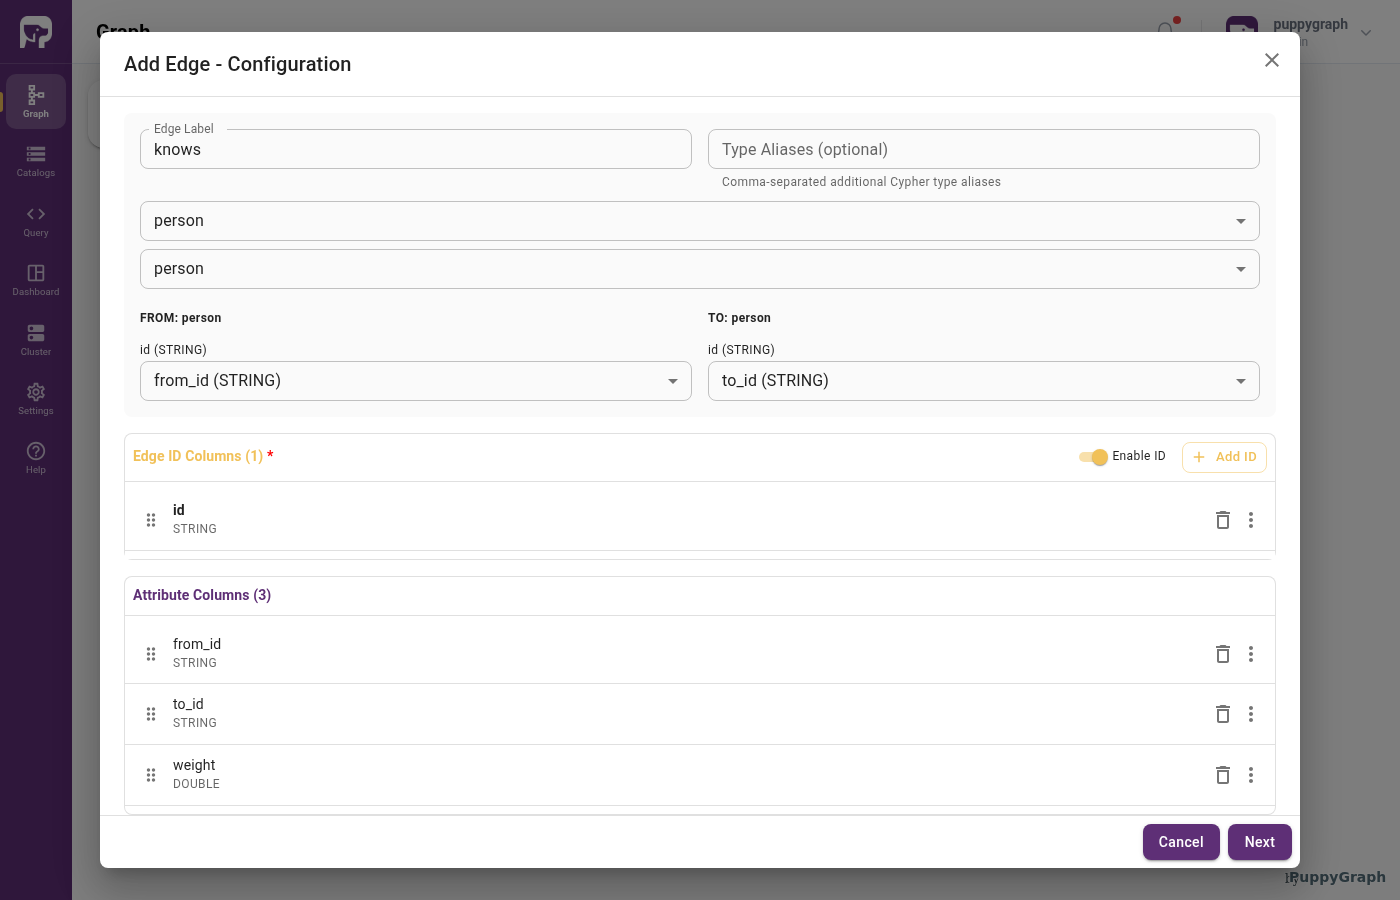
Add the software and person nodes, then the created and knows edges, the same way as in the Postgres tutorial. For each edge, set the From / To Node to the appropriate node label, map from_id and to_id as the FROM / TO Select Column, and assign id as the edge identifier.
Upload a schema file
If you've already built the graph in the Schema Builder above, you can skip this section. The resulting schema is the same.
This method writes the full schema to a JSON file and uploads it directly. It's useful when you already have a schema for an environment and want to recreate it elsewhere (e.g. for CI, scripted setup, or copy-pasting between PuppyGraph instances).
Create a file schema.json with the following content. Replace <UC_HOST> with the hostname or IP at which the Unity Catalog server is reachable from inside the PuppyGraph container (host.docker.internal on Docker Desktop; an explicit host IP on Linux):
schema.json
{
  "catalog": [
    {
      "name": "uc_data",
      "type": "deltalake",
      "metastore": {
        "type": "unity",
        "host": "http://<UC_HOST>:9000",
        "token": "test",
        "databricksCatalogName": "puppygraph"
      }
    }
  ],
  "node": [
    {
      "label": "software",
      "dataSourceGroup": {
        "externalDataSource": {
          "enabled": true,
          "catalog": "uc_data",
          "schema": "modern",
          "table": "software",
          "mappedField": [
            { "sourceFieldName": "id",   "targetFieldName": "id"   },
            { "sourceFieldName": "name", "targetFieldName": "name" },
            { "sourceFieldName": "lang", "targetFieldName": "lang" }
          ]
        }
      },
      "id":        [{ "name": "id",   "type": "STRING" }],
      "attribute": [
        { "name": "name", "type": "STRING" },
        { "name": "lang", "type": "STRING" }
      ]
    },
    {
      "label": "person",
      "dataSourceGroup": {
        "externalDataSource": {
          "enabled": true,
          "catalog": "uc_data",
          "schema": "modern",
          "table": "person",
          "mappedField": [
            { "sourceFieldName": "id",   "targetFieldName": "id"   },
            { "sourceFieldName": "name", "targetFieldName": "name" },
            { "sourceFieldName": "age",  "targetFieldName": "age"  }
          ]
        }
      },
      "id":        [{ "name": "id",   "type": "STRING" }],
      "attribute": [
        { "name": "name", "type": "STRING" },
        { "name": "age",  "type": "INT"    }
      ]
    }
  ],
  "edge": [
    {
      "label":         "created",
      "fromNodeLabel": "person",
      "toNodeLabel":   "software",
      "dataSourceGroup": {
        "externalDataSource": {
          "enabled": true,
          "catalog": "uc_data",
          "schema": "modern",
          "table": "created",
          "mappedField": [
            { "sourceFieldName": "id",      "targetFieldName": "id"      },
            { "sourceFieldName": "from_id", "targetFieldName": "from_id" },
            { "sourceFieldName": "to_id",   "targetFieldName": "to_id"   },
            { "sourceFieldName": "weight",  "targetFieldName": "weight"  }
          ]
        }
      },
      "id":        [{ "name": "id",      "type": "STRING" }],
      "fromKey":   [{ "name": "from_id", "type": "STRING" }],
      "toKey":     [{ "name": "to_id",   "type": "STRING" }],
      "attribute": [
        { "name": "from_id", "type": "STRING" },
        { "name": "to_id",   "type": "STRING" },
        { "name": "weight",  "type": "DOUBLE" }
      ]
    },
    {
      "label":         "knows",
      "fromNodeLabel": "person",
      "toNodeLabel":   "person",
      "dataSourceGroup": {
        "externalDataSource": {
          "enabled": true,
          "catalog": "uc_data",
          "schema": "modern",
          "table": "knows",
          "mappedField": [
            { "sourceFieldName": "id",      "targetFieldName": "id"      },
            { "sourceFieldName": "from_id", "targetFieldName": "from_id" },
            { "sourceFieldName": "to_id",   "targetFieldName": "to_id"   },
            { "sourceFieldName": "weight",  "targetFieldName": "weight"  }
          ]
        }
      },
      "id":        [{ "name": "id",      "type": "STRING" }],
      "fromKey":   [{ "name": "from_id", "type": "STRING" }],
      "toKey":     [{ "name": "to_id",   "type": "STRING" }],
      "attribute": [
        { "name": "from_id", "type": "STRING" },
        { "name": "to_id",   "type": "STRING" },
        { "name": "weight",  "type": "DOUBLE" }
      ]
    }
  ]
}
In the Web UI, click Graph in the sidebar, then Upload Schema, and select schema.json.
Upload via CLI
You can also POST the schema directly:
Querying the Graph
In the PuppyGraph Web UI, click Query in the sidebar. You can run graph queries in either Cypher or Gremlin.
The following query traverses two knows and created hops from any person:
Unity Catalog seeds each table with random data, so the specific path values vary between runs. The query should return at least one path through any person → person → software hop.
Cleanup
Stop PuppyGraph:
Stop the Unity Catalog server with Ctrl+C in the shell where it was started.