Querying Snowflake Data as a Graph
Summary
In this tutorial, you will:
- Create a Snowflake database and load it with example data.
- Start a PuppyGraph container and connect it to Snowflake using key-pair authentication.
- Run Cypher and Gremlin queries against the Snowflake data as a graph.
Requires a real Snowflake account
PuppyGraph connects to Snowflake using the official Snowflake JDBC driver. This tutorial uses key-pair authentication - a private key is mounted into the container so the driver can sign requests. See Connecting to Snowflake for the full connection reference.
Prerequisites
dockeris available on the host where you'll run PuppyGraph.- A Snowflake account, a user with
CREATE DATABASEprivileges, and an active warehouse. opensslfor generating an RSA key pair locally.
Setup
Configure key-pair authentication
Adapted from Snowflake's key-pair authentication guide.
 Generate an encrypted private key on your laptop:
You'll be prompted for an encryption password (passphrase). Save it - you'll pass it to PuppyGraph below.
Derive the matching public key:
Open rsa_key.pub and copy the base64 block (between the BEGIN/END lines). In Snowsight, run:
Data Preparation
In Snowsight, open a SQL worksheet and run:
modern.sql
CREATE DATABASE IF NOT EXISTS PUPPYGRAPH_SAMPLE_DATA;
USE DATABASE PUPPYGRAPH_SAMPLE_DATA;
CREATE SCHEMA IF NOT EXISTS modern;

CREATE TABLE modern.person (
  id   STRING,
  name STRING,
  age  INTEGER
);
INSERT INTO modern.person VALUES
  ('v1', 'marko', 29),
  ('v2', 'vadas', 27),
  ('v4', 'josh',  32),
  ('v6', 'peter', 35);

CREATE TABLE modern.software (
  id   STRING,
  name STRING,
  lang STRING
);
INSERT INTO modern.software VALUES
  ('v3', 'lop',    'java'),
  ('v5', 'ripple', 'java');

CREATE TABLE modern.created (
  id      STRING,
  from_id STRING,
  to_id   STRING,
  weight  DOUBLE
);
INSERT INTO modern.created VALUES
  ('e9',  'v1', 'v3', 0.4),
  ('e10', 'v4', 'v5', 1.0),
  ('e11', 'v4', 'v3', 0.4),
  ('e12', 'v6', 'v3', 0.2);

CREATE TABLE modern.knows (
  id      STRING,
  from_id STRING,
  to_id   STRING,
  weight  DOUBLE
);
INSERT INTO modern.knows VALUES
  ('e7', 'v1', 'v2', 0.5),
  ('e8', 'v1', 'v4', 1.0);
| id | name | age |
|---|---|---|
| v1 | marko | 29 |
| v2 | vadas | 27 |
| v4 | josh | 32 |
| v6 | peter | 35 |
| id | name | lang |
|---|---|---|
| v3 | lop | java |
| v5 | ripple | java |
| id | from_id | to_id | weight |
|---|---|---|---|
| e9 | v1 | v3 | 0.4 |
| e10 | v4 | v5 | 1.0 |
| e11 | v4 | v3 | 0.4 |
| e12 | v6 | v3 | 0.2 |
| id | from_id | to_id | weight |
|---|---|---|---|
| e7 | v1 | v2 | 0.5 |
| e8 | v1 | v4 | 1.0 |
Start PuppyGraph
From the directory that holds rsa_key.p8, start the PuppyGraph container and mount the private key inside:
docker run -d --name puppygraph \
  -p 8081:8081 -p 8182:8182 -p 7687:7687 \
  -e PUPPYGRAPH_USERNAME=puppygraph \
  -e PUPPYGRAPH_PASSWORD=puppygraph123 \
  -v "$(pwd)/rsa_key.p8:/keys/rsa_key.p8:ro" \
  --pull=always puppygraph/puppygraph:latest
Default password
Change PUPPYGRAPH_PASSWORD before running on a publicly accessible machine.
Modeling a Graph
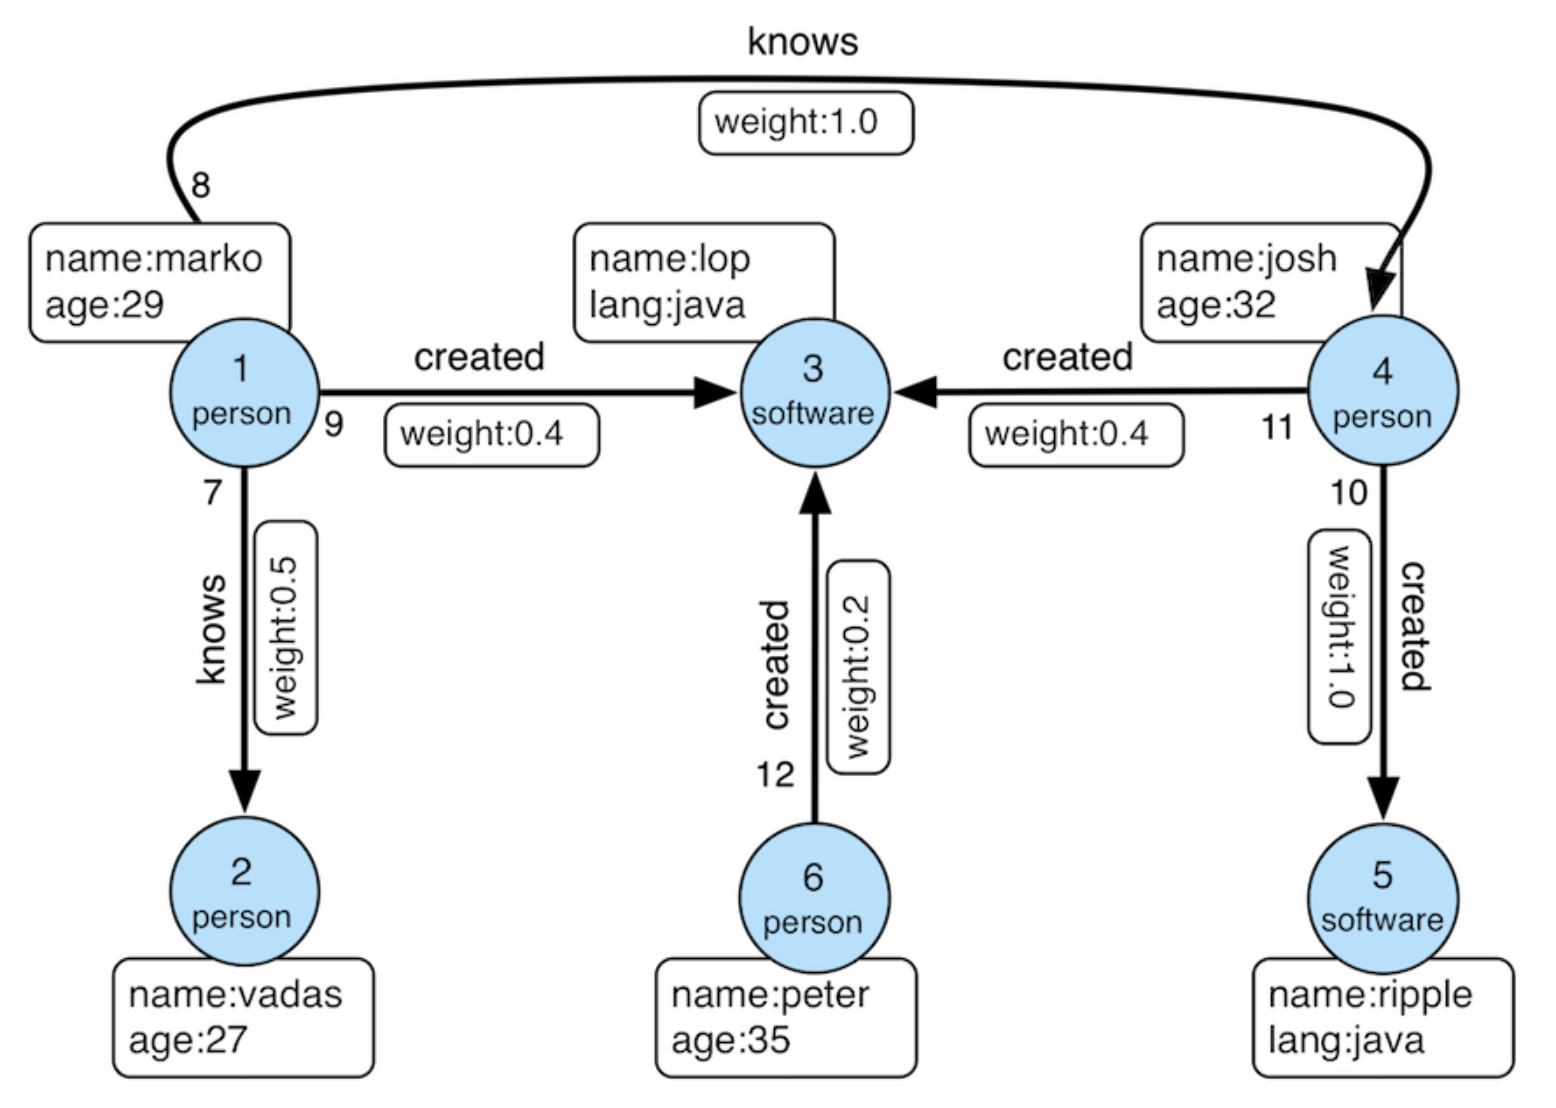
We model the data as the TinkerPop modern graph: two node types (person, software) and two edge types (knows, created).
Log into the PuppyGraph Web UI at http://localhost:8081 with puppygraph / puppygraph123.
Build the graph in the Schema Builder
Click Create Catalog, then expand Cloud Data Warehouses and pick Snowflake.
Fill in the connection form. The private-key path refers to the mount point inside the container, and the passphrase is the one you set earlier:
| Field | Value |
|---|---|
| Catalog name | snowflake_data |
| Snowflake Auth Type | Key-pair authentication |
| Snowflake Server URL | https://<account_identifier>.snowflakecomputing.com |
| Snowflake User Name | <your Snowflake user name> |
| Snowflake Database Name | PUPPYGRAPH_SAMPLE_DATA |
| Snowflake Warehouse Name | <warehouse> |
| Snowflake Private Key file path | /keys/rsa_key.p8 |
| Snowflake Private Key file password | <passphrase you set when creating the key> |
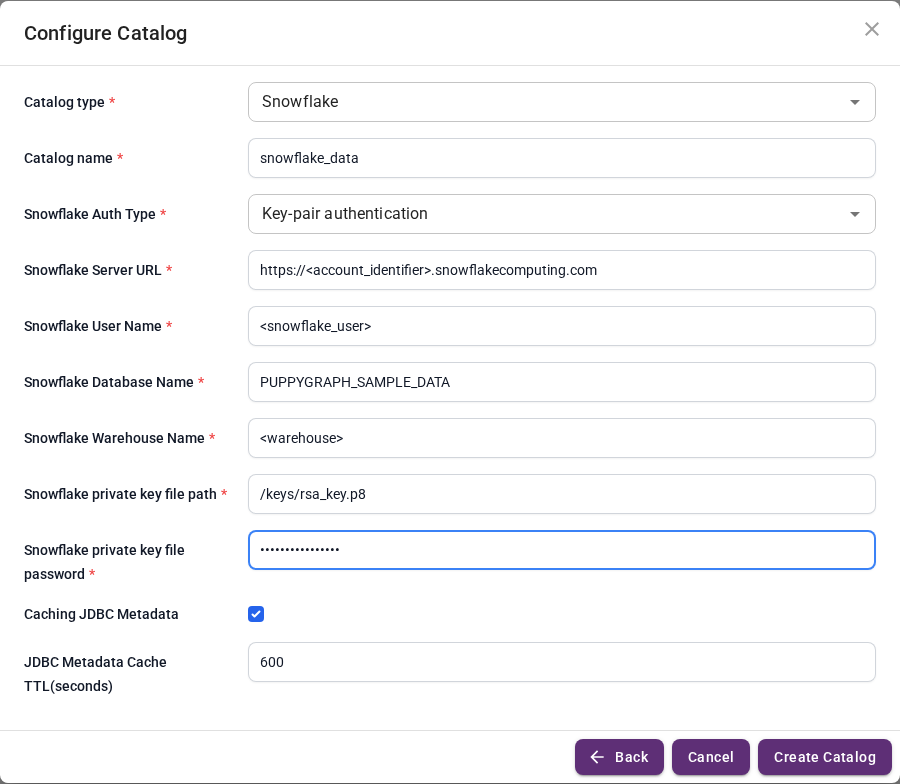
Finding your Snowflake connection values
- Snowflake Server URL: In Snowsight, open the user panel in the bottom-left corner, then select
Connect a tool to Snowflake. You can find the Account/Server URL there. - Warehouse name: Open any SQL file you used to create the database. You can find the warehouse name and database name in the top-right area of the SQL editor.
- Username: Use the Snowflake user whose RSA public key you configured in the step above. You can also find it under
Connect a tool to Snowflake->Login name. - Database name:
PUPPYGRAPH_SAMPLE_DATA, as created in the SQL worksheet above.
Create via JDBC connection string
Alternatively, you can create the catalog by manually constructing the JDBC connection string. The format should be jdbc:snowflake://<snowflake_account_identifier>.snowflakecomputing.com/?db=PUPPYGRAPH_SAMPLE_DATA&warehouse=<warehouse_name>&private_key_file=/keys/rsa_key.p8&private_key_file_pwd=<passphrase you set when creating the rsa file>. Leave the password field empty.
Click Create Catalog, then add the person / software nodes and created / knows edges.
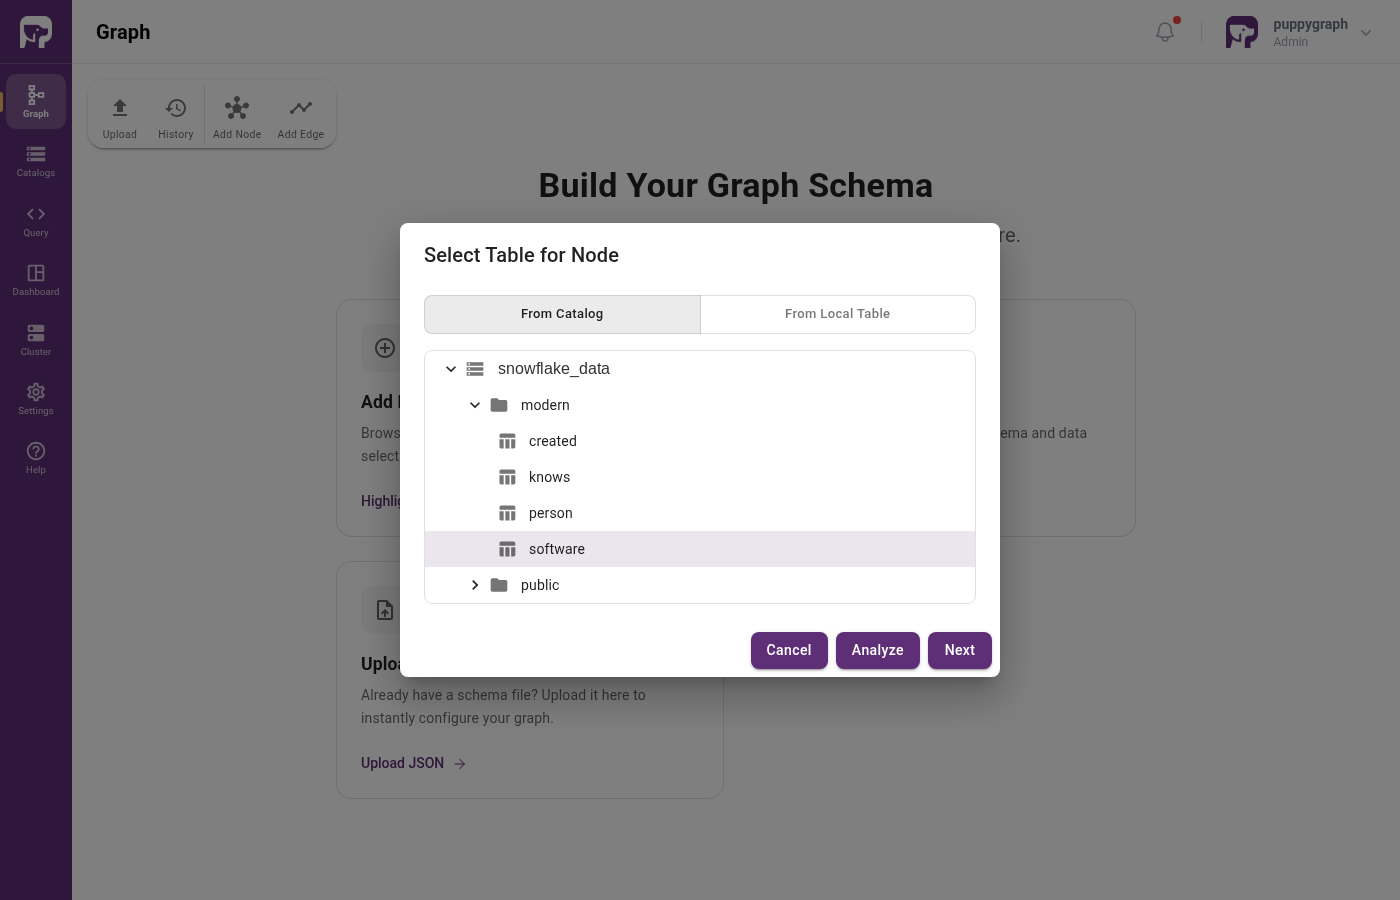
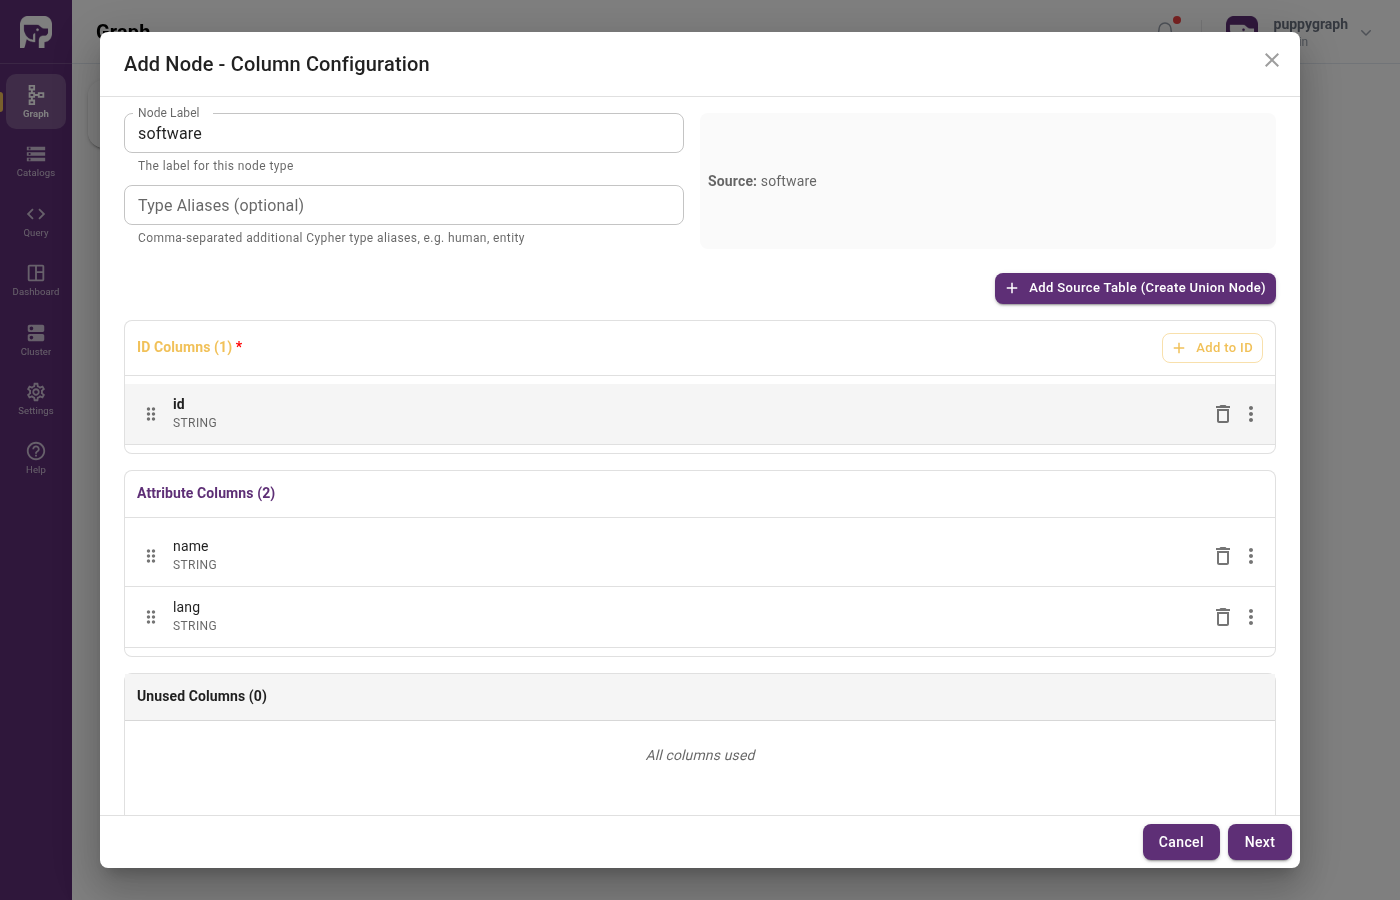
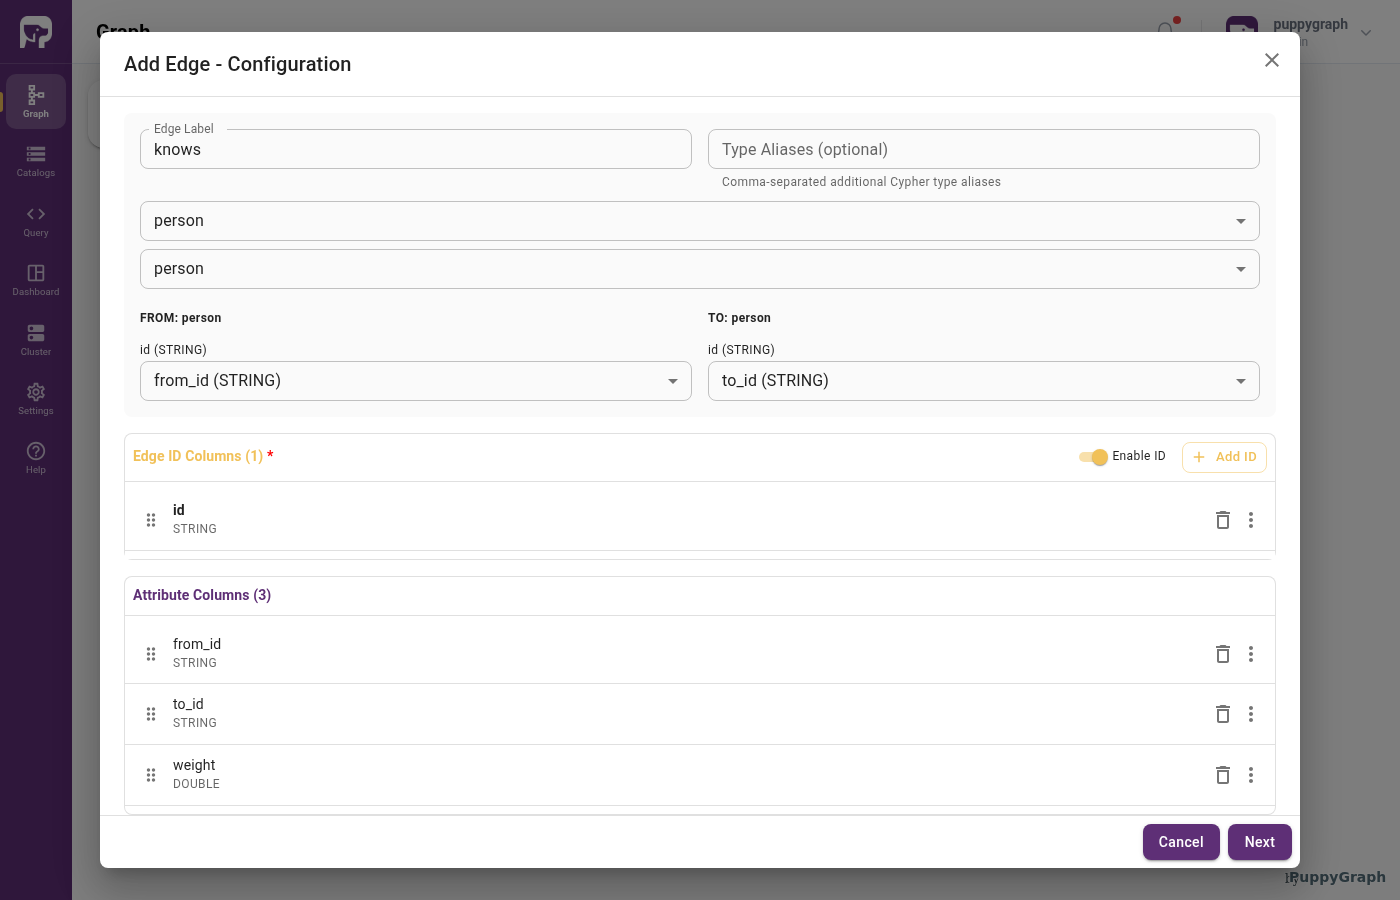
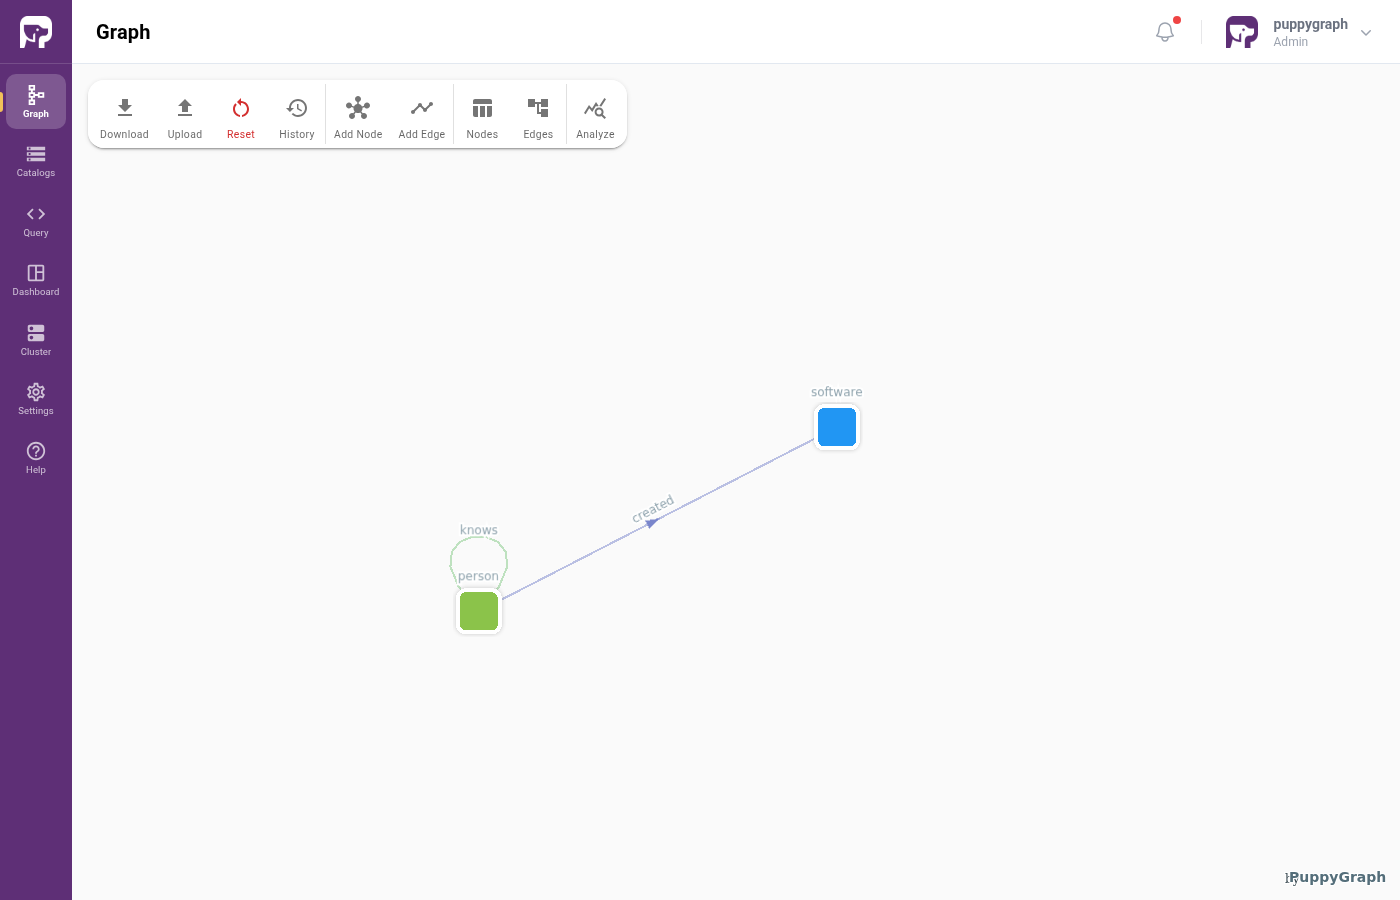
Snowflake folds unquoted identifiers to uppercase; in the schema upload below, the source table names are PERSON, SOFTWARE, CREATED, KNOWS.
Upload a schema file
Create a file schema.json with the following content. Replace the account, user, warehouse, and key passphrase placeholders:
schema.json
{
  "catalog": [
    {
      "name": "snowflake_data",
      "type": "snowflake",
      "jdbc": {
        "username": "<snowflake_user>",
        "password": "",
        "jdbcUri": "jdbc:snowflake://<account>.snowflakecomputing.com/?db=PUPPYGRAPH_SAMPLE_DATA&warehouse=<warehouse>&private_key_file=/keys/rsa_key.p8&private_key_file_pwd=<key_passphrase>"
      }
    }
  ],
  "node": [
    {
      "label": "software",
      "dataSourceGroup": {
        "externalDataSource": {
          "enabled": true,
          "catalog": "snowflake_data",
          "schema": "MODERN",
          "table": "SOFTWARE",
          "mappedField": [
            { "sourceFieldName": "ID",   "targetFieldName": "id"   },
            { "sourceFieldName": "NAME", "targetFieldName": "name" },
            { "sourceFieldName": "LANG", "targetFieldName": "lang" }
          ]
        }
      },
      "id":        [{ "name": "id",   "type": "STRING" }],
      "attribute": [
        { "name": "name", "type": "STRING" },
        { "name": "lang", "type": "STRING" }
      ]
    },
    {
      "label": "person",
      "dataSourceGroup": {
        "externalDataSource": {
          "enabled": true,
          "catalog": "snowflake_data",
          "schema": "MODERN",
          "table": "PERSON",
          "mappedField": [
            { "sourceFieldName": "ID",   "targetFieldName": "id"   },
            { "sourceFieldName": "NAME", "targetFieldName": "name" },
            { "sourceFieldName": "AGE",  "targetFieldName": "age"  }
          ]
        }
      },
      "id":        [{ "name": "id",   "type": "STRING" }],
      "attribute": [
        { "name": "name", "type": "STRING" },
        { "name": "age",  "type": "LONG"   }
      ]
    }
  ],
  "edge": [
    {
      "label":         "created",
      "fromNodeLabel": "person",
      "toNodeLabel":   "software",
      "dataSourceGroup": {
        "externalDataSource": {
          "enabled": true,
          "catalog": "snowflake_data",
          "schema": "MODERN",
          "table": "CREATED",
          "mappedField": [
            { "sourceFieldName": "ID",      "targetFieldName": "id"      },
            { "sourceFieldName": "FROM_ID", "targetFieldName": "from_id" },
            { "sourceFieldName": "TO_ID",   "targetFieldName": "to_id"   },
            { "sourceFieldName": "WEIGHT",  "targetFieldName": "weight"  }
          ]
        }
      },
      "id":        [{ "name": "id",      "type": "STRING" }],
      "fromKey":   [{ "name": "from_id", "type": "STRING" }],
      "toKey":     [{ "name": "to_id",   "type": "STRING" }],
      "attribute": [
        { "name": "from_id", "type": "STRING" },
        { "name": "to_id",   "type": "STRING" },
        { "name": "weight",  "type": "DOUBLE" }
      ]
    },
    {
      "label":         "knows",
      "fromNodeLabel": "person",
      "toNodeLabel":   "person",
      "dataSourceGroup": {
        "externalDataSource": {
          "enabled": true,
          "catalog": "snowflake_data",
          "schema": "MODERN",
          "table": "KNOWS",
          "mappedField": [
            { "sourceFieldName": "ID",      "targetFieldName": "id"      },
            { "sourceFieldName": "FROM_ID", "targetFieldName": "from_id" },
            { "sourceFieldName": "TO_ID",   "targetFieldName": "to_id"   },
            { "sourceFieldName": "WEIGHT",  "targetFieldName": "weight"  }
          ]
        }
      },
      "id":        [{ "name": "id",      "type": "STRING" }],
      "fromKey":   [{ "name": "from_id", "type": "STRING" }],
      "toKey":     [{ "name": "to_id",   "type": "STRING" }],
      "attribute": [
        { "name": "from_id", "type": "STRING" },
        { "name": "to_id",   "type": "STRING" },
        { "name": "weight",  "type": "DOUBLE" }
      ]
    }
  ]
}
Snowflake's INTEGER is LONG, not INT
Snowflake stores all INTEGER columns as NUMBER(38,0). PuppyGraph maps that to LONG, so the age attribute is declared as LONG (not INT).
In the Web UI, click Graph in the sidebar, then Upload Schema, and select schema.json.
Upload via CLI
Querying the Graph
In the PuppyGraph Web UI, click Query in the sidebar. You can run graph queries in either Cypher or Gremlin.
The following query answers "What software was created by people that marko knows?"
Cleanup
Stop the PuppyGraph container:
Drop the PUPPYGRAPH_SAMPLE_DATA database in Snowsight when you're done.